Patterns

Home of Garter Stitch Joy

safe-at-home-blanket-emma-varnam

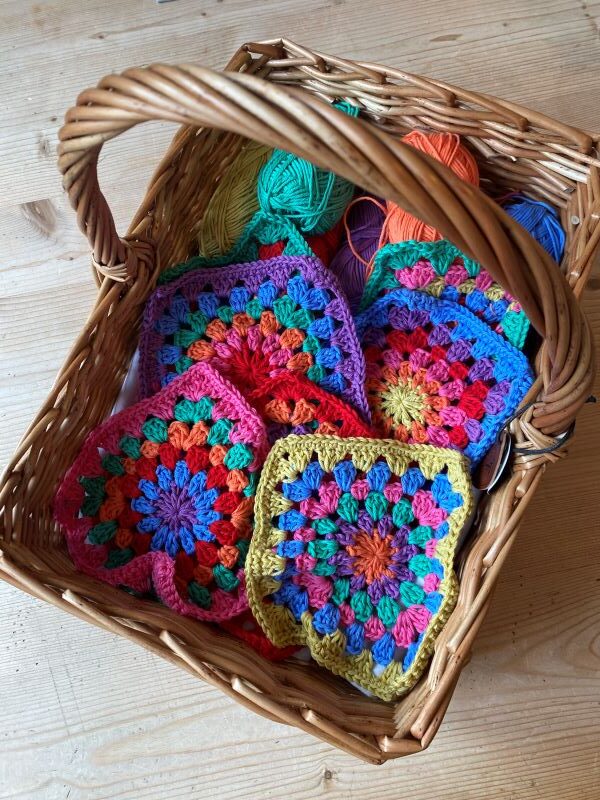
It all starts with left-overs. There is a nice contained discipline in thinking – what would be fun to make out of this? I know that I can’t be the only person to see the beauty of making something out of what is left. Then there is the middle of the night, crashingly early morning creative planning. Compelled by a little nugget of an idea I tiptoe towards my yarn stash and with the subtlety of a baby elephant start extracting balls of yarn and some needles or a hook, ‘to have a quick go’. These are special moments.

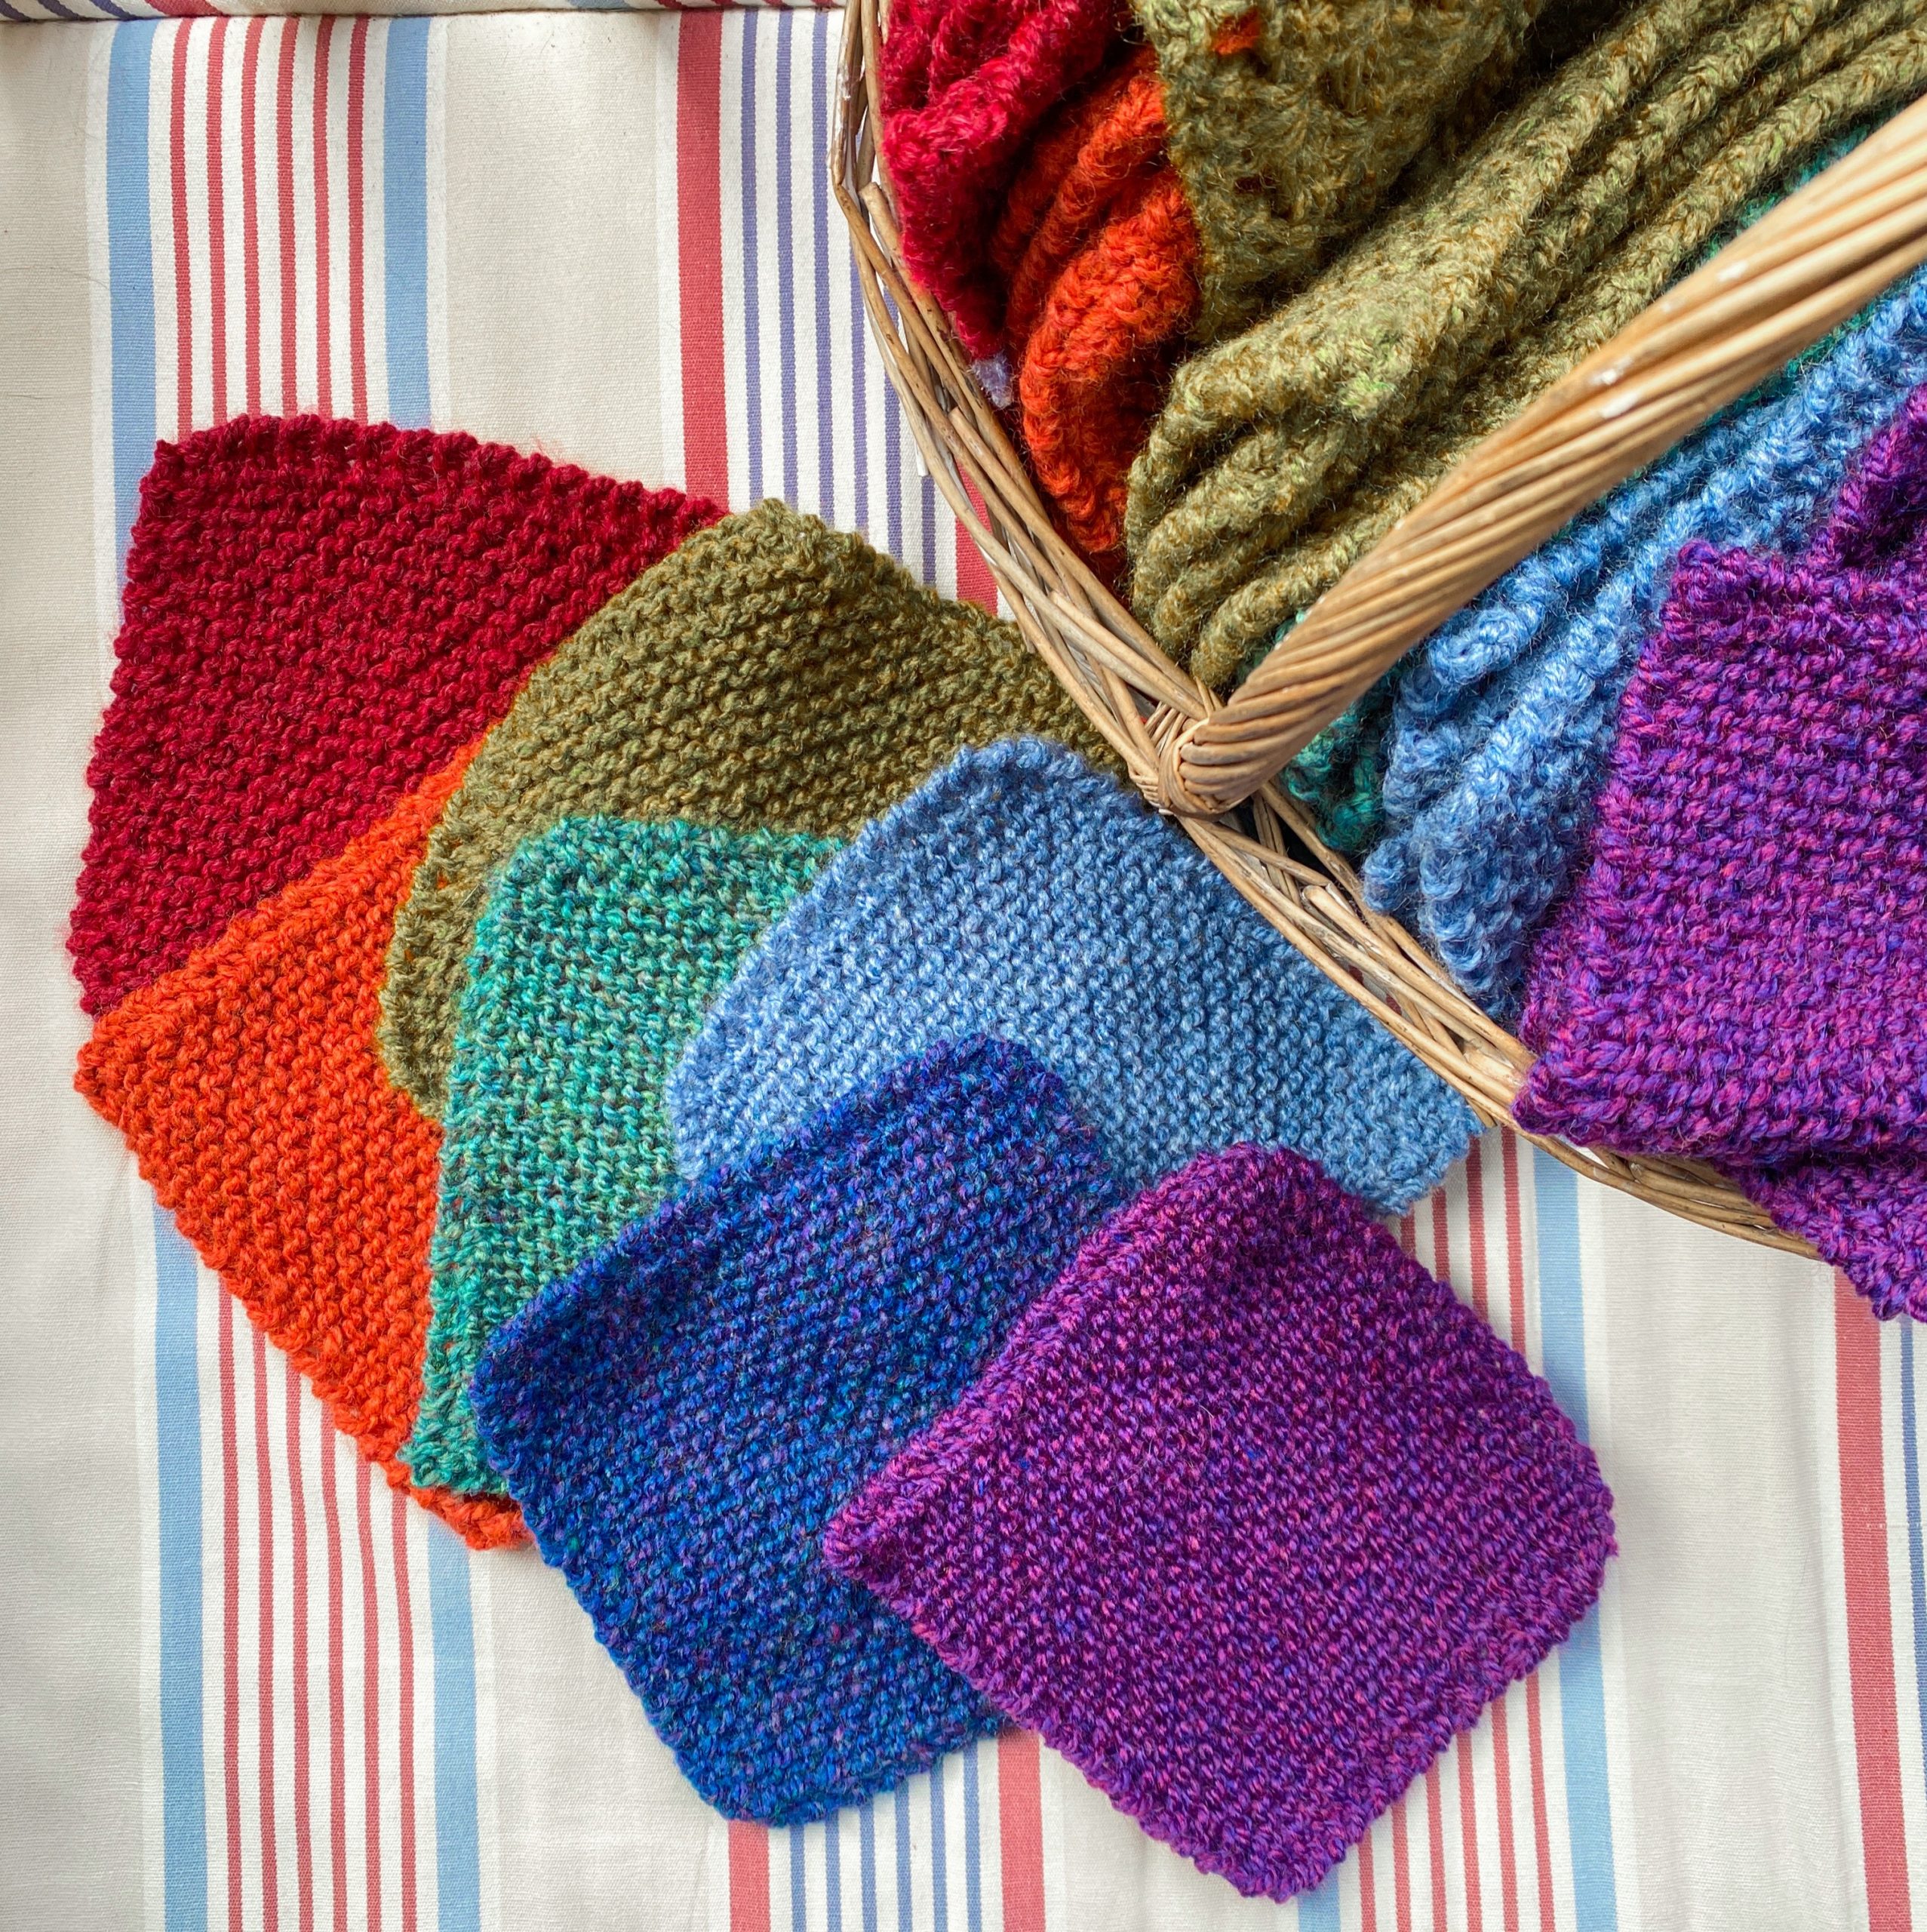
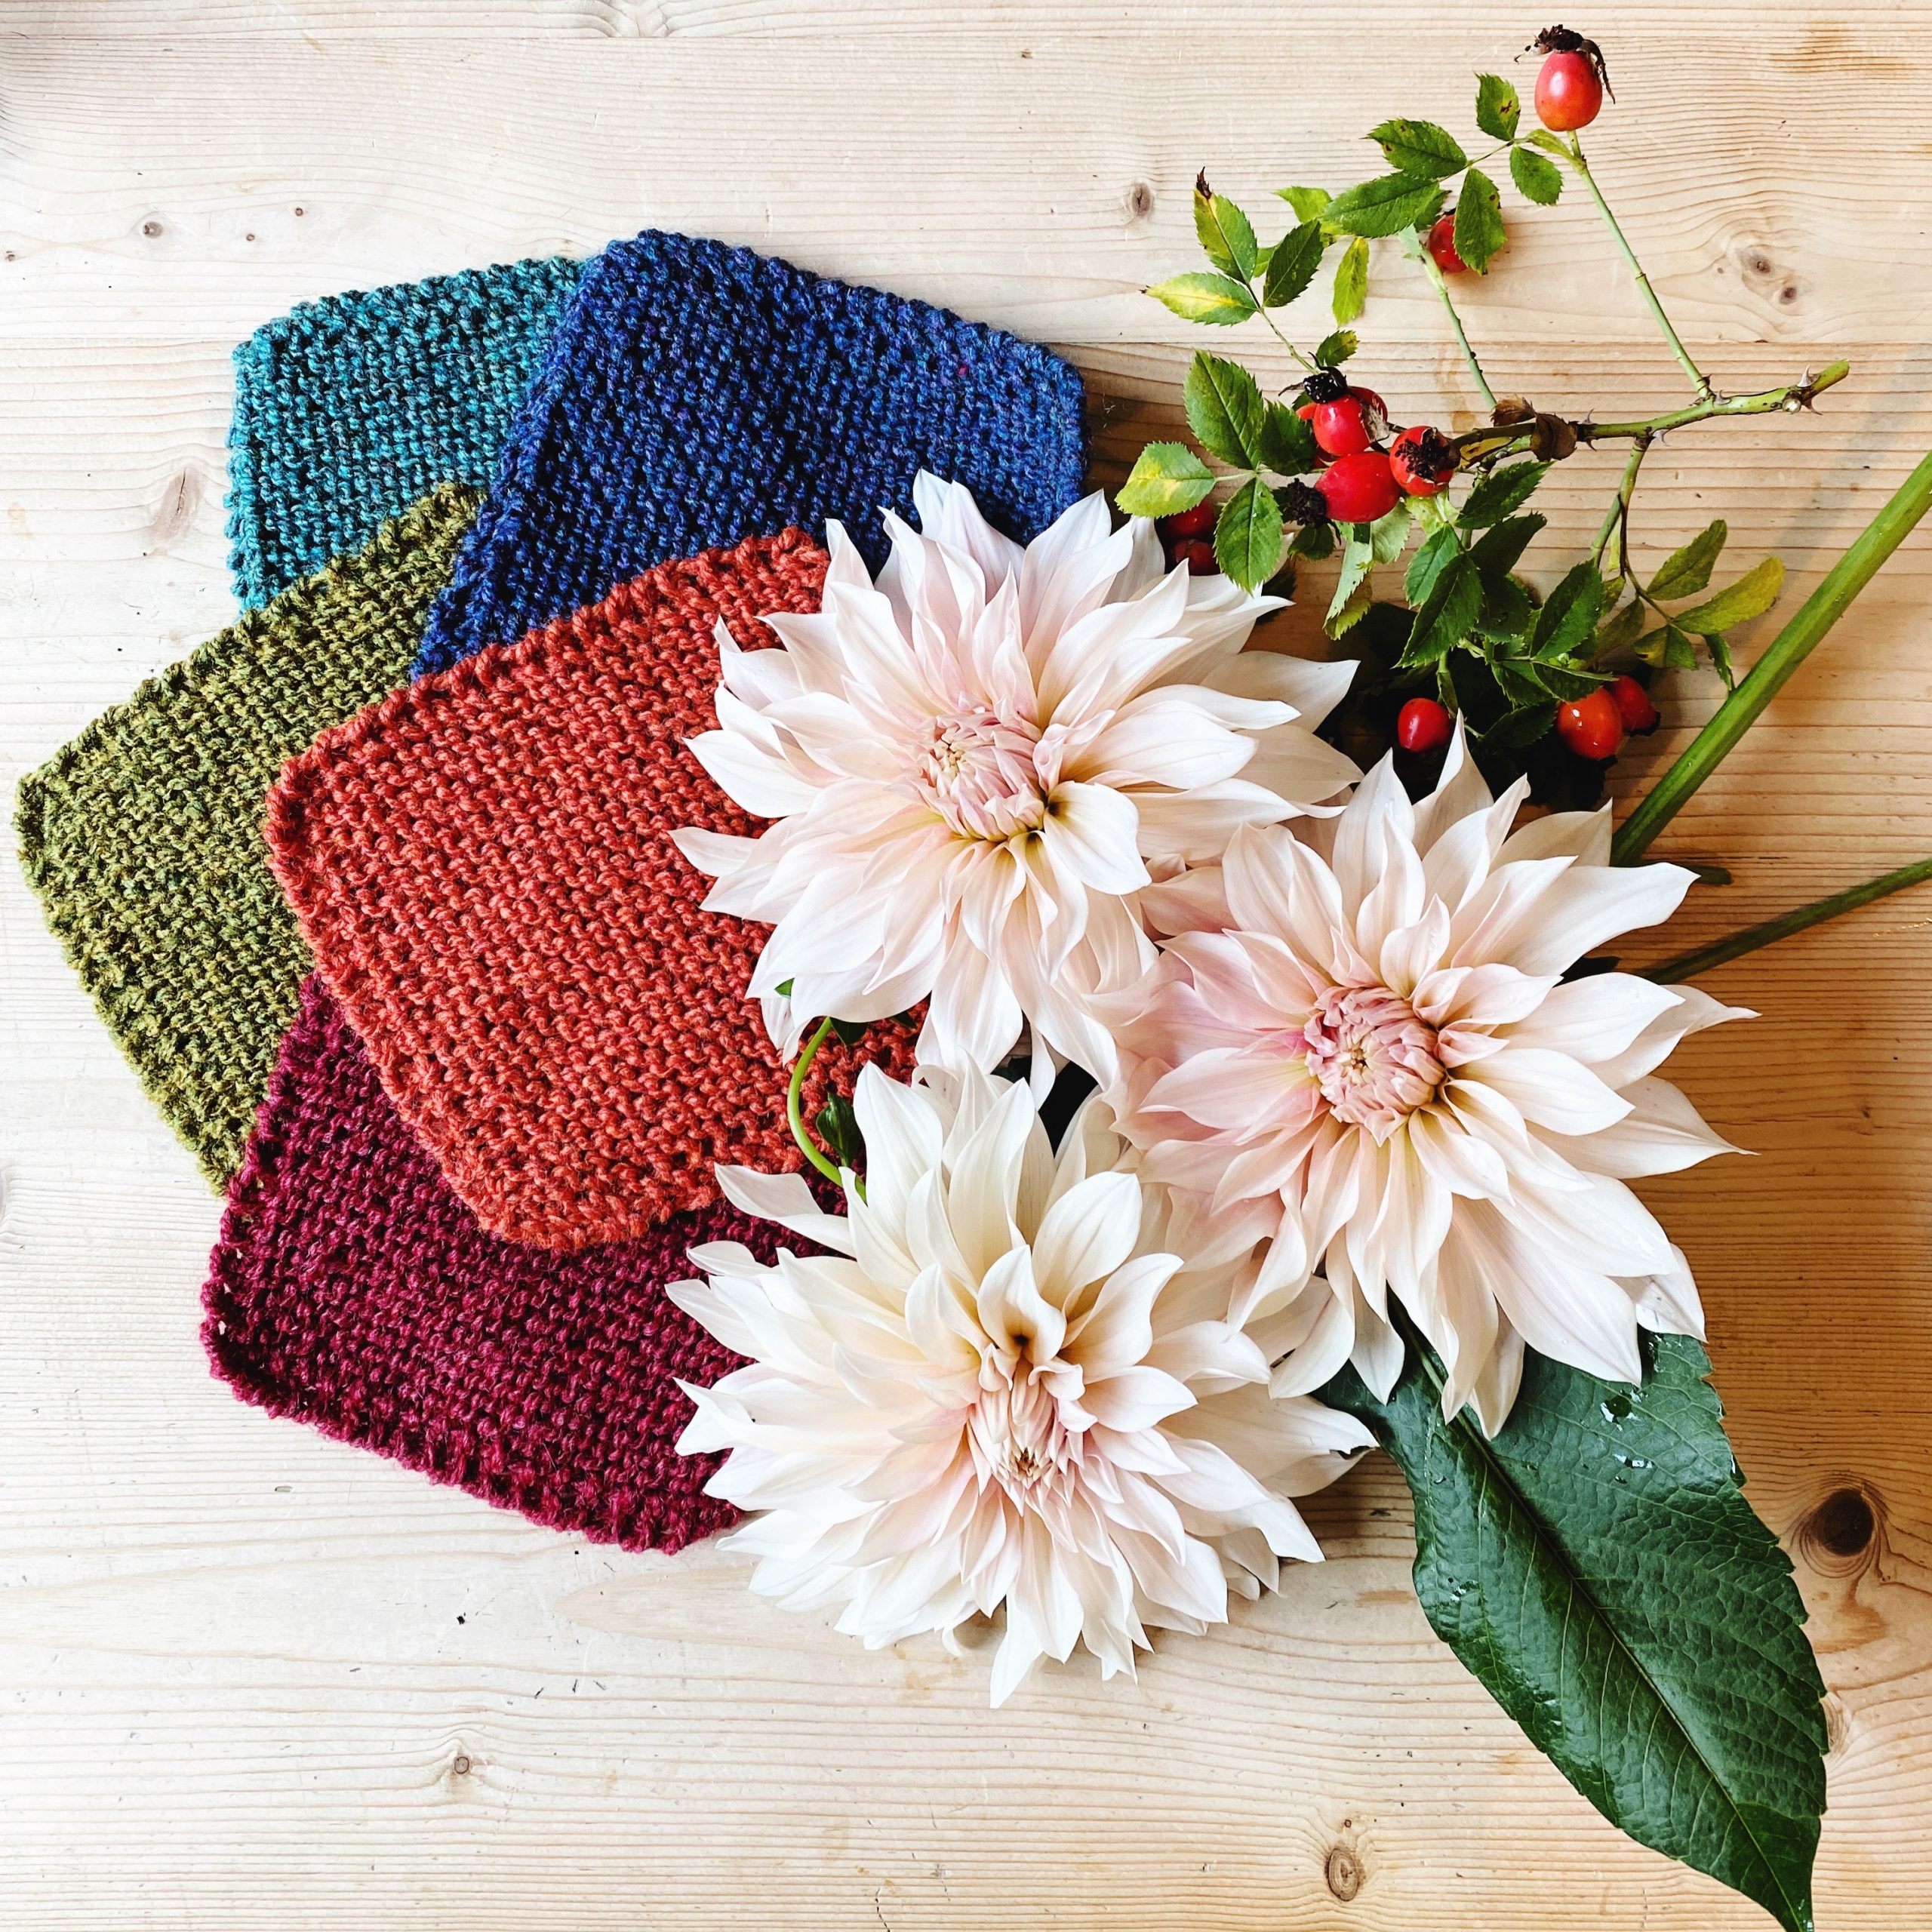
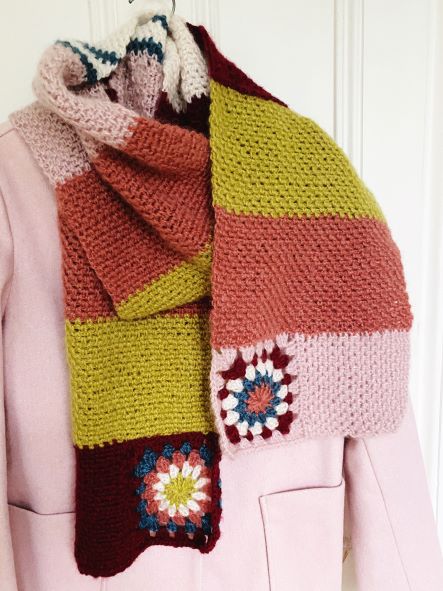
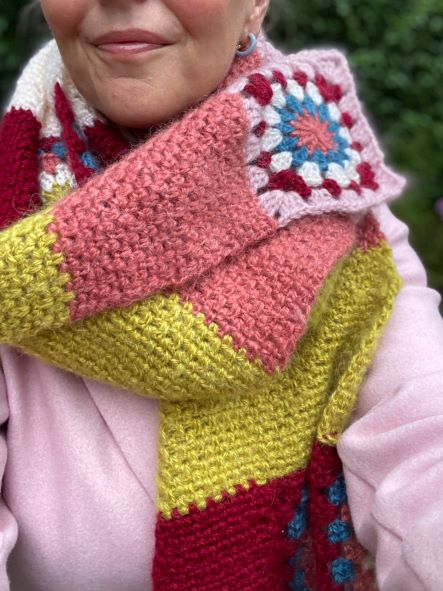
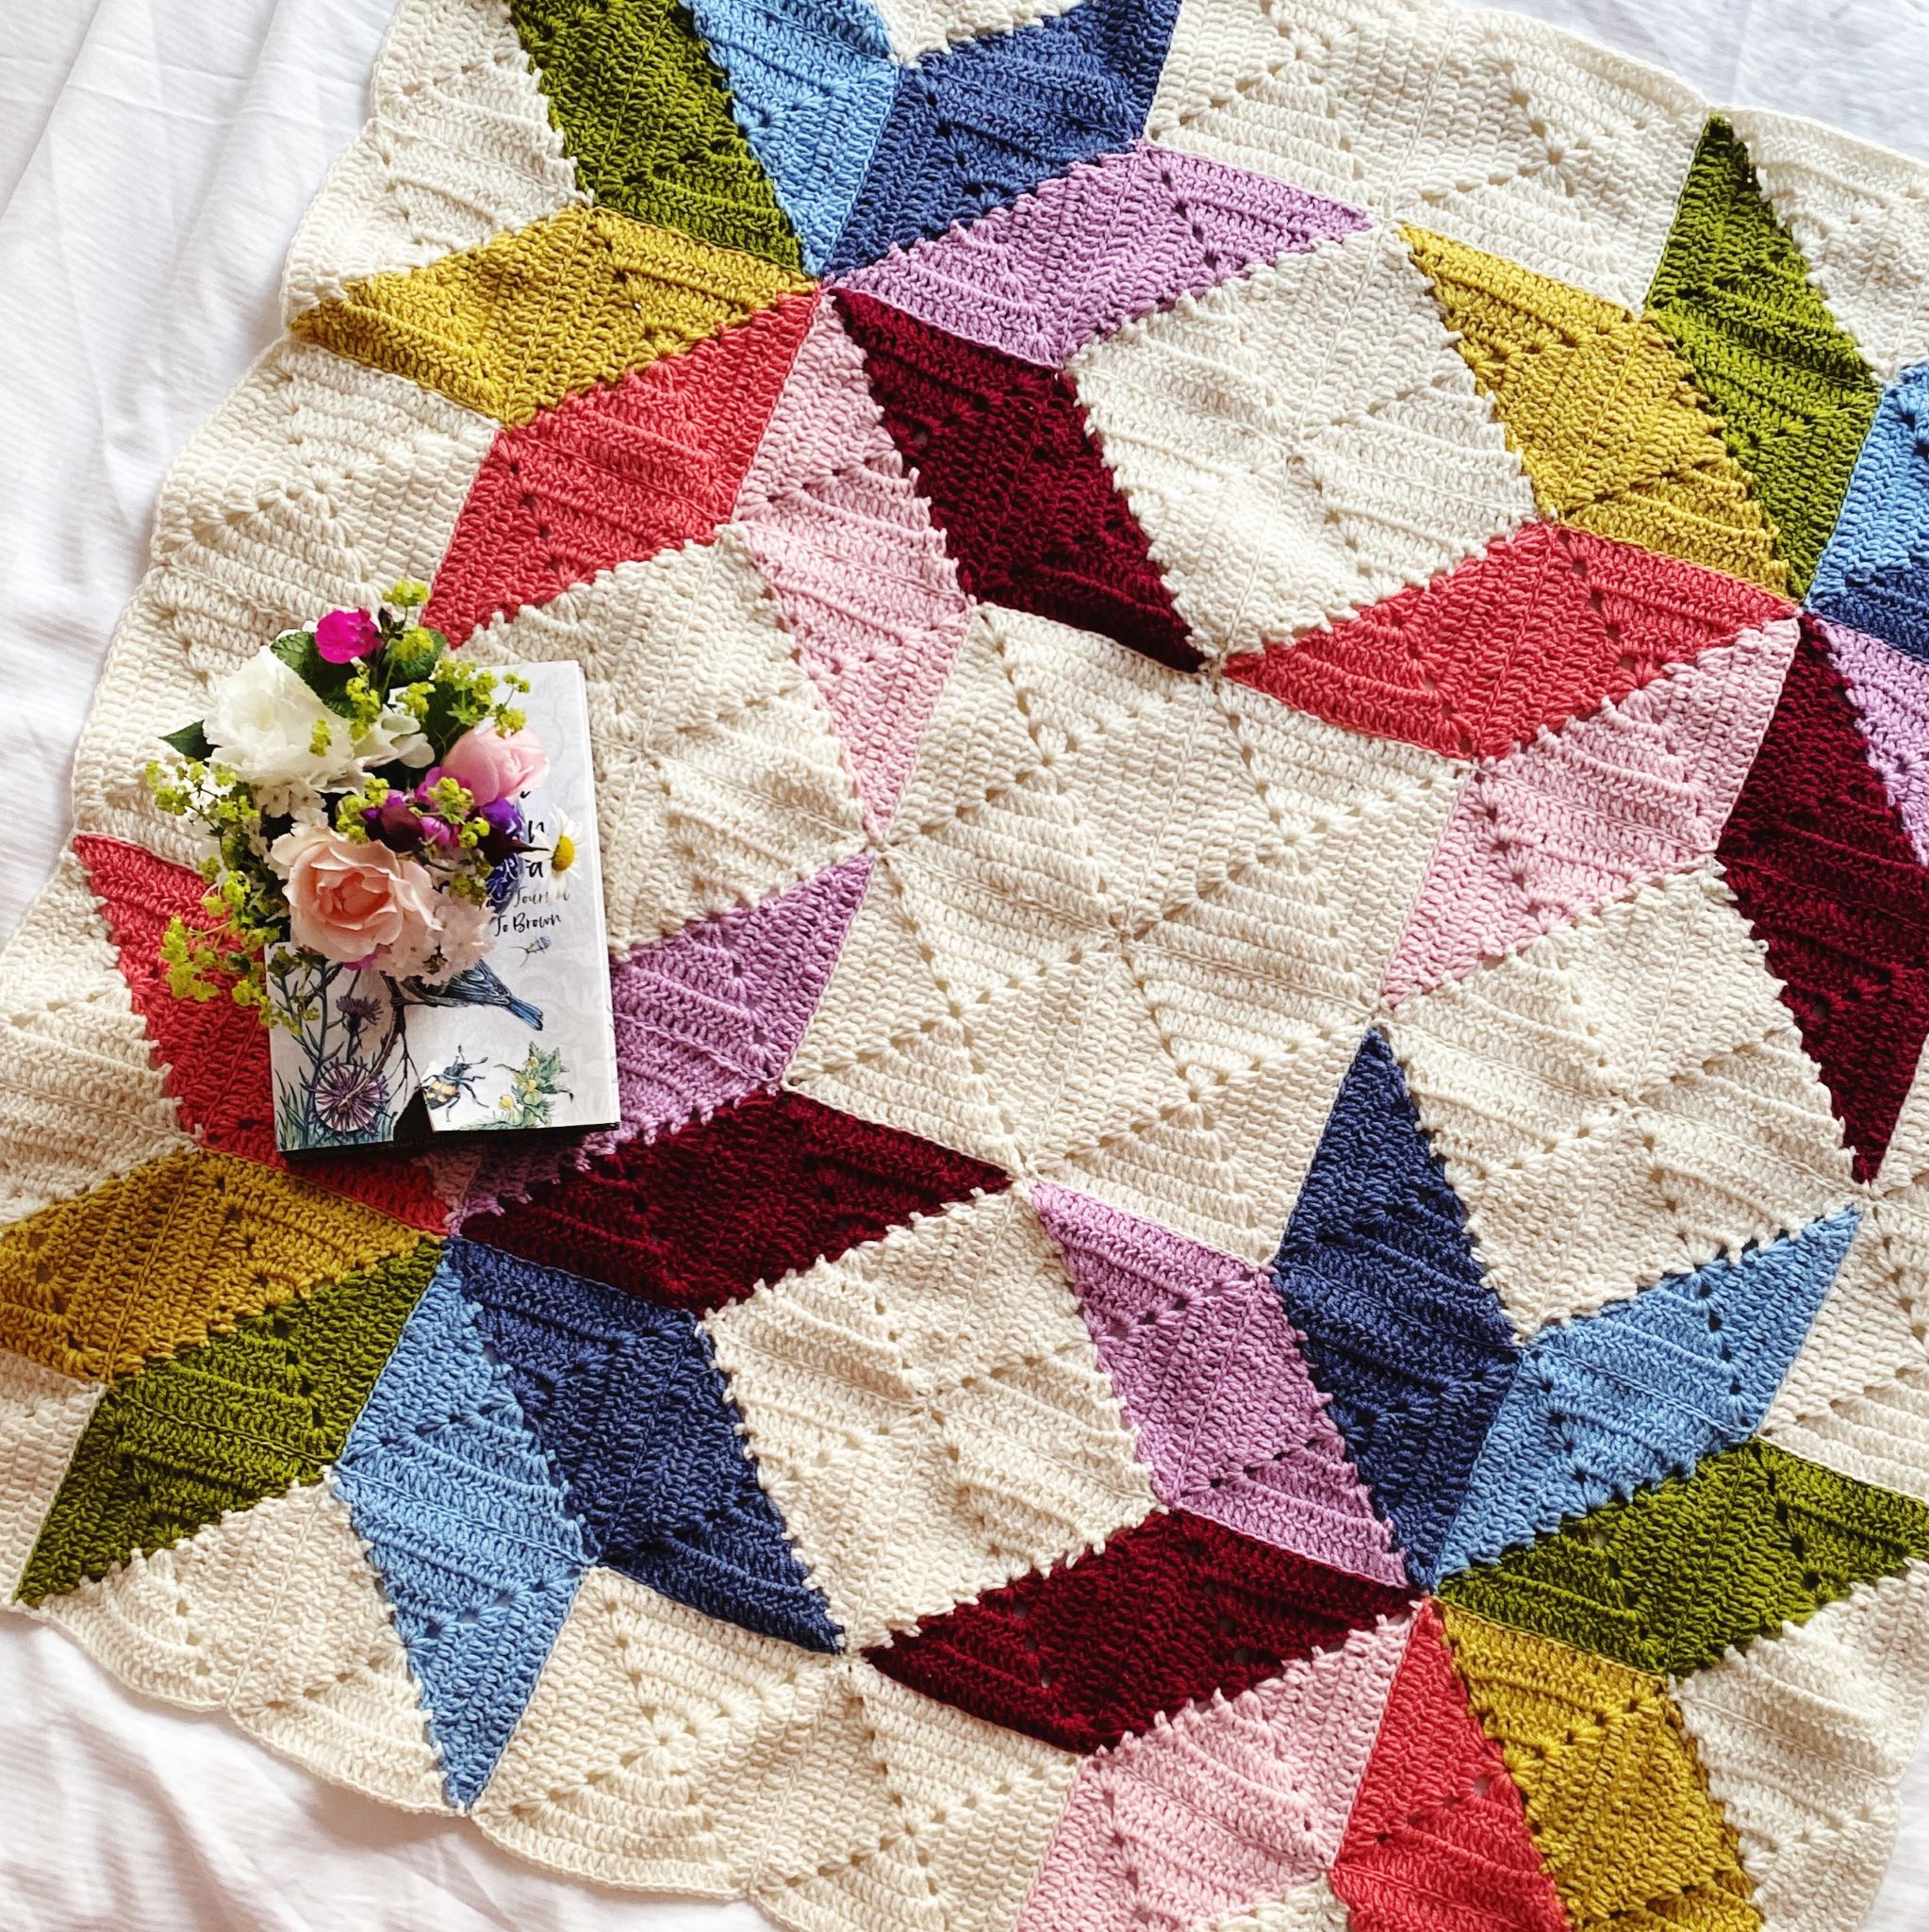
This time it is the left-over aran yarn I have accumulated from my last book. I love aran weight yarn, but my preference is to knit with it rather than crochet. And let’s not be snobby – a basic garter stitch with even tension and a lovely firm twist is a thing of joy.

safe-at-home-blanket-emma-varnam

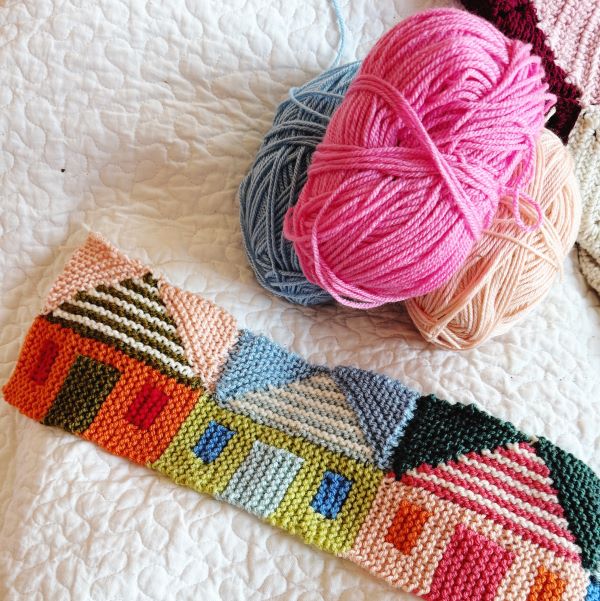
I wanted to slash through the accumulated aran yarns of two colour schemes. To combine the warm peachy oranges which I have used for one project and match it with the blues/duck-egg and greens of another. Not in any way perfect but joyful none the less

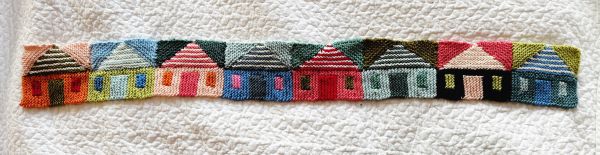
Back in my memory and in the depths of my pinterest collection has been the Safe at Home Blanket by Margaret Holzmann. There is something so graphic, so simple about this pattern. Why do little houses bring us such joy? Is it because they are one of the first thing we draw? However simple the pattern, it is the changing colours of the windows and the doors which speaks to me. Even in real life a row of beach huts is so appealing or the joyful cottages on the dock of Tobermory. The small house sat happily, yet contrasting with its neighbour.

safe-at-home-blanket-emma-varnam

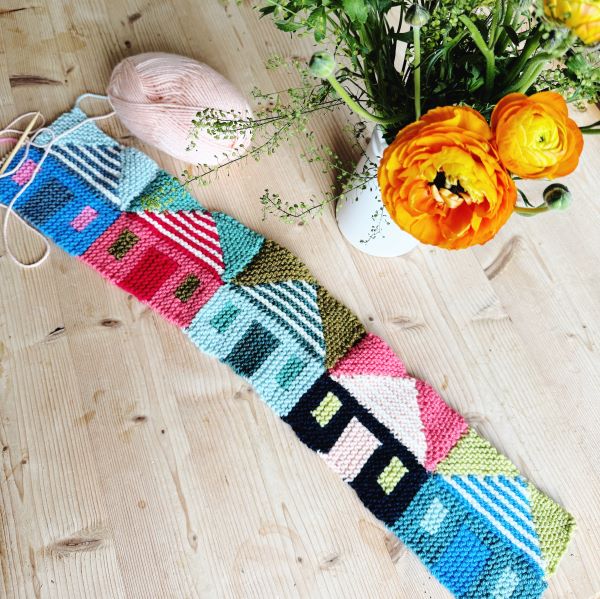
So in amongst a myriad of projects I should finish. I have started a new blanket. You and I both know that a knitted blanket will take me much longer than a crochet version. I could try to replicate that pattern in crochet. I haven’t looked but I am sure it has been done. But sometimes its just nice to follow a pattern and not feel the need to design. I know I will make a few tweaks to the design. I plan just to put 8 houses in a row. I also want to add a strip of plain garter stitch between each row of houses. But that is my preference.

This is going to be a long project. If I get it finished for the autumn I will be thrilled. The pattern is wonderfully simple and if you fancy making your own you can buy it as a downloadable pattern from Ravelry. The windows and doors use the intarsia technique and when I started I didn’t realise that you can put the last stitches from each house front on a holder when you work on the roof. This sets you up nicely for the next house.

Quite a few people have commented on my very first post of the houses, so I wonder if people might like to start their own Safe at Home Blanket. If you do – please tag me into the photo on Instagram.

beach, hut, doorstop, pattern

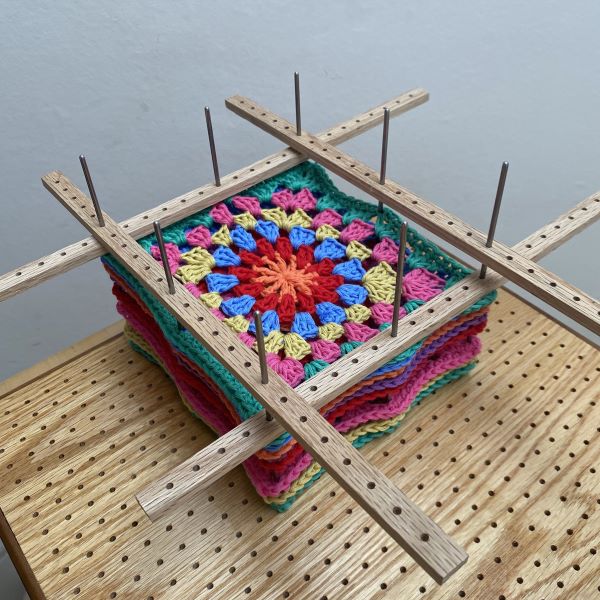
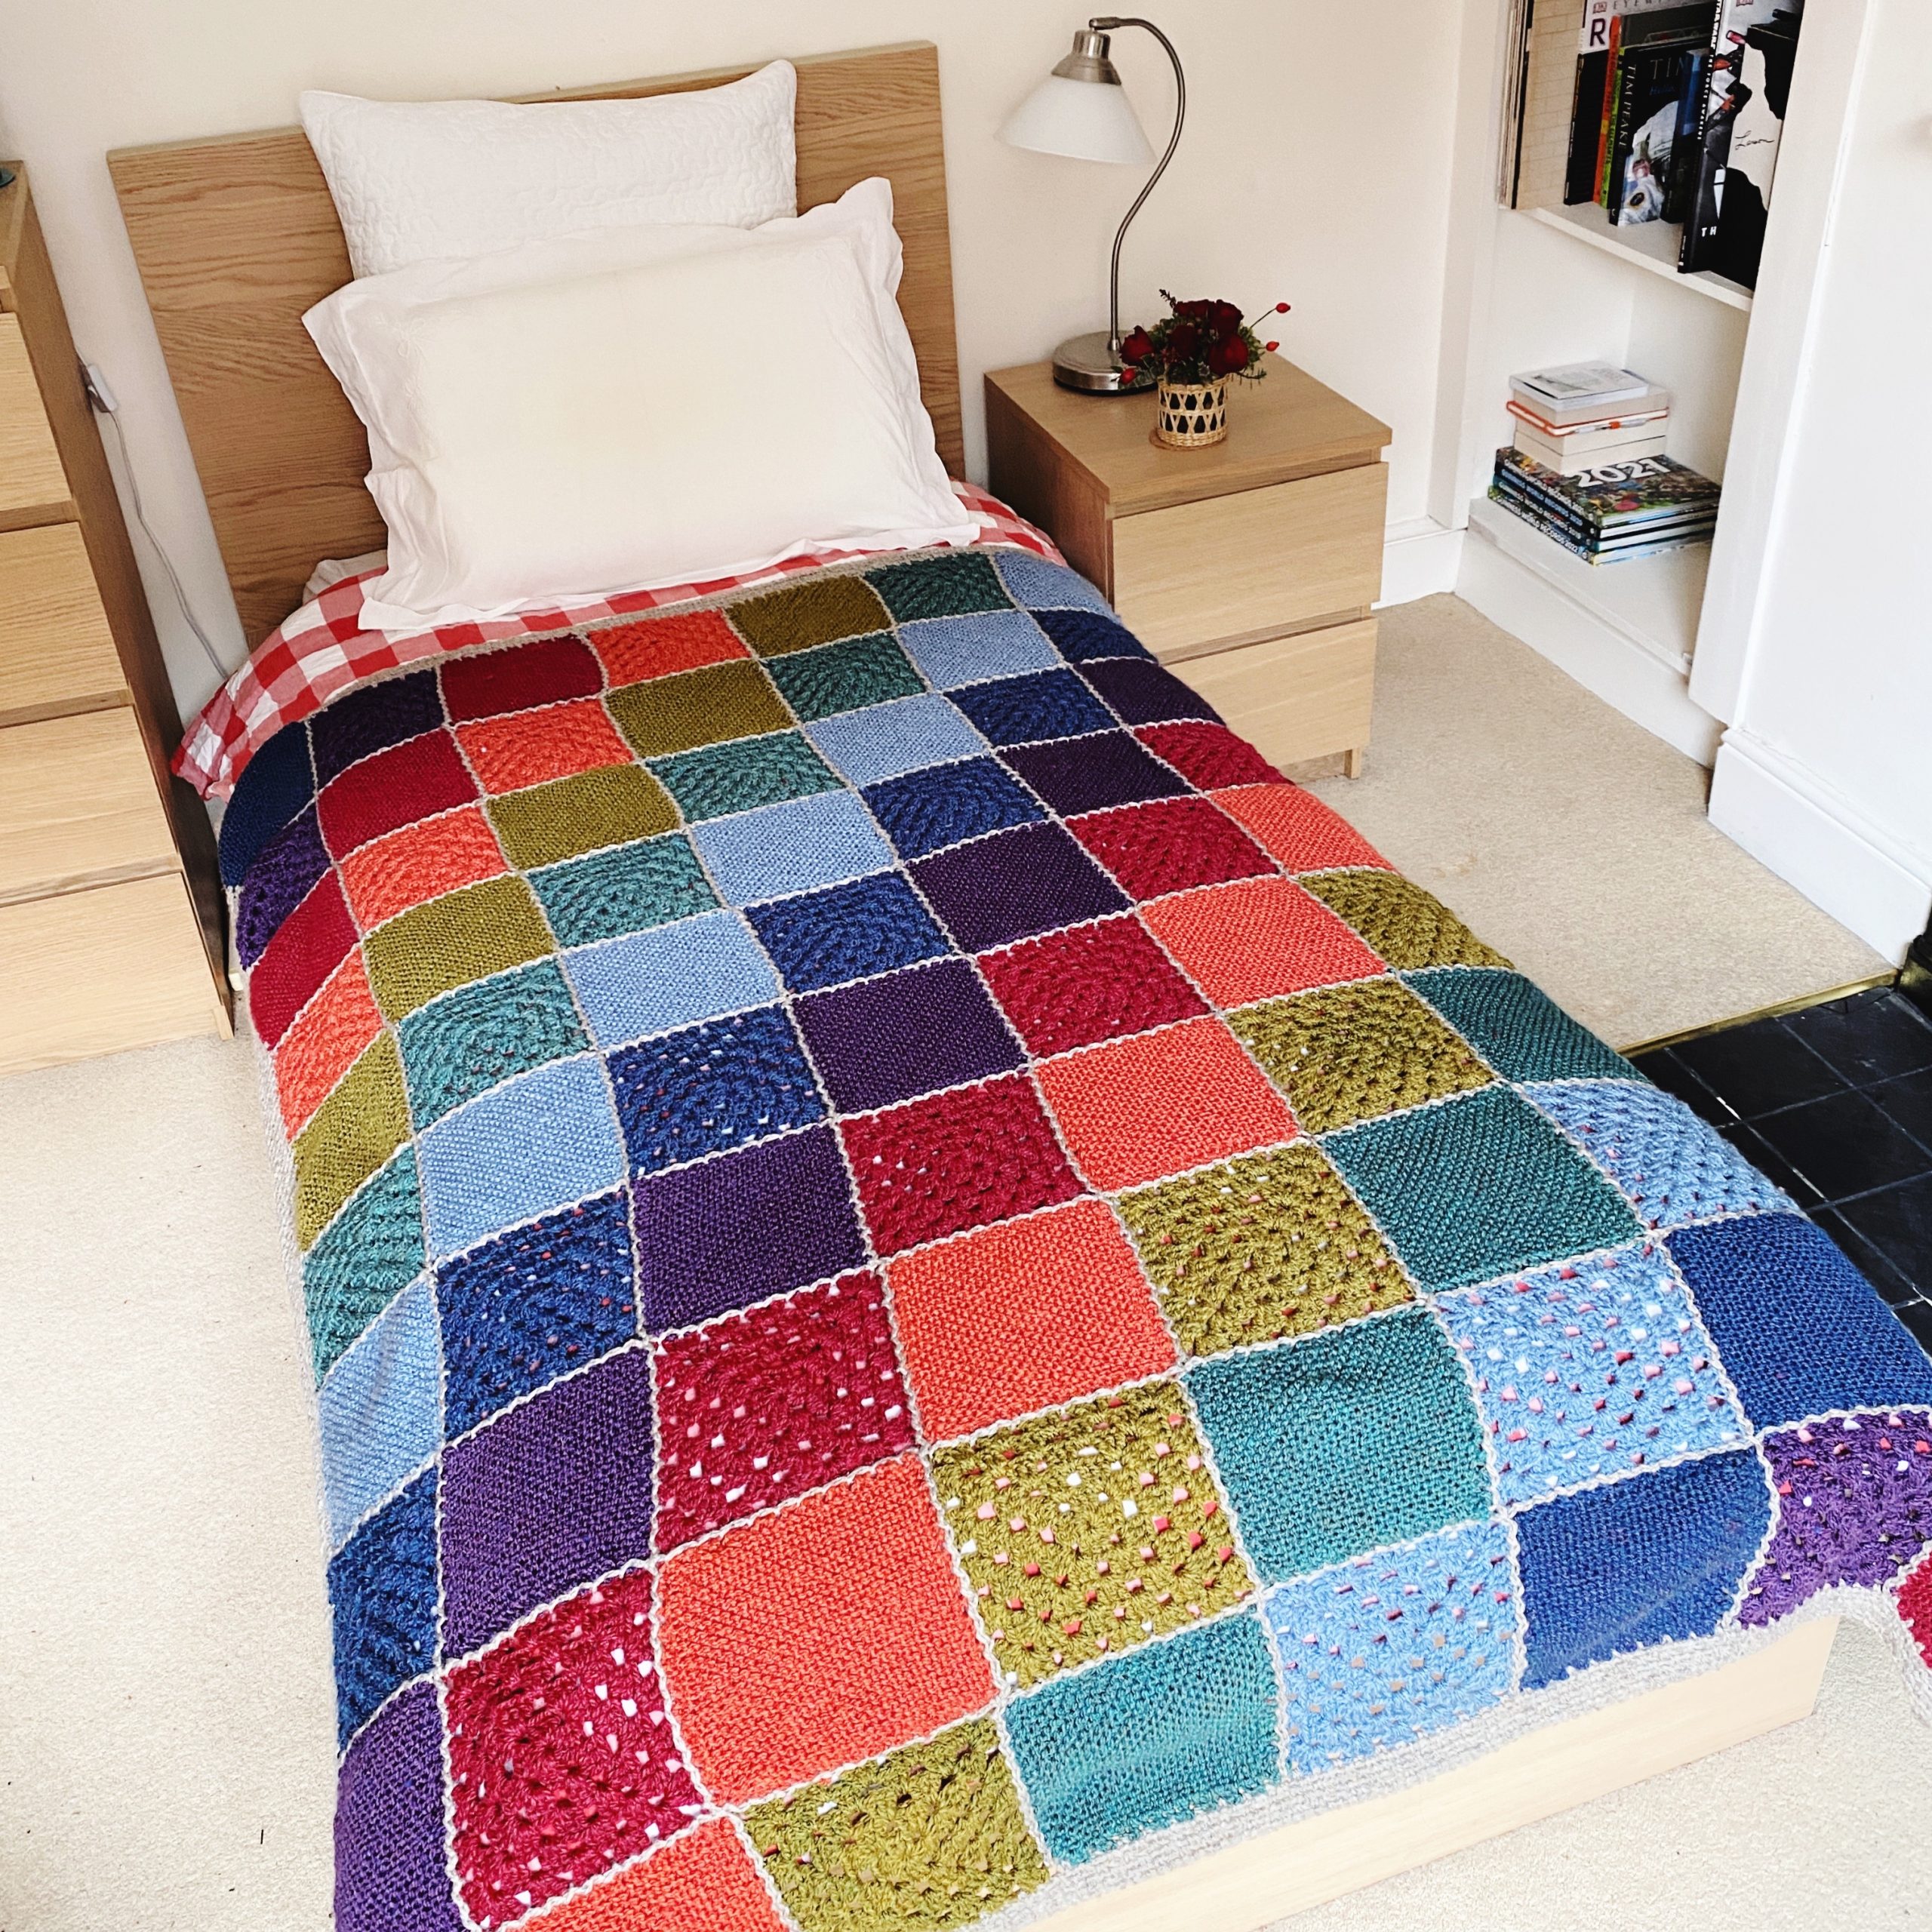
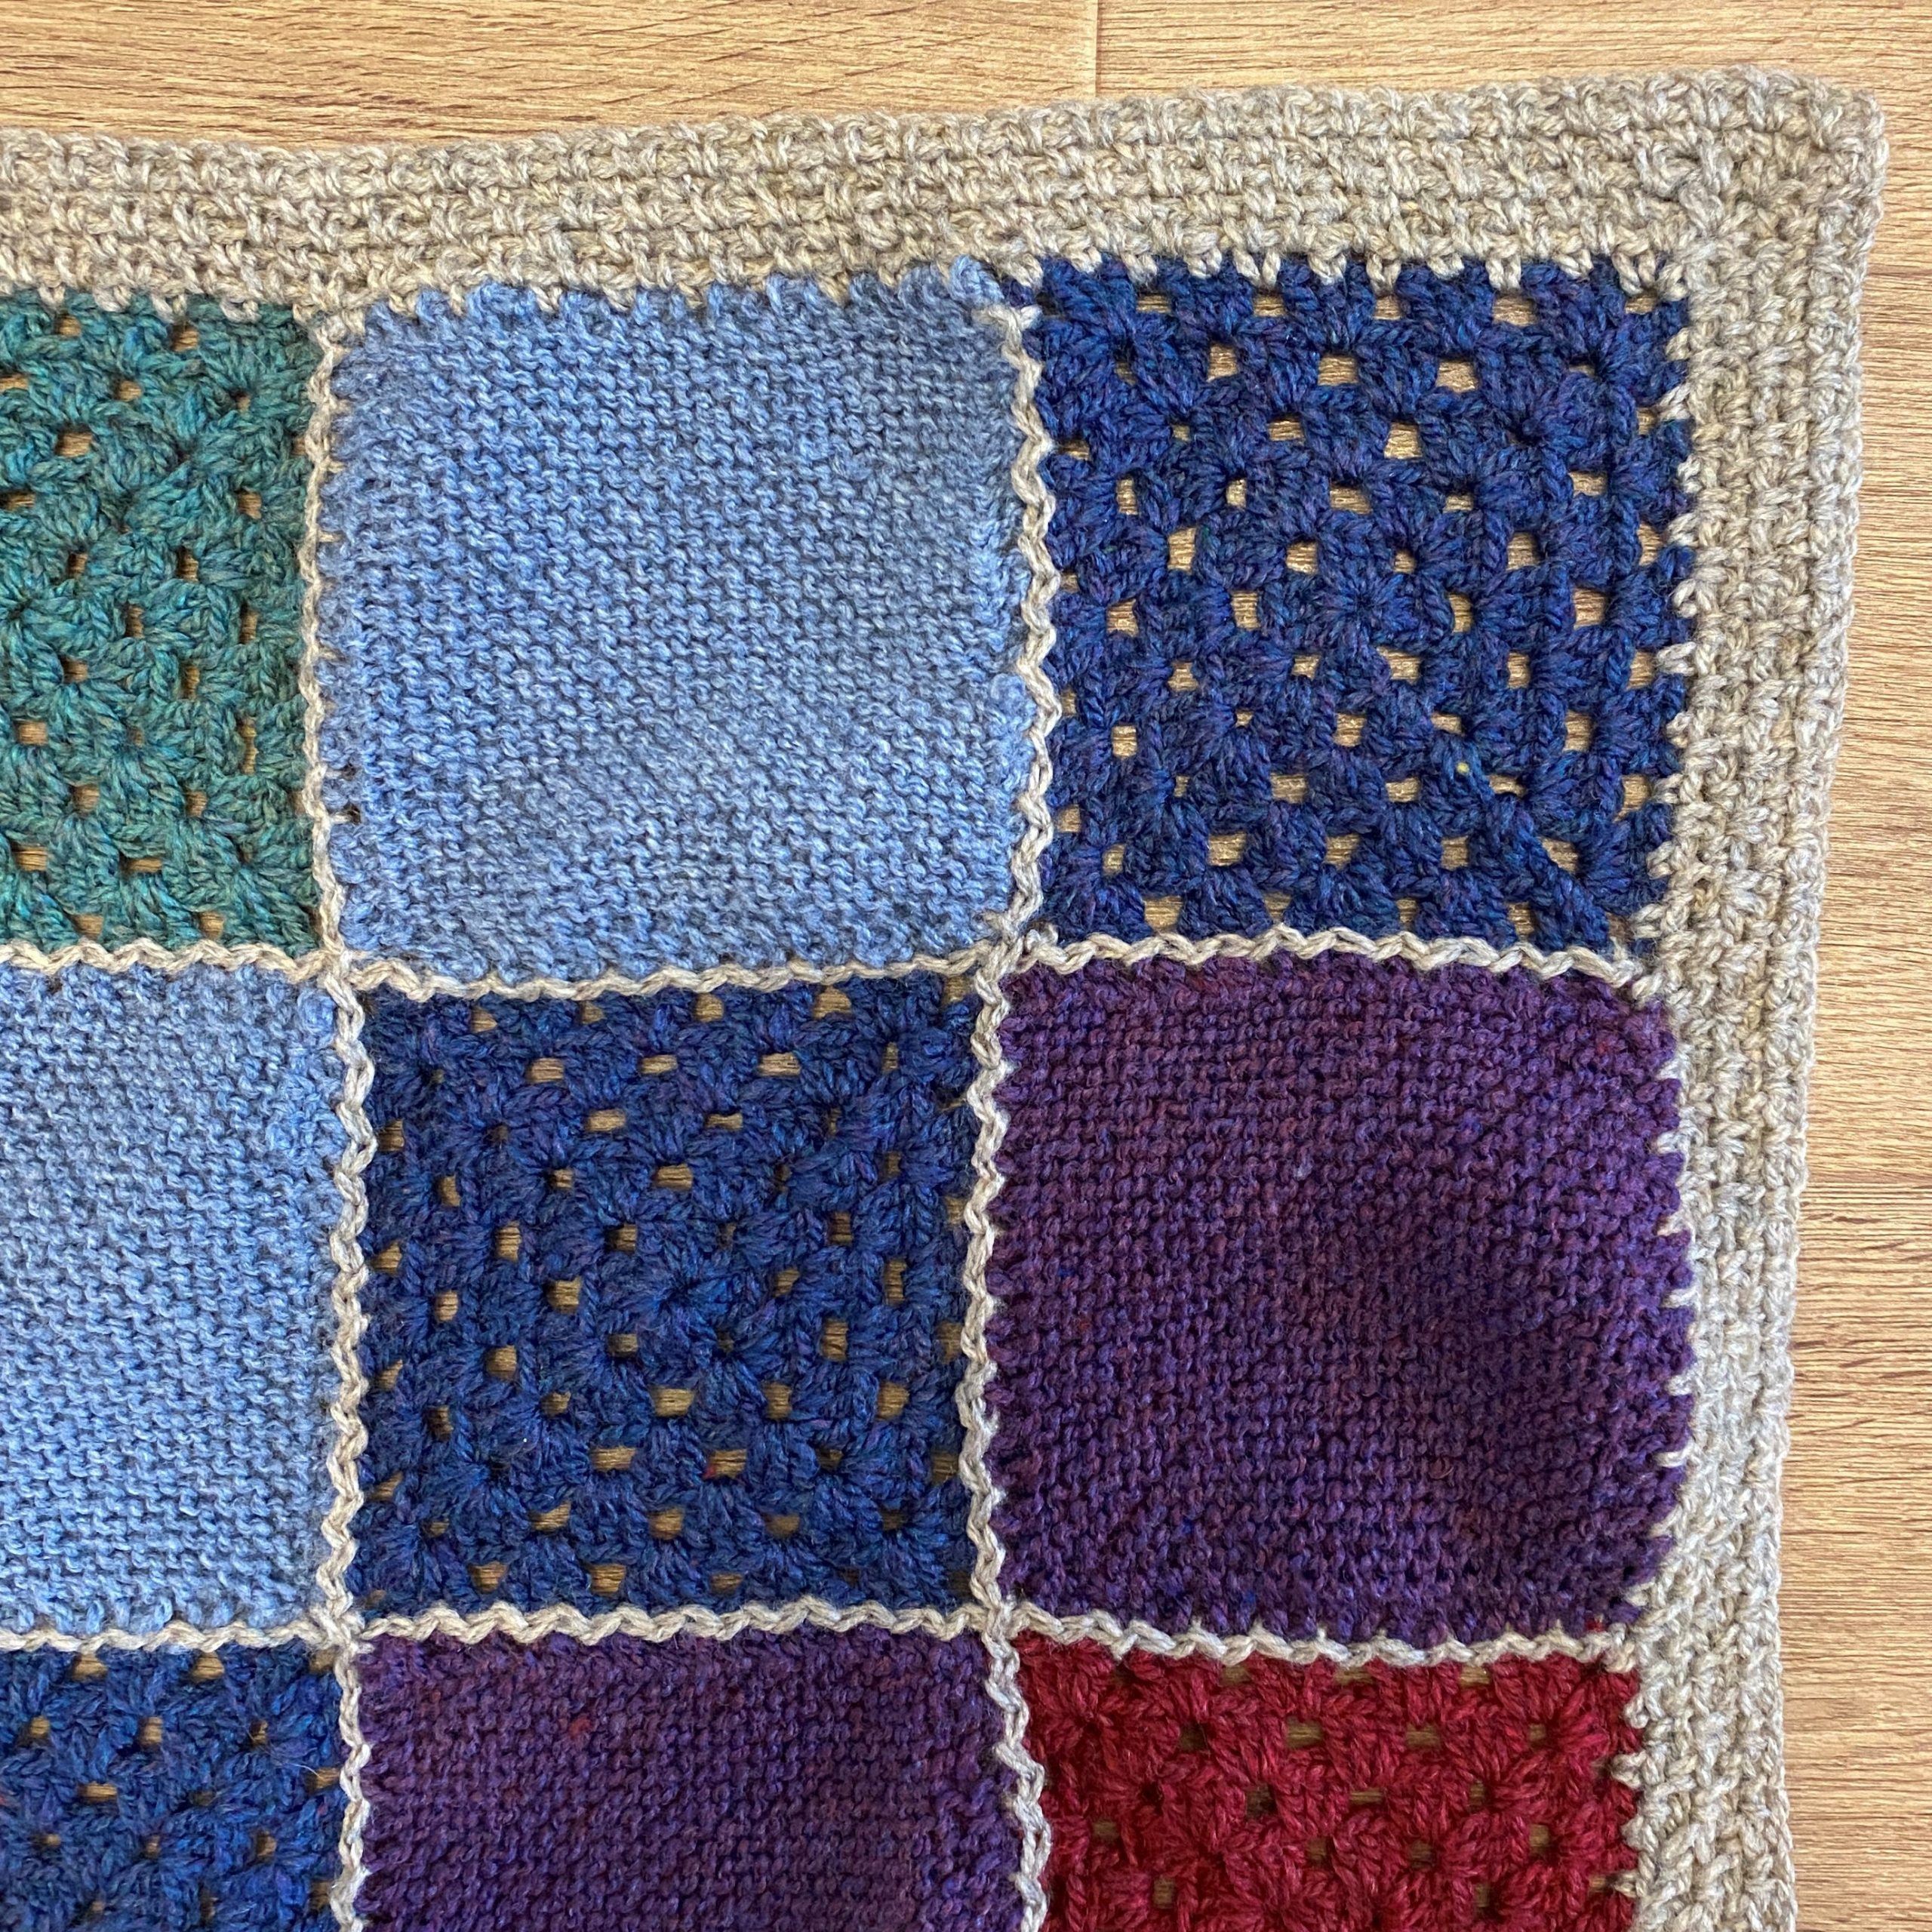
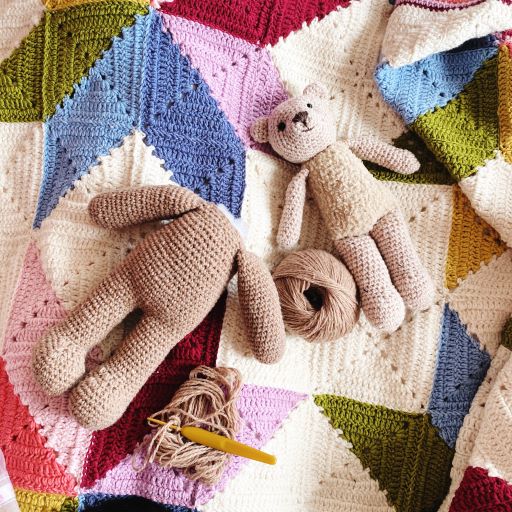
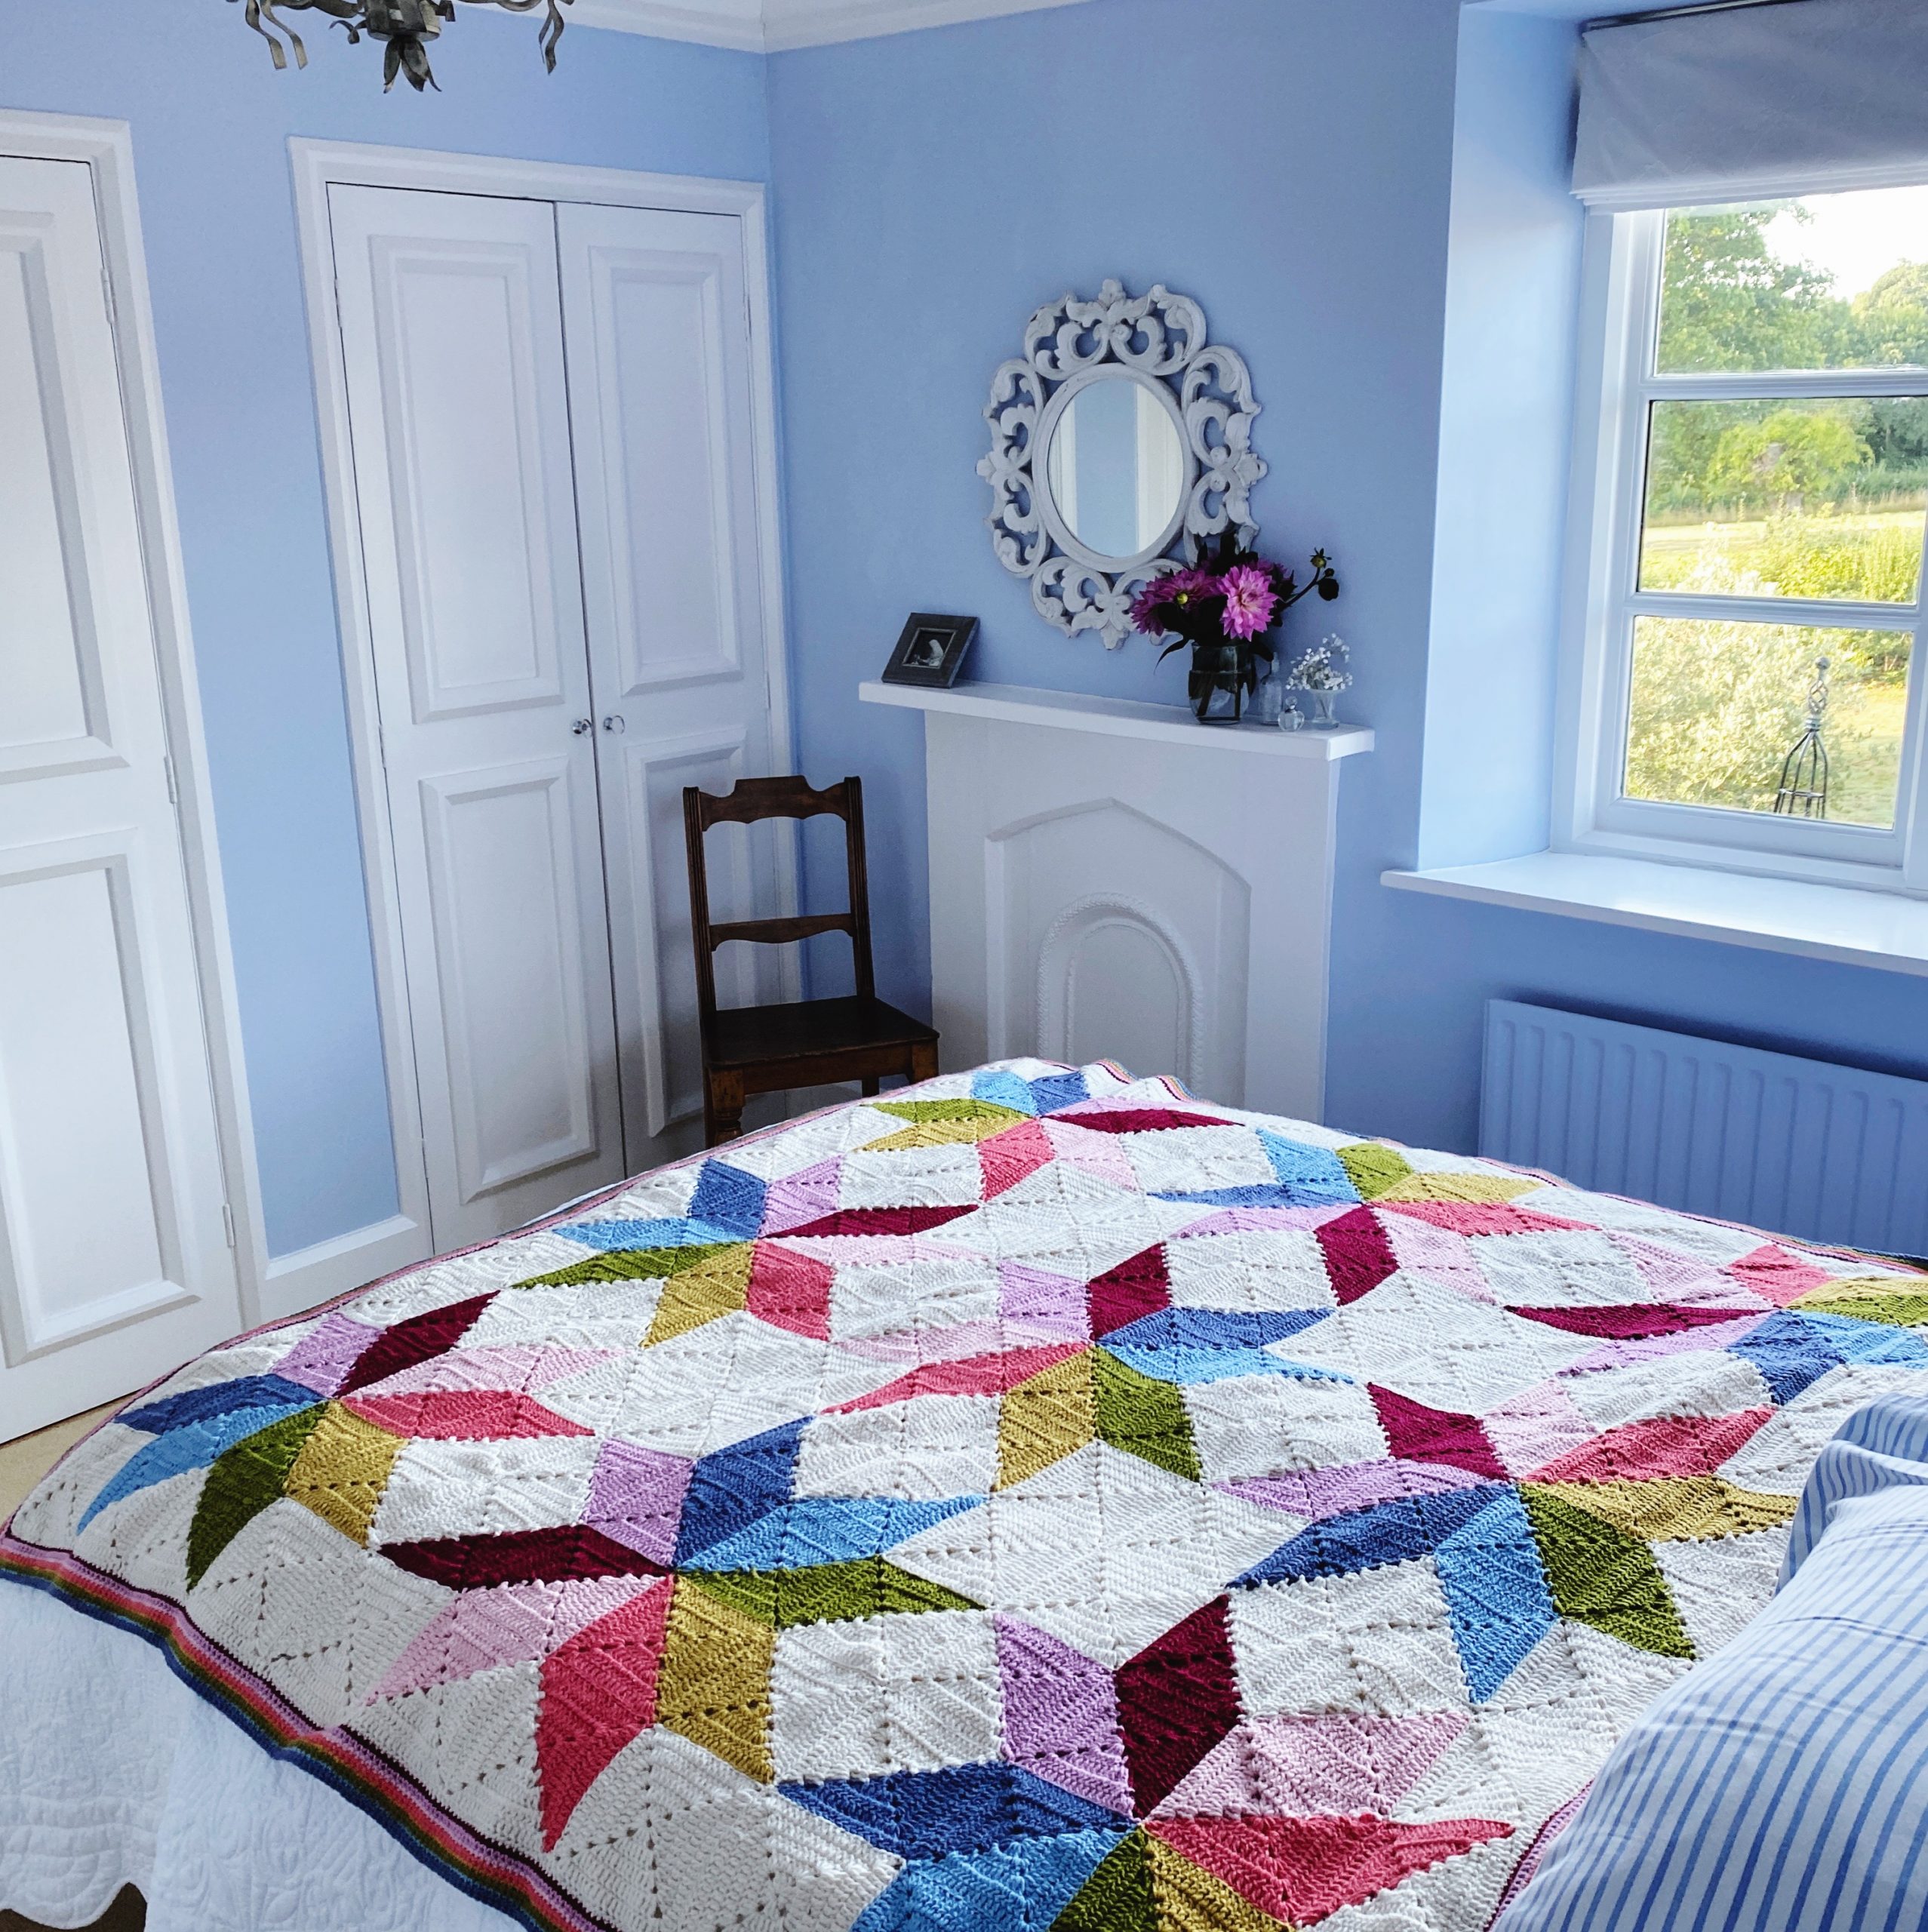
Looking through my photos I realise that the last blanket I knitted was my Croknit blanket which combines knitted and crochet squares. There you go simple garter stitch knitting again, and in aran. It must be a particular preference. I had also forgotten that I have created many years ago a beach hut door stop. The stripes are a obvious favourite.

Well there you are simple garter stitch home making – good for the soul and excellent for the stash. Happy Weekend. x

Home of Garter Stitch Joy Read More »

Patch Passion

I have been inspired by patchwork for such a long time. Seriously it is the craft I would love to do – but I don’t. Why? I mean I love it so much and I understand the basics. I have even done some English piecing when I was young (you know covering little paper hexagons with fabric and sewing them together). Yet I never seem to carve out the time.

I had lovely memories of a house I used to visit as a child. The mother of a friend had made beautiful hand stitched patchwork curtains for every room. They were mesmeric. Very beautiful and such a labour of love. When we first moved to our current house I decided to make a patchwork curtain for the spare room. I really can’t believe I had the dedication. But it is rather special and has fabrics which belong to treasured clothing, pieces of embroidery from old pyjamas. It is these memory scraps which make it so beautiful. And yet that was the last time I did any patchwork.

But the patterns, the traditional blocks are so inspiring. The combination of simple shapes to create a new pattern. They really lend themselves to our crochet craft. I literally have about 5 blankets in my head that I would like to do.

The Stargazer is really popular and I love that so many people have downloaded the pattern. Currently in use in these cold days it brings so much joy. But then my next adventure has just been in a recent issue of Inside Crochet. the Hexagon Blanket is so fresh and joyful and so reminiscent of traditional granny flower patterns it is wonderful used as a bed spread. A number of years ago I designed a Scandi inspired blanket in browns, yellows and ochres. It was my first play at traditional quilt patterns. I really enjoyed the pattern, but have re-worked the colours in blues and pinks – colours which I am very fond of. I think if you remake a large pattern, you really do need a bit of space so that you can enjoy the making journey again.

I have come to the conclusion that I am not sewing patch work because crochet for me as a much quicker craft – and if I am honest it is much more mobile. So what is on the hook now? Back before Christmas I was inspired to star making a scrappy pattern. I have used the smallest squares of Bellissima and Bambino as a central pattern. The pattern was inspired by the new quilt book by ‘Quilt Alchemy’ by American artist Sara Larson Buscaglia. You can see her work on instagram as Farm and Folk.

Honestly I think I need to say that the quilt inspired designs are not always plain sailing. This design definitely has fiddly sewing-in elements. I enjoy working half-and-half Granny Squares, but they are not everyone’s jam. Finally since taking this photo I have decided that I do not like the beige colour and have switched to my faithful blue. So there has been some quite severe ripping back. That might explain why I haven’t quite finished this project yet.

So even though I can’t get into sewing Quilts…luckily one of my lovely and brilliant friends is a fabulous quilter. You can find her on Instagram here. For my birthday. She presented me with this beautiful quilted bag. Isn’t it just simply gorgeous! It even has a liberty print liner. I can’t tell you how excited I am to use it this weekend. Whilst I am not quilting I am still surrounded by clever people who are and the inspirational patterns and that I can bring to life in yarn. All I need to do is to get those 5 other pattern ideas out of my head and onto the hook.

I wonder if you have a craft you keep meaning to take up – but just don’t seem to be able to divert your time. Is it just better to admire from afar?

Patch Passion Read More »

Making and re-making – the little doll

If you read last week’s blog, you will know that one of the things I would like to achieve in my crafty world this year is to finally finish, write up and and publish my doll pattern. It has been a two year journey – no not a journey, because we have not been going anywhere – a two year stop-and-start.

I have made lots and lots of toys. Bunnies and bears are a joy to me, in lots of shapes and style. But a doll design has alluded me. I’m going to be honest – I have designed a pineapple last year in a morning… I mean seriously how hard can it be!

There are a number of things I like to get right before I let a design go into the world. Firstly I do think about the yarn. I think about the price point – is it reasonable? Also how easy is the yarn to get hold of? Now these things are important. I know you might make a design using your stash, and to be fair that’s the best scenario, but no one would thank me if I didn’t say what yarn I have used in the original.

Honestly I think I have made 3…perhaps even 4 versions of a doll. For most of the toy animals I make I have used a DK weight yarn, but with the doll I felt I need to finer stitch. It seems to matter more with the faces. So I have been searching for the perfect 4ply yarn – oh my we have been around the houses. I think I have experimented with 5 different types. It can get a bit expensive this trial and error. But the availability of tones has been important to me for skin colour – I think I have finally cracked it. I know if you make toys you might say – Emma …4ply that is fiddly! Yes… Yes I know but I promise you – have a go and I am sure you will get into it. Or lets be honest – used a larger hook and DK you already have – your doll will just be a bigger toy for bigger hugs!

stanley-the-cat-emma-varnam

The really….really difficult thing has been the faces. I have never been really pleased with the head size and the face shape. I have made 4 versions of the head, and looking through my notebook with all the crossings out and over writing it has been quite difficult to decipher. I was so frustrated with me lack of ‘getting it’ the lovely little girls have made as samples have been placed quite firmly in the corner – poor things. But in the New Year break I was determined to crack it – and started again.

Crochet friends of mine have said that the ability to create good faces for toys is one of my USP’s (they are kind people), so I didn’t want to get this design wrong. So I think we are there now. Ideally to help you replicate the look of the doll and for you to feel satisfied with your make I like to be specific with the placing of features – which round to place the eyes – how far apart they should be etc.

(If you are reading this and are not a crocheter…sorry this might be far too much tedious detail…but this stuff matters).

Then there is hair… thinking about it… it might be the hair that has really halted this project. For a crochet doll there are lots of different ways you can tackle the hair. You can make essentially a ‘hair-hat’ or helmet. An added piece of crochet that fits the shape of the head and that is just sewn on. You can also just take strands of wool and sew them to the head at a centre parting. I have done loads of ‘doll hair’ research. Perhaps too much. I have even used my sewing machine to sew a centre parting between two pieces of paper with professional doll hair. I mean it was fun. But it just didn’t feel like a technique that was accessible to everyone. I couldn’t solve the problem. What I have finally landed on, is a combination of two techniques. Creating a piece of crochet to sew to the head and adding some simple pompoms for bunches. I think this looks cute and is easier to recreate.

The body and the limbs haven’t changed much at at all. I have been happy with them all along, but I have thought quite a bit about the clothing. Full disclosure my preferred option would be to release this design with a pretty cotton skirt. My very first bunny design for Inside Crochet – way back in 2015 was Bonnie Bunny. She was really the prototype for what developed into Jack and Emily in Cute Crocheted Animals. But in that design, I combined some simple crocheted clothes with a pretty and simple cotton dress. I have wanted to return to this idea. So the doll design will come with two options; a simple crochet dress and instructions to make a very simple skirt made from cotton fabric. The dress is small enough that it could be hand sewn and would not need a sewing machine.

Two years ago I did ask you all what other clothes and accessories you would like me to design for the dolls. I still have that list – but I am always keen to add to the idea. So if you have a suggestion I would love to know.

So what next? Well what I need to do is to take a few instruction photos, which will much easier to follow the pattern. At the moment I am thinking I will release this pattern on my website and Etsy shop. So after I have taken all the photos I will begin writing up the pattern and then get the pattern tech-edited. This is really very important. I have a few dedicated makers who make lovely versions of my toys, so I will also ask them to have a look at the patten and make up their own version. After so much trial and error, I am finally pleased with how things are looking. I hope you like the dolls too. See what you think and please do leave a comment below. Have you got a project that took you years and years to finish?

Making and re-making – the little doll Read More »

Summer is made for Crochet

Get the pattern for this beautiful bag

So many people think that as yarn crafters we throw away the hooks and needles as the seasons heat up and the yarn is banished to all the normal hiding places for the short months of summer. But I love the changing seasons for my crochet. Yes I love to make snuggly blankets for chilly months. Come January I frequently make a new hat for the out-door pursuits. But then summer is just as inspiring.

The good people of Stylecraft asked their Blogstars designers if they would be happy to take their either their organic cotton yarn, or Naturals Bamboo cotton yarn and make something perfect for the Beach. YES PLEASE! In cottons I am most frequently attracted to the bright primary colours. I also love to make practical, helpful accessories.

emma-varnam-blogstars-beach-bag

I have chosen to make a bright and glorious Granny Square Beach Bag. The classic gawdy hues that make crochet so attractive and capacious enough to hold all the sandy towels at the end of a joyful day by the sea.

I will admit that I rather selfishly designed this bag so I could use it this summer. Yes it will get much use. I did not line this version as I was keen to get the stretch which crochet can give you. But I did sew some ribbon to the inside of the handles.

I have two top tips for you if you are making this pattern. Use the most colourful and joyful cotton colours you can find. If you find yourself on the beach – you bag will be unlike any other – meaning you will not lose it.

Secondly I do like to block my squares when I am finished. It really helps to get straight edges when you join the squares together. I have once again used my favourite slip-stitch join. It provides a clean and sturdy line between two squares.

There are many gorgeous patterns you can download for this Blogstars Beach festival. I just love the parasol made by the super talented Catherine Bligh. But then also look at Lucia’s fabulous Starfish bag! So much talent.

I will be releasing this pattern for just this week at a sale price on the blog shop and then it will go for sale at my normal pattern price. Please pop over to the blog shop for the pattern.

The very generous people at Stylecraft are doing a fabulous yarn give away for each project with the pattern, and all the yarn for each project. Keep watch on their facebook and instagram accounts for a chance to enter.

So now is the time to make your perfect summer bag for all the joyful gubbins for holiday adventures – if you do make one please do show me your version!

Summer is made for Crochet Read More »

Snuggling under your hobby

cosy-croknit-blanket-emma-varnam

Right I am just going to say it – sometimes I just like making for making. Sometimes I have no intention of making a project into a published pattern and then it just becomes such a joyful make that I can’t help sharing it with you.

This is true of the Cosy Croknit blanket. Like many of my most favourite designs, the idea came following a few conversations and a little bit of necessity. I had received some Aran weight yarn in the post and I began making a few garter stitch squares to see how it behaved. There is something so tactile about aran and garter stitch knitting. So satisfying and joyful. I am not eloquent enough to explain. But if you know – you know.

cosy-croknit-blanket-emma-varnam

Then I remembered a conversation with my Granny. She often collaborates with friends to create blankets for charity. They work on different squares, some crocheted and some knitted. Due to tension and style, the squares can be a bit challenging to align and sew together. It got me thinking…. could I write a pattern which combined both crafts? Could I create a pattern with an easy size guide, a basic colour scheme and plan which would include both crafts?

cosy-croknit-blanket-emma-varnam

My mind began to whir… And that is how I began to work on the Croknit pattern. I have used the juicy Highland Heathers Aran from Stylecraft. If you are a knitter…you can just knit all the squares… if you are solely a crocheter why not just have a blanket full of granny squares. I have enjoyed combining both skills. I flitted between both crafts as my whim took me.

cosy-crocknit-blanket-emma-varnam

It wasn’t easy for me to decide how to join the squares. I had several aborted attempts. Then I landed on a zig-zag slip stich join. The crisscross motion allows for just the right amount of ease between the differing drape of the knitted and crochet squares. I also went for a linen stitch edging which is just intricate enough for interest but doesn’t detract from the beautiful jewel like colours of the squares.

The finished item has a pleasing amount of heft. So much so, that it is being argued over most evenings! Stanley is winning.

So whilst the pattern is very simple I have written it up for you with hints and tips on how to collaborate to get your squares to match. You also get the colour schematic and the edging stitch pattern.

cosy-croknit-blanket-emma-varnam

Whilst it is important to give yarn suggestions for published patterns. In my mind, this pattern was always intended for stash busting and the pattern has stitch suggestions for DK yarn too.

Well I hope you like it. The Cosy Croknit Blanket will not be leaving our house I am afraid it is far to snuggly for that.

What do you think about patterns that combine knitting and crochet? There don’t seem to be many about. When you are working as a team…or a yarn bee, what are your handy hints or tips to make sure your blanket squares fit together? I would love to know.

**** I am hosting an instagram live about the blanket at 11am GMT on Sat 14 Jan 2023 if you would like to join me ***

Snuggling under your hobby Read More »

Bailey Bear – a teddy to hug

It is a plain fact – I make things that I love. With toys, I’m often inspired by the children I know – I look at their soft toys and observe how they carry them – how big they are. Are they held by the paw, the ear?…frequently by the foot.

You might have thought that I have made enough bears and bunnies. But there is always a new yarn, a new size, a new child that inspires me and so I have to make a new design.

Bailey Bear is a good ‘best friend’ size. Not a baby bear – but a traditional ‘this is my very special soft toy’ size. I have made the feet in a way that I really like. I have thought about the length and width of his arms. This bear also has a tail. Being specific the bear is approx 35cm tall (excluding the ears) and 20cm at the widest part.

You know that the face matters a lot to me. A kind smiley face is very important. In the majority of my designs I like to work from the nose out, as this enables me to place the ears exactly where I want them. I have gone for a larger eye, because this adds to the friendly appearance.

If we want to go all technical I have used a nice tweed DK yarn. I’m loving tweed yarns at the moment. The little flecks in the fibre gives a little life to the finished crochet fabric.

Because winter is around the corner, I occurred to me, wouldn’t it be fun to add in a little cardigan, perhaps even a bobble hat and a key hole scarf. Let’s be honest I have been making key hole scarves for me – why not Bailey?

The bobble had is striped – but you could very easily make it plain. The cardigan is a new pattern. I made the sleeves first and then worked on whole strip for the body of the cardigan and added in the sleeves as I got towards the yoke. All you need to do when you finish is to sew up the sleeves under the arm and sew on a little button.

I have made the first clothes in my festive favourite of Duck Egg Blue with Red and Cream. But you choose what you have in the stash.

In my imagination, this is the sort of bear that would look just gorgeous peeking out of a stocking on Christmas morning. All smiles and cheers of joy. Immediately the ted would be tucked under the arm and new adventures would be planned.

I think I could add to the wardrobe – what do you think? But for winter I think Bailey will be just warm enough. I have placed a PDF pattern in my blog shop for just Bailey and if you want to make the clothes there is an additional pattern. Just to be safe you will need 100g of DK yarn for Bailey.

Well I hope you like my new bear. I really rather fond. Do tell me about new clothes ideas and I will add them to a list. Have a happy hooky week.

Bailey Bear – a teddy to hug Read More »

Autumnal Grace

barney-ted-emma-varnam

Is there a phrase for crafters who have finished a project and they can’t wait to wear it or use it? A WIP fashion-dash? A quick knit flit? Crochet crush race? I don’t know but if there is one will you tell me?

In the past few weeks I have been finishing off old projects and started dwelling on new ones. Let’s start with the finishing. When I got my sticky mitts on the new aran mohair from Stylecraft ‘Grace’, I knew I just had to make something. The colours are scrumptious. Soft but with a depth that creates brilliant combinations. My order arrived in the late Spring and other projects and quite frankly higher temperatures persuaded me not to start my project.

grace-stylecraft-aran-scarf-emma-varnam

I even began to noodle around with ideas at the end of August, but the humidity was still a little high for mohair making. Honestly this yarn is so beautiful, but it is very suited to cooler weathers. The patterns for the yarn are incredibly tempting and very very ‘NOW’ in terms of what is currently on the high street.

grace-stylecraft-aran-scarf-emma-varnam

I have opted to make a scarf which I know will be great for the Autumn and goes nicely with my blush pink coat.

I will now infuriate the crocheters by saying the dreaded words….’I just went with the flow, and made up the pattern as I went along.’ Sorry – but sometimes I don’t want to rigour of pattern writing and just want to stitch. But the idea is based on the ‘Zesty Scarf’ which I designed for Inside Crochet Magazine Issue 121 in 2019 and this pattern would work for this yarn.

I have chosen the colours: Oyster, Petals, Hibiscus, Hip, Long Grass and Storm. I have just one ball of each and there was loads left over and I have used the rest to knit a few cute beanie hats for friends.

grace-stylecraft-aran-scarf-emma-varnam

If you are worried about shedding with this scarf (fibres coming off onto other clothes) I haven’t noticed much at all and I have worn it this week many times into the office. There is nothing nicer than finishing a piece of clothing, realising that it doesn’t disappoint and then wearing it almost immediately. That my friends is the adrenalin rush of craft – the WIP Fashion Dash – if you will.

So I have a couple of other projects on the hook. My ‘Croknit’ blanket, which I am just joining together. It’s an evening comfort project. You know, snuggled under the squares in front of the telly. Then I have a yearning to make another teddy. A new size and pattern, just in time for the festive season. If I am going to get this ready for you I had better hurry up. But I will concentrate on this one in the next week. I really am enjoying chatting on Instagram and Facebook with followers about names and colour choices. The best ideas come from you. So while the bear in nearly finished, I need to make a mini cardigan and a bobble hat. Hopefully he will be a fun addition to the festive makes.

So there you go a bit of an up date. My new book launched this week on Create and Craft TV and you can get signed copies there – and in my next post I promise I will give you a bit of an update. Have a lovely week!

Autumnal Grace Read More »

The Stargazer Blanket

There are some projects that you know will be very special even before you start them. This blanket belongs in that category.

I have always loved patchwork quilts and I was browsing some beautiful designs on Pinterest and thought, ‘If only I had more time to sew and make a beautiful traditional quilt’. I am realistic – this is never going to happen. But then it occurred to me that I can create a similar effect in crochet. For me, this is a much faster goal.

I definitely chose a joyful colour palette to be cheery. I love using Stylecraft Bellissima and Bambino (its the same yarn). The yarn has a lovely soft quality and the hues are clear but slightly muted. As I played around with the colour I adapted my design. As you can see from one of the earlier images, I mixed up the colours. But then I felt it would be lovely to create a muted rainbow… and the more I played, the more I enjoyed the combination.

Honestly this was just going to be a ‘me’ project. No plan for at written up pattern, just crochet for the love of crochet. But I was so encouraged by how so many of you messaged me with your love for the pattern.

stargazer-crochet-blanket-patchwork-emma-varnam

I have made a large ‘kingsize’ square. It has 9 stars. I have designed 2 motifs – one way of combining the colours is used 5 times and the other motif is used 4 times. I think it would be easy to make a lovely baby blanket just using one star – or a lap blanket using 4. I have given the yarn quantities in the pattern for all three sizes.

I have written the pattern in UK crochet terms and there is a colour diagram showing how the colour squares fit together for both motifs. There is also a stitch diagram for the solid square and for the half and half square. This diagram shows you how to work the stitches up to row 3, it gives you the idea of the pattern. But each square has 5 rows. The photographs provide a suggestion of how you can fit the stars together. But don’t feel restrained by my design, place each star on the floor and see how you like them to fit together. For the edging I used a very simple double crochet stripe. When the blanket is this colourful. You don’t need to have a fussy border.

My top tips for making this blanket are:

  • Have fun and enjoy making it.
  • Make up enough squares to make a star, then block those squares so they are nice and neat. I would sew or crochet those square together so you have the wonderful sense of the blanket growing.
  • You might find you solid squares are much looser than your half and half squares. If this is the case, try working your solid squares in a small hook – perhaps a 3.25mm or a 3mm.
  • Make sure you are economical with your tails. A large blanket uses a lot of yarn. I make sure I fasten off my yarn with enough to weave in the ends 3 times. But I am economical with my yarn
  • I have enjoyed used this yarn – but if you have yarn in your stash please use my design as a guide and whittle down your yarn collection

For me this design flew off my hook. I began it in June and finished it in mid-August. But right from the beginning I knew it would be a perfect Autumn project. As the blanket grows you can snuggle under it with your hook and yarn in hand.

If you make up this blanket (big or small) I would love to see how you get on. It is such a brilliant feeling to see us all working together to create something special. Finally, thank you for your encouragement and enthusiasm. It makes the world of difference and motivates me to keep on making.

The Stargazer Blanket Read More »

Stargazing – getting yarn ready

I love it when I really enjoy a project so much that I almost don’t want to finish it. Last year I made two blankets that I totally adored. The Soft Summer Blanket and my Hexagon Blanket. They were slow makes that were a joy. This year I saw a patchwork quilt colour scheme and thought; ‘Wouldn’t that be beautiful in crochet?’.

emma-varnam-stargazer-crochet-blanket

I love patchwork so much, it has such a nostalgic place in my heart. But I cannot stretch time enough to properly work on sewing quilts. When I see an attractive patchwork pattern I wonder if it would work as a crochet blanket. For me it is a much faster make.

emma-varnam-stargazer-crochet-blanket

I’m a big fan of Stylecraft’s Bellissima and Bambino yarn. I love the softness of the yarn and the tones worked well for the design. For the large blanket you only use 1 ball of each of the colours for the star motif. It is the background cream which you need to adjust for different sizes.

emma-varnam-stargazer-crochet-blanket

By my calculations you could make a very sweet baby blanket with just one star in the centre – approximately 60cm x 60cm (24in x 24 in) square. A very useful lap blanket could be made using four motifs – 115cm x 115cm (45in x 45in). I have made a larger blanket with nicely covers two thirds of a kingsize bed which is approximately 165cm x 165cm (65in x 65in).

emma-varnam-stargazer-crochet-blanket

I have drafted the pattern and will be asking my gorgeous tech-editing friend to help me spot all the mistakes, typos and where my ramblings don’t make sense. I plan then to release the pattern for a introductory small amount to cover the costs and those of you who want to can start your making. Many veteran crocheters will probably be able to make the pattern up themselves.

So if you are planning to make a Stargazer blanket – here are the yarn quantities:

For the Large Blanket – Stylecraft Bellissima DK – 7 x  100g ball: Single Cream 3921 (A)

1 x 100g of the following: Rio Red 3932 (B), Papaya Punch 3977 (C), Mellow Yellow 3925 (D), Sugar Snap 3926 (E), Denim Dungarees 7219 (F) Orchid Haze 7217 (G)

Stylecraft Bambino DK – 1 x 100g of the following Soft Pink 7113 (H) Little Boy Blue 7118 (I)

For a Baby Blanket you will only need 1 x 100g of yarn A and all the contrasting colours.

For a Lap Blanket you will need 4 x 100g of yarn A and 1 x 100g balls of each of the contrasting colours.

Honestly I think this blanket is going to be a huge favourite in our house and I know Stanley has already adopted it. The colours are bright and cheerful and it will bring cosy comfort in the Autumn and Winter. If you are thinking of making it I would love to hear. My plan would be to do a few short videos on how the work a half square and attach the second colour. I also want to show you how to sew squares together using mattress stitch.

emma-varnam-stargazer-crochet-blanket

Please do subscribe to my newsletter as I will post news of the pattern to my followers first. I do hope you have a lovely weekend. Here’s to planning new crochet adventures.

Stargazing – getting yarn ready Read More »

The new campervan – lets go for an adventure!

new-campervan-crochet-emma-varnam

My campervan pattern which I first shared on the blog perhaps nearly a decade ago is perhaps my most popular pattern. That is hard to believe if you are a fan of crocheted cacti or succulents – or if you are a maker of my cuddly toys. But across the world people who have always wanted to own the best symbol of adventure and escape have enjoyed making a crocheted version

The first one I ever made was a gift for a friend. I often find my best ideas come from that place. Imagining a great of fun gift. Inside Crochet Magazine published the first version of the pattern and then a few years later I revisited the pattern. I think it has been reprinted maybe 2 or 3 times.

new-campervan-crochet-emma-varnam

The latest version is slightly different from my first creations. How so? Well the first and second editions used grey felt for the windows. I really enjoy working in mix-media and using felt or fabric in my designs. But some crocheters find sewing a bit daunting and they asked me to integrate crochet windows into the pattern. Secondly I did use HUGE buttons for the wheels. I think they looked super cute but some people found them difficult to get hold of. So the new version has a crocheted wheels and hub-caps.

You will be pleased to know that the new pattern doesn’t only have the written instructions for the colour changes. It also contains a stitch schematic which has the colours shown in a simple colour graph. So simple to follow. If you want to download this pattern it is available in my shop here.

new-campervan-crochet-emma-varnam

My top tip would be to add a bag of lentils or rice to the base of the campervan if you intend to use it as a doorstop. But the design would also make a really fun cuddly toy for the campervan enthusiast. As usual please do share if you have made your own version. I love to see them.

The new campervan – lets go for an adventure! Read More »