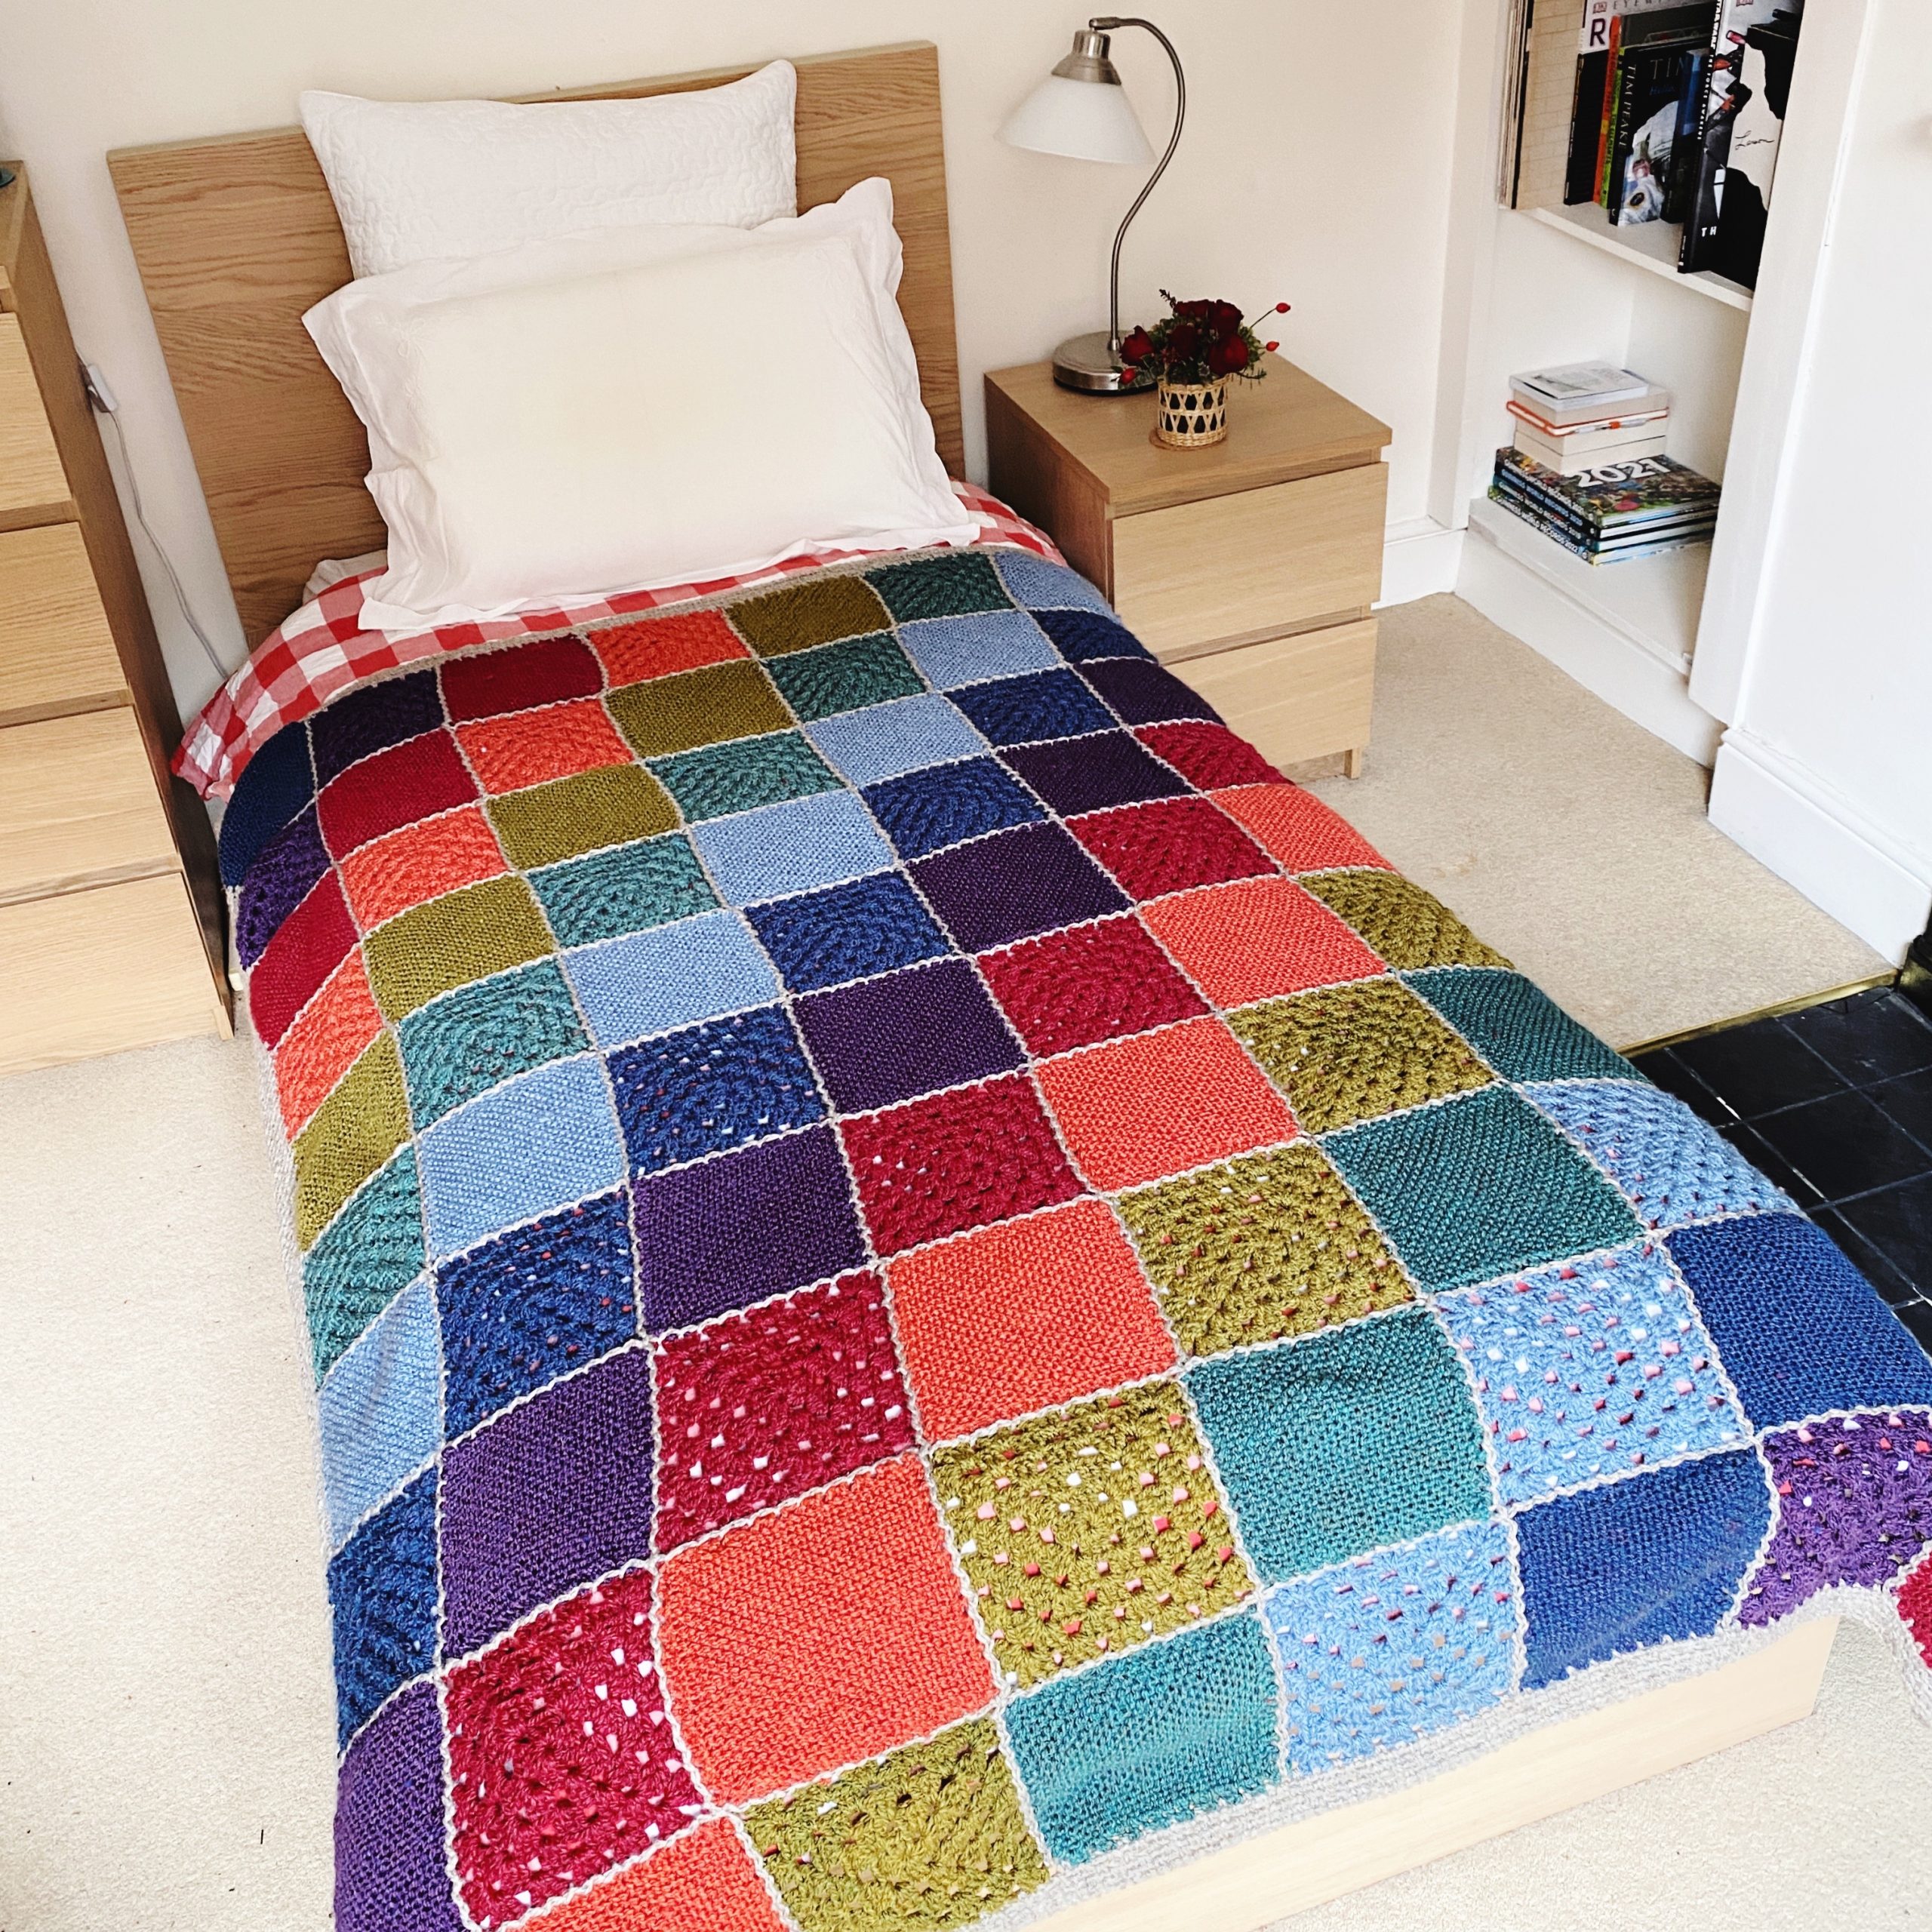
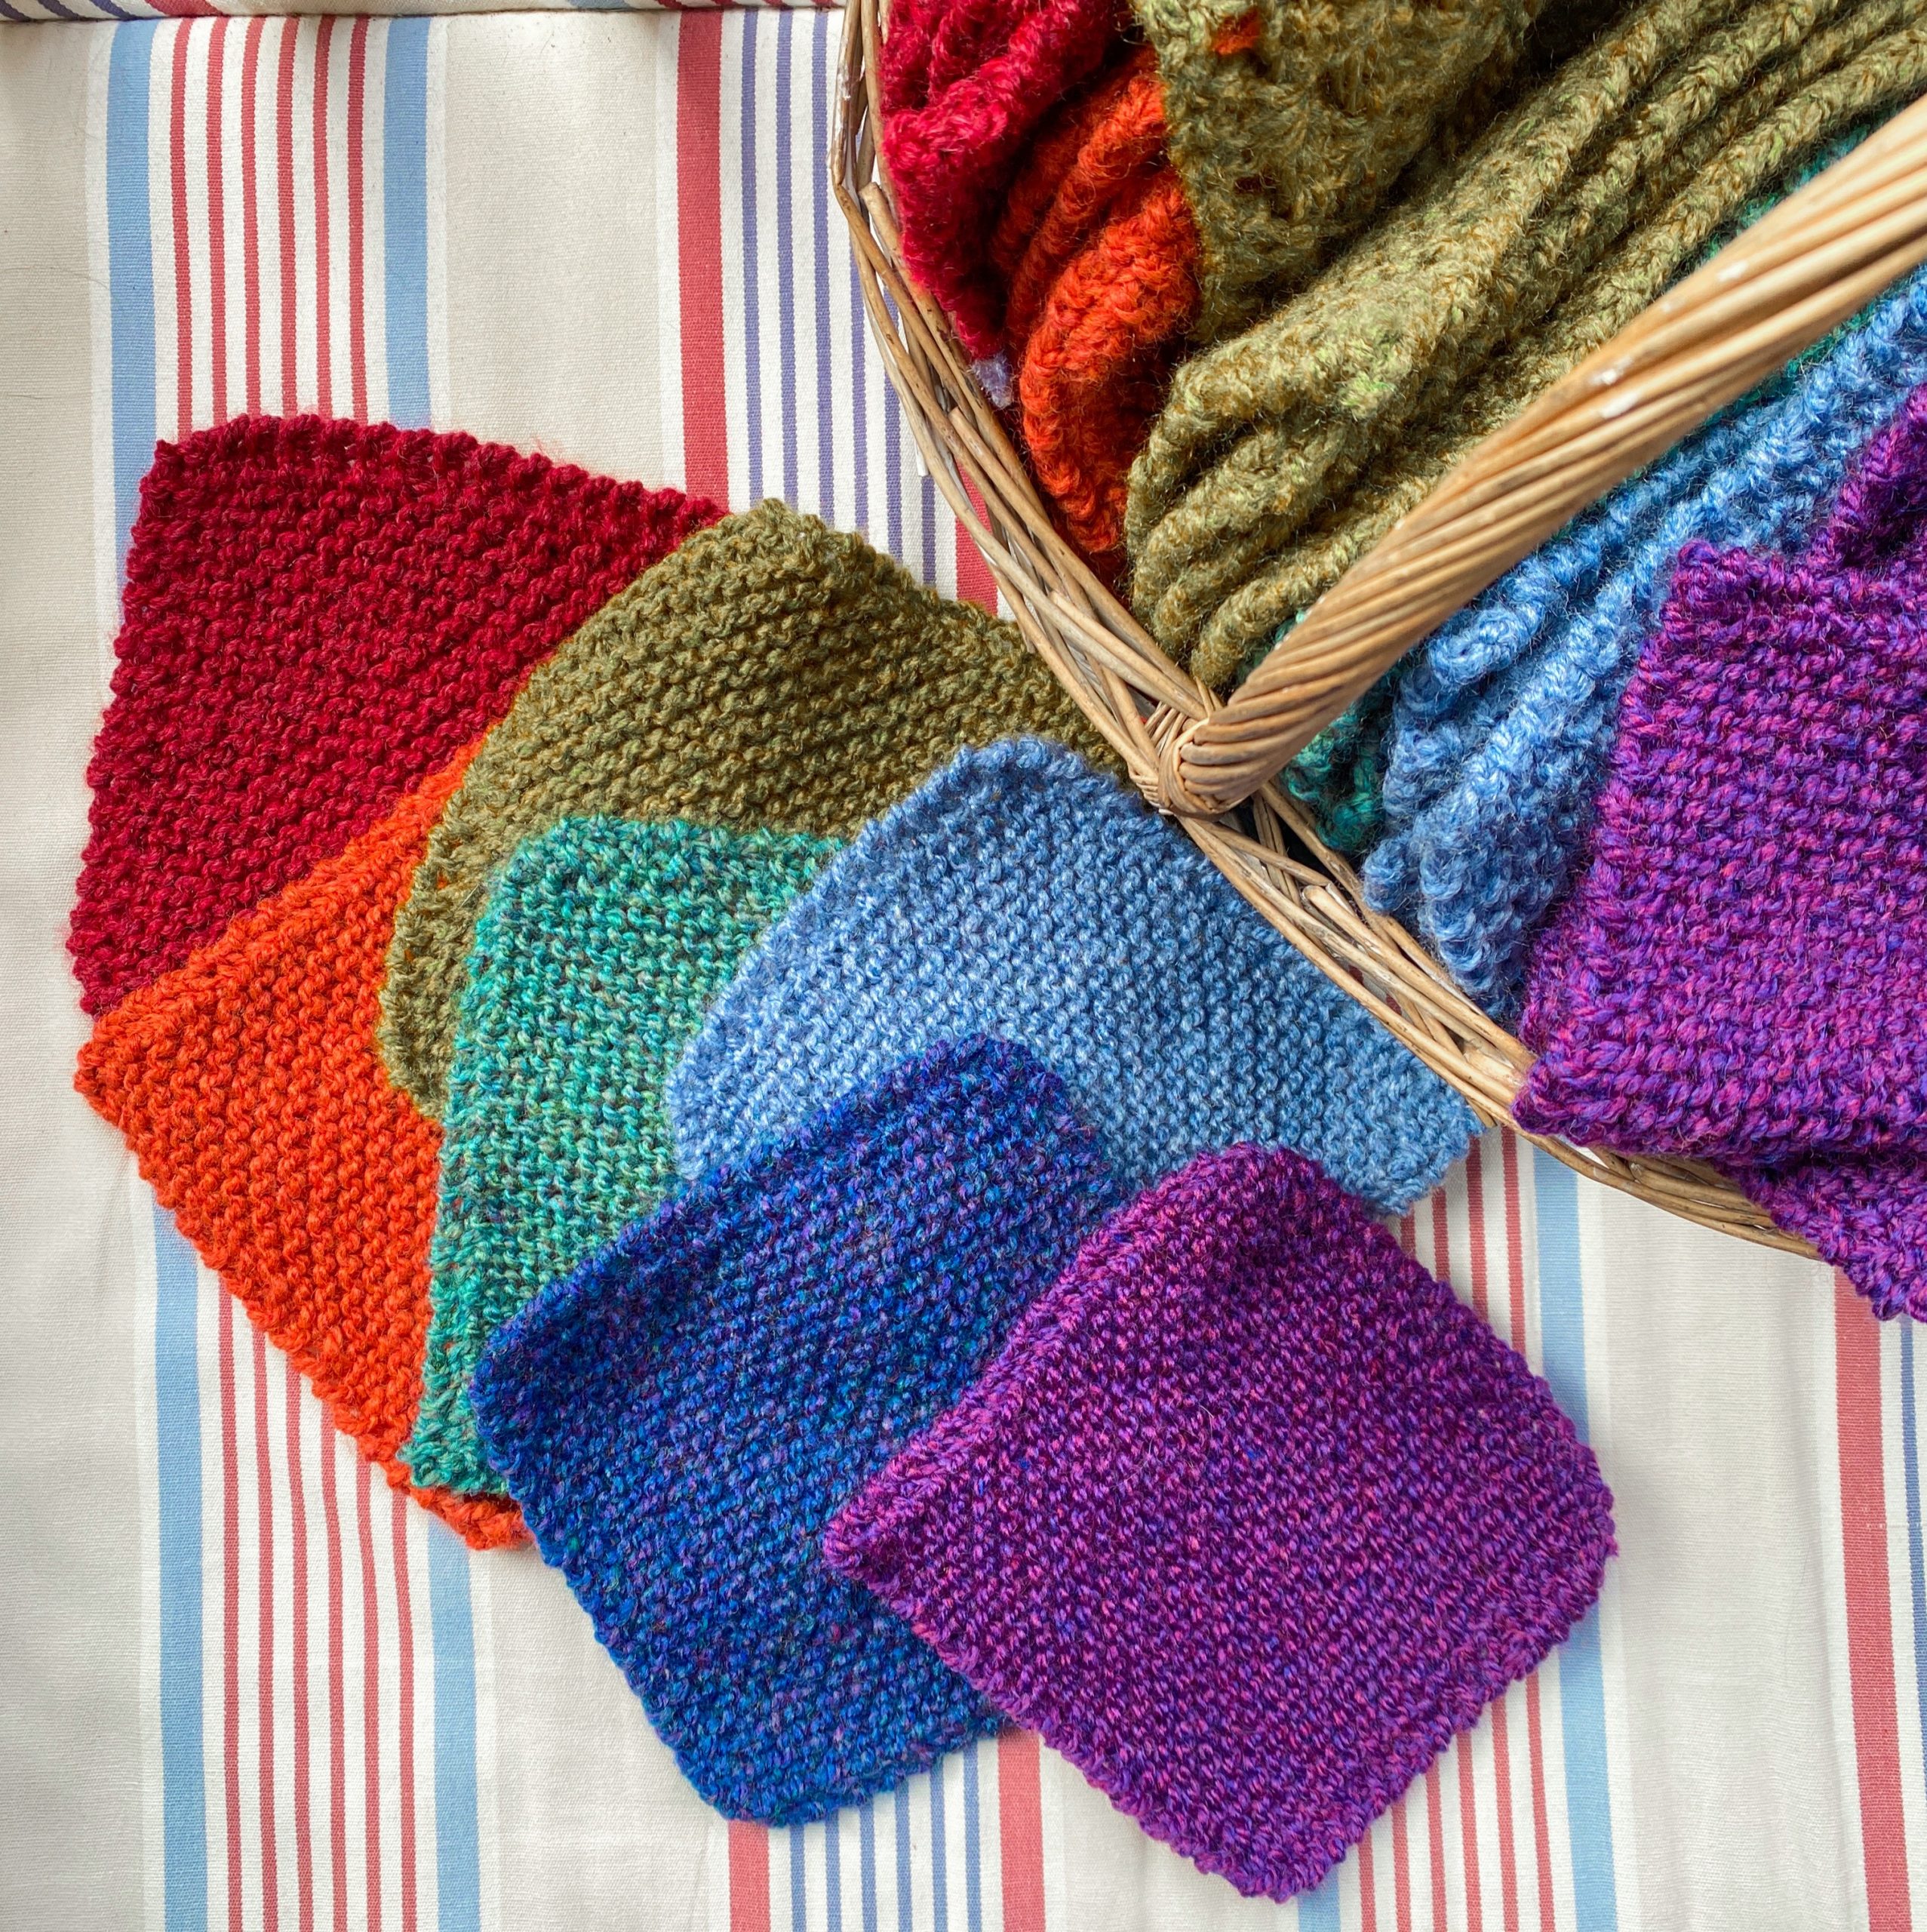
Right I am just going to say it – sometimes I just like making for making. Sometimes I have no intention of making a project into a published pattern and then it just becomes such a joyful make that I can’t help sharing it with you.
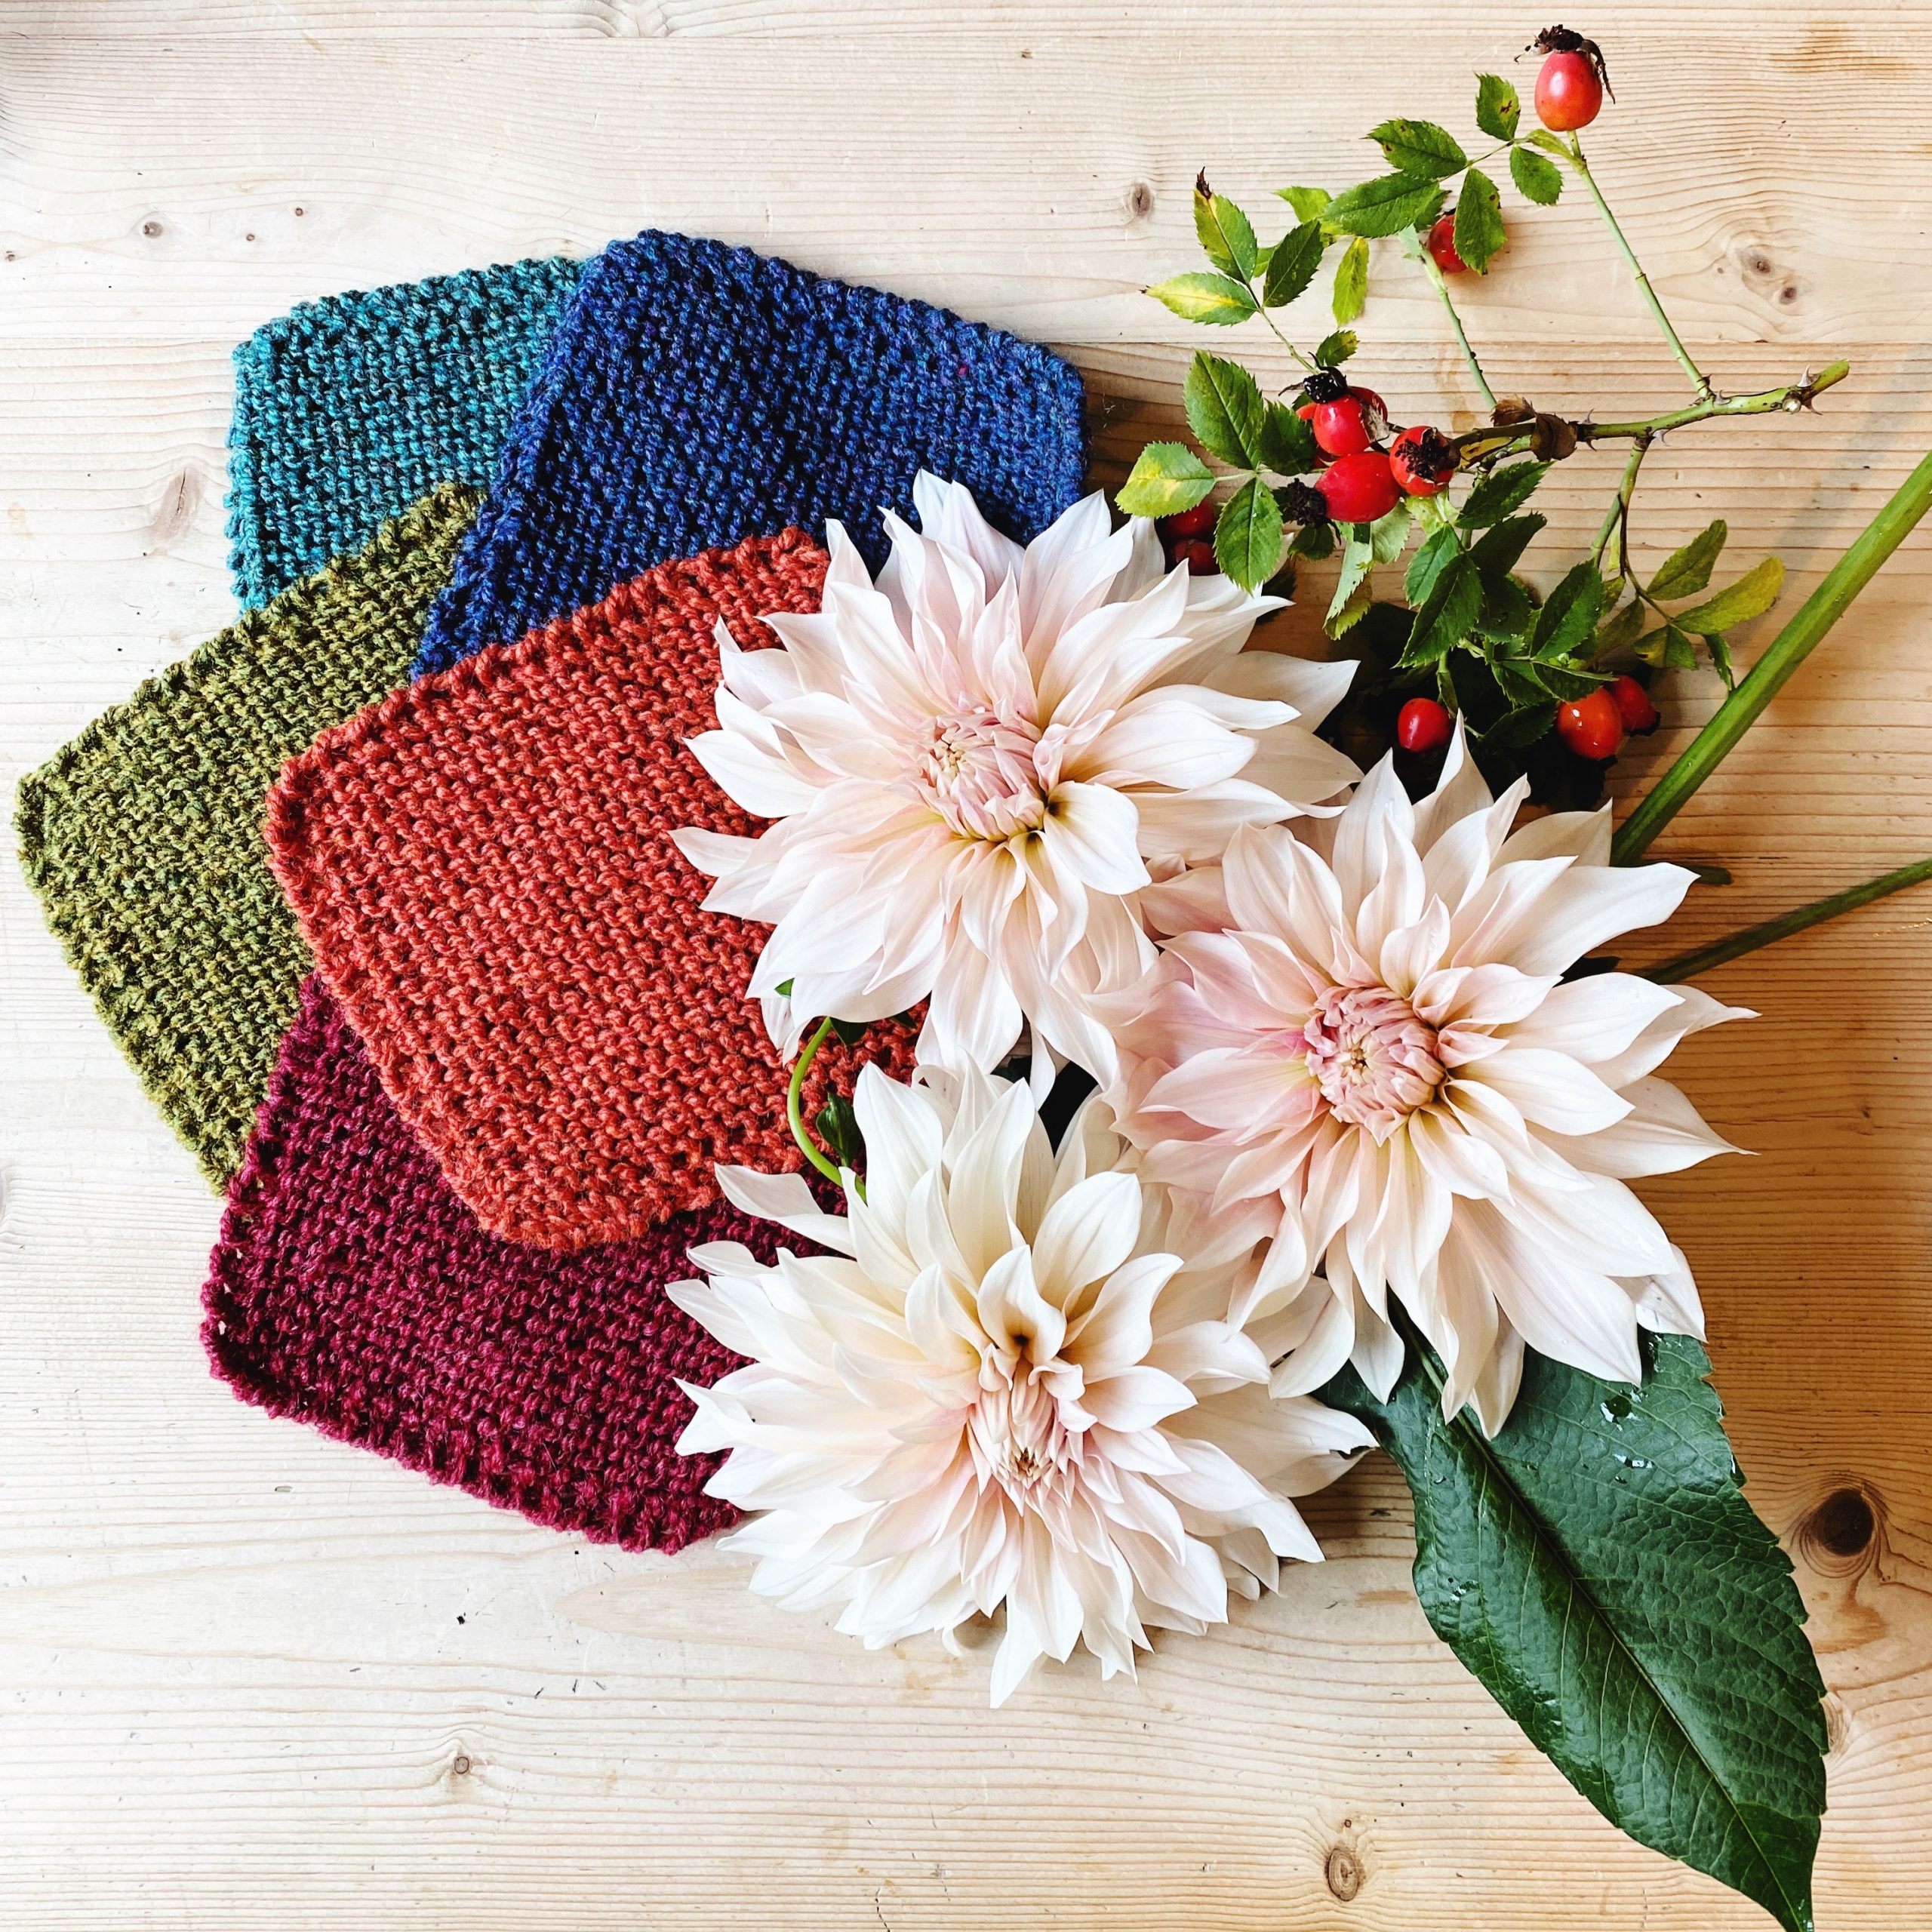
This is true of the Cosy Croknit blanket. Like many of my most favourite designs, the idea came following a few conversations and a little bit of necessity. I had received some Aran weight yarn in the post and I began making a few garter stitch squares to see how it behaved. There is something so tactile about aran and garter stitch knitting. So satisfying and joyful. I am not eloquent enough to explain. But if you know – you know.
Then I remembered a conversation with my Granny. She often collaborates with friends to create blankets for charity. They work on different squares, some crocheted and some knitted. Due to tension and style, the squares can be a bit challenging to align and sew together. It got me thinking…. could I write a pattern which combined both crafts? Could I create a pattern with an easy size guide, a basic colour scheme and plan which would include both crafts?
My mind began to whir… And that is how I began to work on the Croknit pattern. I have used the juicy Highland Heathers Aran from Stylecraft. If you are a knitter…you can just knit all the squares… if you are solely a crocheter why not just have a blanket full of granny squares. I have enjoyed combining both skills. I flitted between both crafts as my whim took me.
It wasn’t easy for me to decide how to join the squares. I had several aborted attempts. Then I landed on a zig-zag slip stich join. The crisscross motion allows for just the right amount of ease between the differing drape of the knitted and crochet squares. I also went for a linen stitch edging which is just intricate enough for interest but doesn’t detract from the beautiful jewel like colours of the squares.
The finished item has a pleasing amount of heft. So much so, that it is being argued over most evenings! Stanley is winning.
So whilst the pattern is very simple I have written it up for you with hints and tips on how to collaborate to get your squares to match. You also get the colour schematic and the edging stitch pattern.
Whilst it is important to give yarn suggestions for published patterns. In my mind, this pattern was always intended for stash busting and the pattern has stitch suggestions for DK yarn too.
Well I hope you like it. The Cosy Croknit Blanket will not be leaving our house I am afraid it is far to snuggly for that.
What do you think about patterns that combine knitting and crochet? There don’t seem to be many about. When you are working as a team…or a yarn bee, what are your handy hints or tips to make sure your blanket squares fit together? I would love to know.
**** I am hosting an instagram live about the blanket at 11am GMT on Sat 14 Jan 2023 if you would like to join me ***
I have a little confession – I don’t drink tea…never have…never will. But that doesn’t mean I don’t like teacosies. I love them! I love the shape of a traditional teapot and I love the fact that a cosy is practical and a brilliant gift for all tea drinkers.
Over the years I have made and designed quite a few cosies. I have even co-authored a book on the subject. I have a few go-to patterns that I make regularly for tea drinking friends. Well as we get cosy for Autumn I have rummaged in my yarn stash and started cosy making.
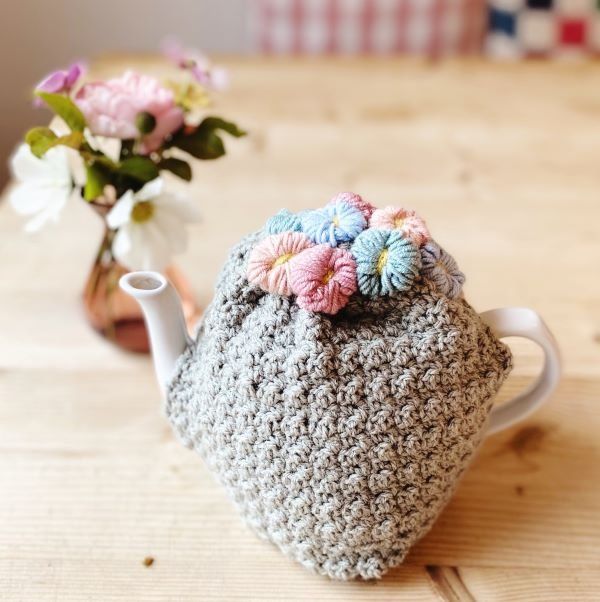
I thought it might be fun to share with you a new textured crochet pattern for a cosy and top it with some yarny flower puffs. The is certainly not a new idea – it is an old vintage trick. There is an excellent knitting pattern and explanation in the book ‘The Gentle Art of Knitting’ by Jane Brocket. A book that is a real favourite for me and worth borrowing from your Library or ordering your own copy.
If you would like to make the cosy for yourself. Below is the pattern recipe and a few photos to help you make the flower puffs.
Pretty Flower Puff Teacosy
Sides (make 2)
Using a 3.5mm hook and some DK yarn – I have used Stylecraft Special DK – Warm Grey, make 29 ch sts.
Row 1: 1dc in 2nd ch from hook, 1tr in next ch, (1dc, 1tr) rep to end, turn. (28 sts)
Fasten off leaving 20cm tail of yarn. Attach sides together at the top and the bottom of each side to create 2 large slits. Then use a large length of yarn to gather the top of the teacosy together using small running stitches.
Flower Puffs (make as many as you like)
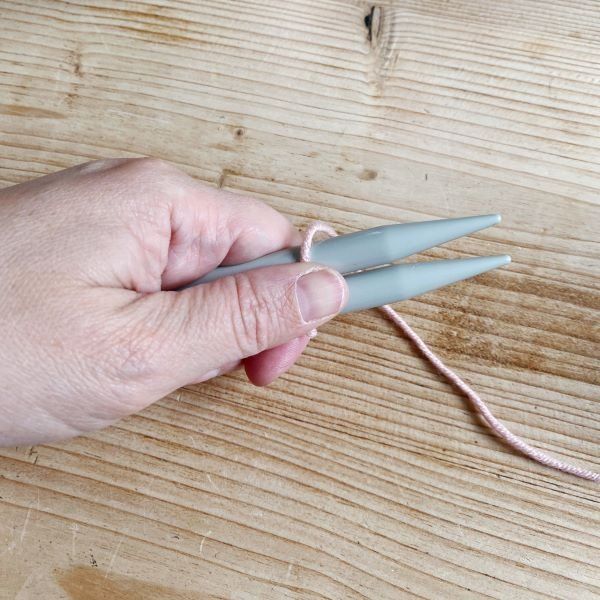
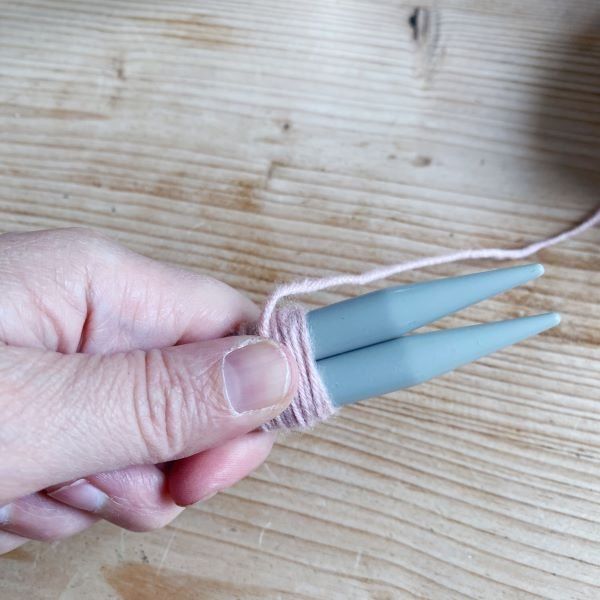
You will need some large knitting needles (I used 2 x 10mm) or thick pens. Also some left over yarn from your stash.
Holding the needles together and with your thumb holding the yarn down at the end, wind the yarn over both needles about 20 times. Cut off this yarn.
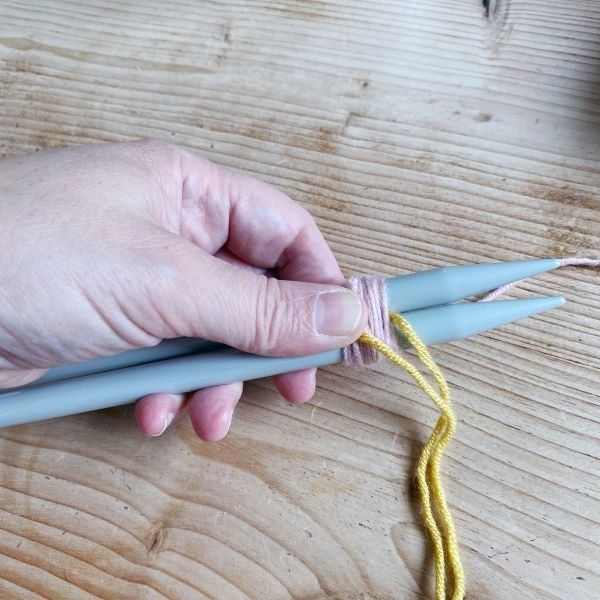
Then using another strand of yarn about 20cm long, pull it between the needles and tie over the centre of the wound yarn. Make one knot
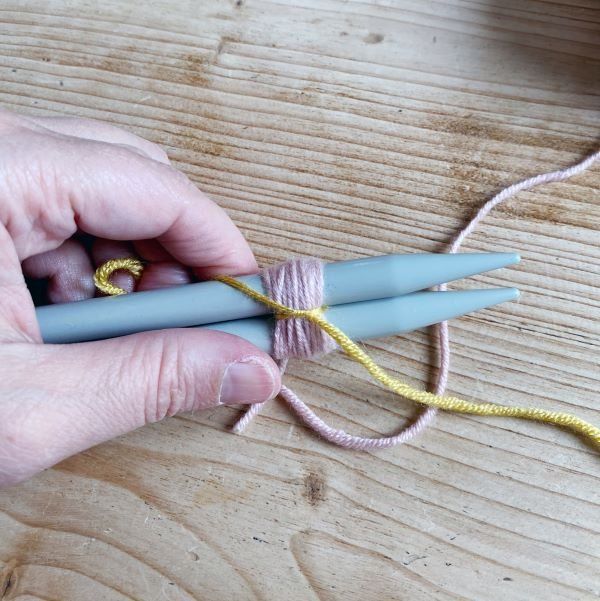
Slip the yarn off the needles and secure with a second knot. Neaten all the ends and sew securely to the top of your teacosy. Ta-dah!
So pretty. I have shared a little tutorial on Instagram if you would like to watch me doing it in real time. But it is fairly simple and a really fun way to use up the ends of your yarn.
If you like this little pattern and find it helpful – please do share and I would be delighted if you use the ‘Buy me a Coffee’ button in the Shop. But also comments and suggestions are so welcome below. Happy Making!
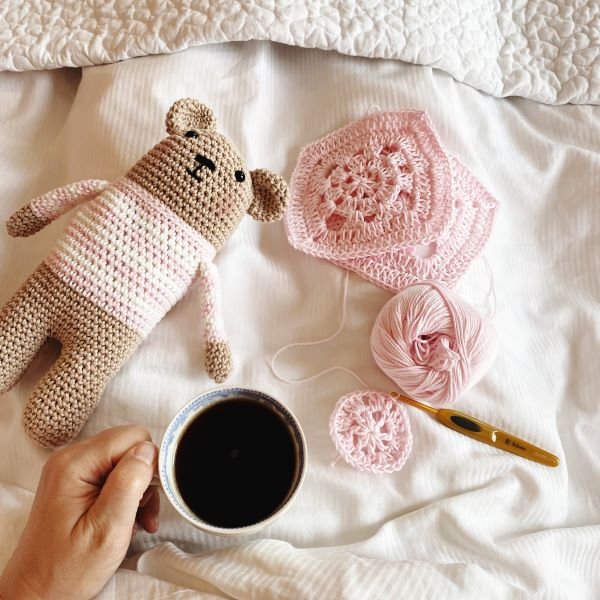
The first toy you ever have – always has a special place and for a maker is a gift of love. I have updated my Billy Bear pattern to create my very best guide of a first crochet toy.
People often ask me what they should make if they are just starting to make crochet toys. If you have begun crochet making a granny square then the jump to working in the round or making ‘amigurumi’ can seem a bit daunting. Perhaps it is just the name. But essentially you are just working the most basic double crochet stitch in a spiral to build up a seamless shape.
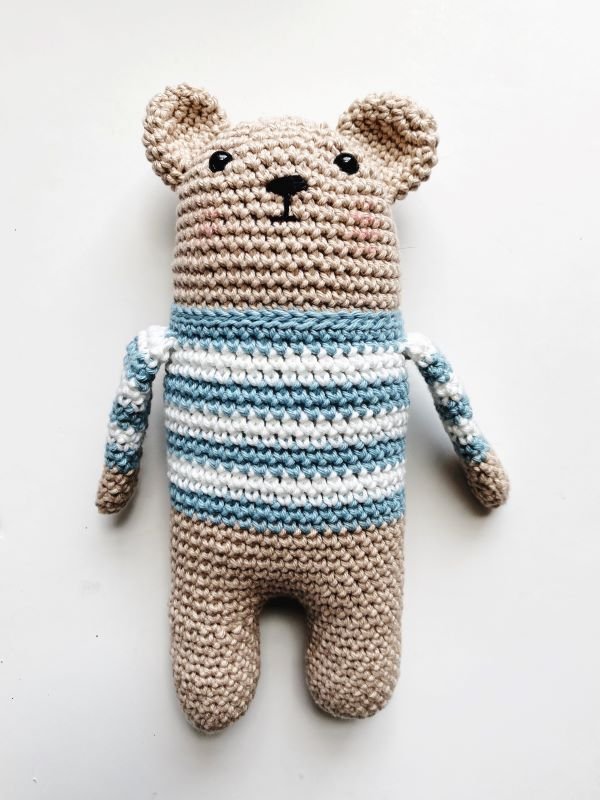
Billy Bear with his striped jumper and simple legs and arms is a brilliant introduction to all the techniques I use in my other toys. My preference in all my toy designs is to incorporate the limbs into the fabric of the crochet. This will ensure that no matter how much play a treasured bear might have – their arm will not unravel. I also like joining each leg together before you work the body. Before you have your first go – this technique might seem complicated. But never fear it is actually quite simple.
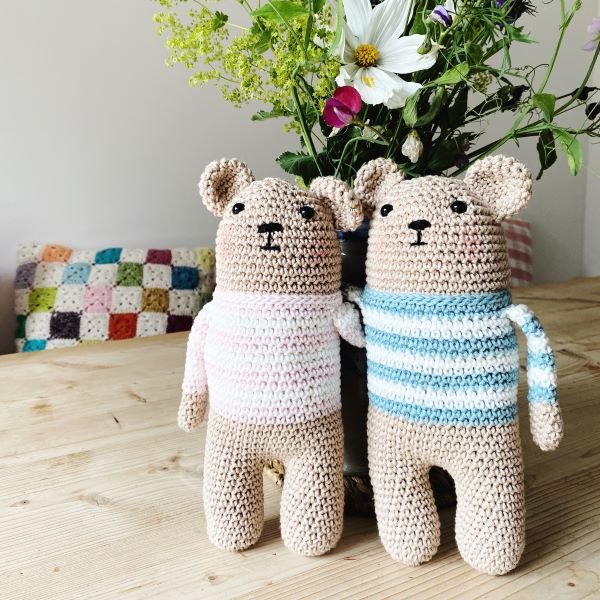
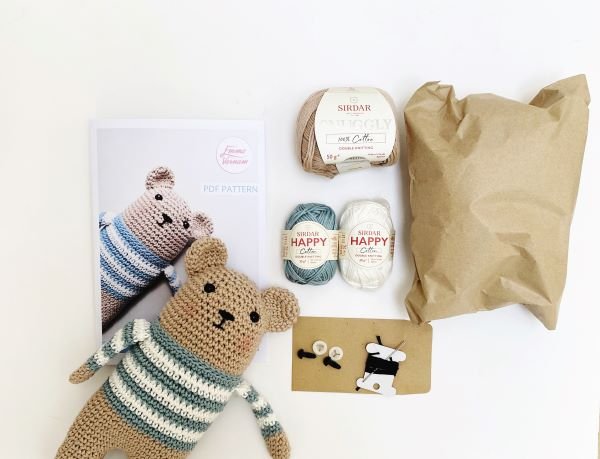
I have written the pattern for you with helpful photos and honestly I am keen for you to fly with you toy making and to feel confident with all the techniques. If you are are a real crochet starter and not sure that this will be your thing, I have introduced a few simple kits to my shop so that you can buy just a few of the items you need before you start building a huge stash. You can choose from a beautifully classic duck egg colour or the softest powder pink. One of my customers messaged me to ask if I had a bespoke colour that she could use and I was able to help her and pop it in the kit. So if you have different stripe in mind, do message me.
Followers to this blog will notice a little change. I have added my own shop to the blog so that you can buy kits and books directly from me. It’s a new exciting venture and I am so delighted to connect with you and help you develop your crochet.
Pop over to the shop to have a look and tell me about any other items or patterns you would like to see.
I have never really taught. I have too much respect for great teachers. I don’t dare step on that hallowed ground. I had some incredible teachers when I was at school. Inspirational, funny, fiercely clever. I have good friends who are stunning teachers and when I have had the privilege of watching them – it is like art. They impart information, adapt the subject matter to make it relevant to a child who is struggling and then manage to control a huge room full of very different individuals…in a finite time…how do they do that?
I have been asked a few times to deliver crochet workshops and managed to deflect the question. But I have taught a few people individually to crochet; a one-on-one session. They have tended to be good friends who I know have ‘needed’ to learn. Famously I have one good friend who I have always refused to teach. It has become a thing. I always said… ‘you don’t want it enough, there is nothing that you actually want to make…therefore I won’t teach you.’ Isn’t that dreadful. Out of frustration she has scoured department stores and in fact door-stepped a rather famous yarn producer and persuaded her to teach her the basics… The Granny Square she produced following that encounter is one of my most treasured gifts.
I still won’t teach her.
When the second lock-down came I felt a huge ache of friends saying …’Oh no… we are going into the darkest days of a British Winter…I cannot cope!’ It occurred to me that for those of us in the yarny community the announcement was softened. Many of us thought, ‘well it’s not good, but I do have a lot of projects to finish before Christmas… I will hunker down’. It seemed selfish not to share the consoling balm of our hobby. I put out a quiet call to my friends on Facebook asking if anyone wanted to learn the basics. I thought I might get perhaps one or two flickers of interest.
In fact I was overwhelmed. The only answer was to set up a Zoom tutorial. Mrs V’s Crochet Society was born. In the end we had about 9 willing students. I set a time and date for a little introduction meeting and then the realisation hit…how on earth was I going to do this?
In the introduction session I showed everyone the sort of things they could make and pointed out some good books and websites that are worth visiting. I also wanted to glean what their ambitions were. Was there something that they wanted to make? How keen were they…etc.
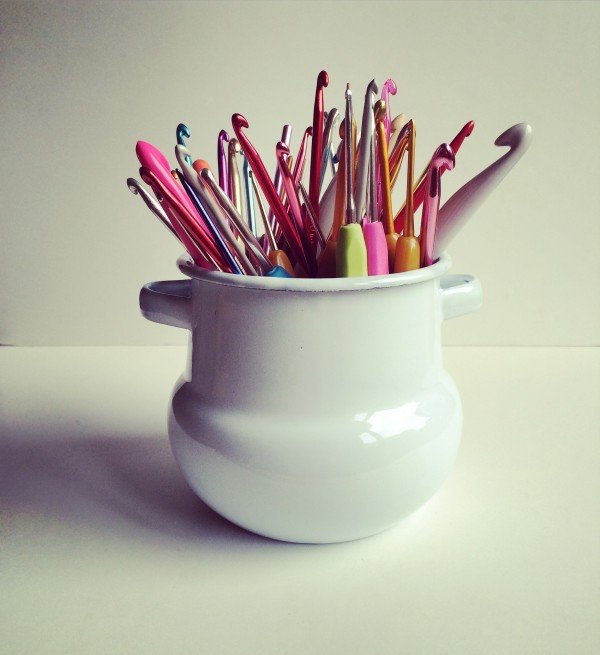
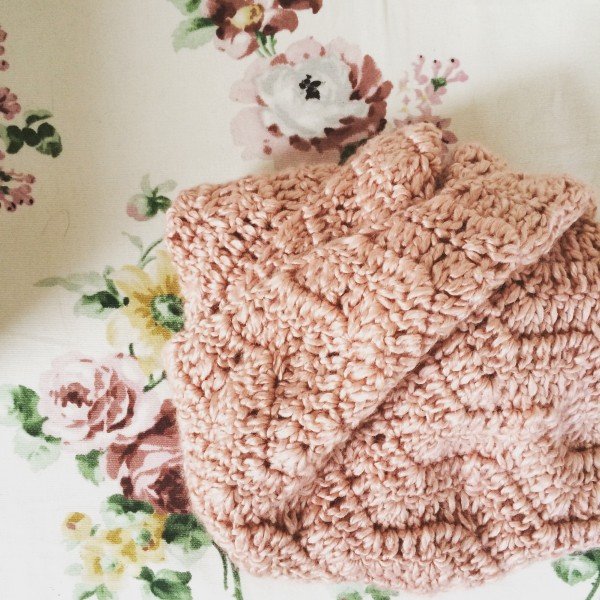
We set a date and time for our first actual on-line tutorial. In that intervening week I ordered yarn in their favourite colour, some hooks in the correct size and obtained enough copies of my book, ‘How to Crochet’ so each participant had their own to refer to. It took me a while to settle on our first project but in the end I devised a simple cowl pattern – something you could proudly wear once you had finished. Later that week I drove round our city dropping of this yarny starter kit, thinking all the while, ‘What am I doing! I can’t teach and certainly not remotely!!!’
Experience told me that for both the teacher and the students it was a good idea to set a session limit. I committed to 4 sessions, weekly on a late Sunday afternoon. Technically it wasn’t a total breeze. I am fortunate that my husband is a whizz with video and computers. So I was able to swap between a camera looking at the my face and then an camera positioned over my hands.
On the first session we covered making a slip-knot, completing and foundation chain and successfully learning the double crochet stitch. It is hard not being able to actually stand over the shoulder of someone as they crochet. All the students showed incredible patience both with me and with each other. At the end of the first hour and a half, everyone was off and running with a simple double crochet cowl.
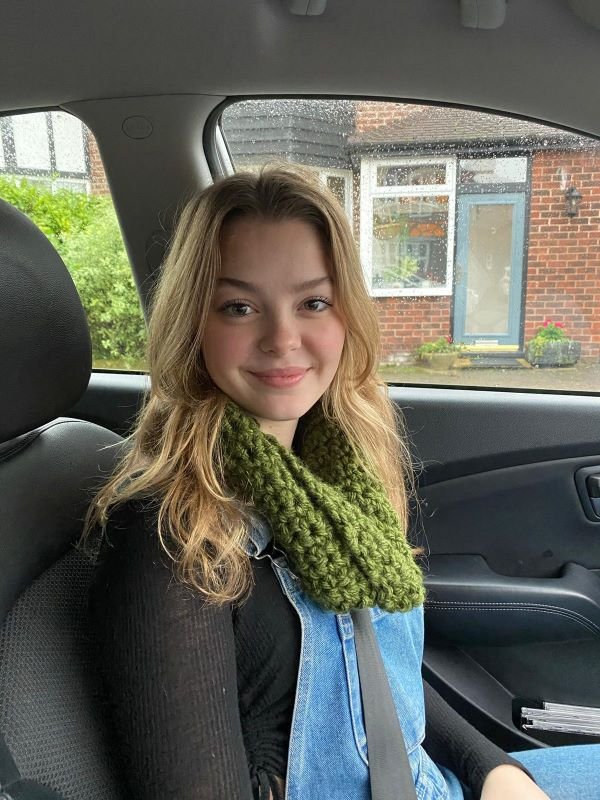
For some the stitching came easily. For others the mid-air manipulation of the yarn and the hook was frustrating. What totally surprised me was that by the following week virtually everyone had made their cowl!!! That blew me away. Some people were on to their third!
I was so amazed after the first week to be able to get a cowl underway (albeit a bit wonky!) I loved that despite my imperfections it looked great! The second one I embarked on was a lot neater and I was so pleased to find it looked more like the photo in the book! – Helen
In the second week we picked up some problems, perfected techniques and began looking at treble crochet and the granny square.
At week three some students had begun a chunky Granny Square blanket, others had begun a Christmas production line of cosy cowls. The progress and passion was inspiring. I introduced everyone to amigurumi in week three and the magic ring. This is complex stuff, but if you get it – you never go back.
On each session there were good friends of mine, their daughters, teenagers and even an awesomely talented 9 year old. Everyone had a mixture of crafty experience and competency. I taught Kate to knit a few years ago for her Duke of Edinburgh award and I knew instinctively she would love crochet – I loved learning to crochet!! I’ve tried knitting before but just as Emma said, once you crochet you never go back to knitting, and I don’t think I will! The technique is so fun and really simple once you’ve got it so it’s really easy to continue developing more styles and patterns! – Kate
In the final week I invited some expert crocheters to join us on our last zoom tutorial to share their top-tips and favourite makes. They joy of hearing these new crocheters and established experts conversing was thrilling.
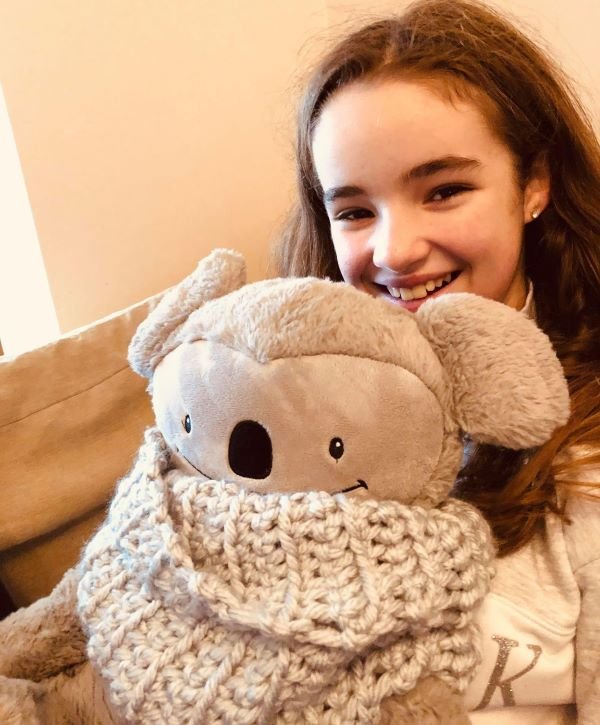
My little star Hadiah has such passion for the craft and as a close neighbour I would often see her on my doorstep. She kept asking me to teach her amigurumi. She wants to make the little rabbit in ‘How to Crochet’. I think perhaps this was the second and most compelling reason for working out how to teach on-line. Her Mum, Mars was delighted;
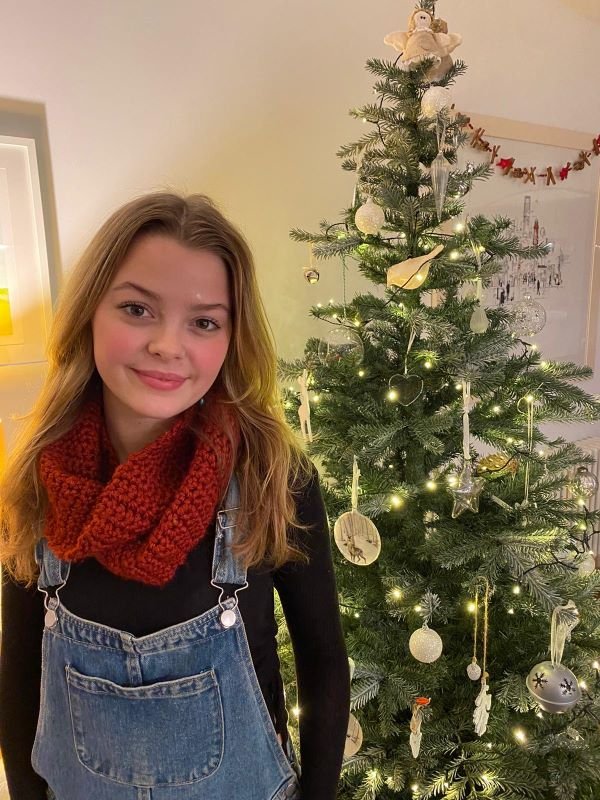
Mrs.V’s crotchet club is an inspired thing. My 9 year old has absolutely adored having sessions on-line learning to crochet. She’s now developed a creative hobby that will keep her busy for the rest of her life. Since the classes, she’s been busy making crochet presents from star Christmas tree ornaments to cowls for friends and family. It was lovely to see her engage with Emma on-line and get excited every Sunday when she knew she was going to have another lesson. She even told her classmates about her lessons with a celebrity in the crochet world, and took in a signed copy of her crochet book as evidence of her crochet superhero Mrs. V!
I think that for some of my friends, that little autumn workshop will be a one off adventure. Others I know have become gloriously addicted and like Alice have fallen down the rabbit hole of crochet adventures. Bella said: I never imagined I could actually master crochet as it looked so complicated. I was surprised how quickly I picked it up’ I loved it
It is also a weird thing that often I seem to lead a double or triple life. Some friends and work colleagues never really know that I crochet or even write books about it. The thought of teaching my oldest friends felt awkward and certainly I didn’t think I could do it successfully (see my previous reticence). Setting up the online tutorial made it far easier. I am sharing with you this experience to encourage you to take a step either to share your skills with a friend (they will appreciate it) or discover a new craft in this difficult year… it will be enormous fun! – my friend Charlotte pretty much sums it up.
Start by doing what’s necessary; then do what’s possible; and suddenly you are doing the impossible. -Francis of Assisi
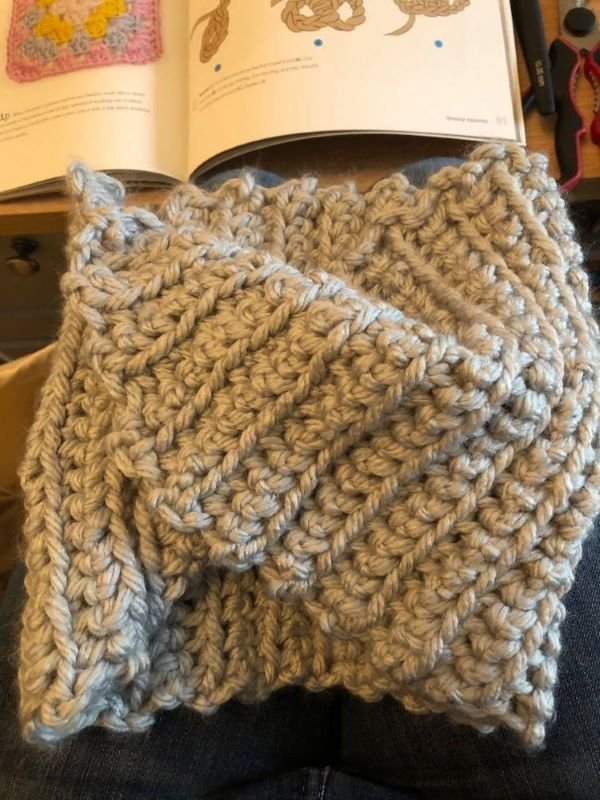
I was probably the most reluctant beginner and realised that my hesitancy to learn crochet came, not from a lack of interest, but a lack of confidence. I would look at Emma’s crocheted masterpieces with admiration and decided that I wouldn’t even bother learning because I’d never reach those heady heights. Once I had put my pride to one side, accepted that learning is a journey where you are ALLOWED to make mistakes ( and indeed should make mistakes), I did what was necessary, picked up the hooks and yarn, leaned into the advise and was soon doing the ‘impossible’…I am the proud creator of two crocheted scarves. They might not be perfect but I am ok with that ❤️
If you would like to make your own beginners cowl here is the Yarn Recipe:
Using a 10 mm hook and super chunky yarn, you are going to make a slip knot and then chain 21 stitches.
You will double crochet into the second chain from the hook. (20 stitches) Work a double crochet into each chain to the end.Turn the work. Work 1 chain. 1 double crochet in each stitch to end. 20 stitches. This is your pattern. Work straight until your crochet measures, 50 cm/20 inches.
Row 1: Using 10mm hook and yarn A ch66 sts.Do not fasten off.
Finishing Create the circular cowl by twisting the yarn once, so that point A meets point A, and point B matches point B. Then slip stitch the side edges together. Wear with pride.
My little Crochet Society was created by my super talented friend Eve
This should be the ultimate making month don’t you think? Yet time again I rush headlong in crazed list creating and catching up.
I imagine myself curled up on the sofa … fire blazing and carols faintly heard in the distance. The perfume of the Christmas tree catching the air in waves.
More likely I finish work – later than planned. Despair at my lack of menu planning and scrabble to make something half decent for tea. When all is scoffed – plates are left aside while I hide on the spare room floor wrestling with sticky tape and paper. This year we have the extra frisson of wondering if parcels will be delivered on time. My word what a pickle.
So while December should really be the key making month of Winter. In reality November and January seem far more productive.
If you are a seasoned maker and sickeningly organised, then your gift making might start in August. Seriously?! Yes seriously. Nowadays I don’t always make crochet or knit gifts. But there are a few patterns that are a good standby.
Chocolate Orange Cosy
Every year I say I won’t make more of these. Yet every year I am tickled by the idea and remember what a great mini-gift they are.
The Chocolate Orange is a stalwart of the UK festive season. Zingy little segments of zesty infused milk chocolate. Classically you were taught to ‘tap and unwrap’ the solid ball in order to prise free the first segment. In our house the chocolate orange is a MUST in the Christmas stocking. A revolt would ensue if it were not there.
First segments are eaten before breakfast. Cheeky, sickly traditions. In the old days, after all the segments were eaten a central core of chocolate would remain. We christened it ‘the bark’. This added bonus was seen as the final eating honour. Whilst you might have generously offered others one or two segments. The ‘bark’ belonged to the orange owner. Stealing such revered chocolate would be criminal.
Don’t ask me why – but this welcome design fault has now disappeared. Shame I say.
The milk chocolate chocolate orange is adored by the boys and I prefer the plain chocolate version. I drop heavy hints to Santa in the run up to the big day to ensure he hasn’t forgotten.
A few years ago I saw a chocolate orange covered in a crochet cosy – disguised as a Christmas Pudding. This idea appealed to my sense of humour. I created my own pattern and for more years than I care to count have made them as teachers gifts and small gifts for friends and colleagues.
I always use oddments from my stash. Sometimes I purchase red buttons to create a holly berry other times I make a bobble using yarn.
This is my link to the jotted down yarn recipe. Use it if it is helpful. But get a wiggle on… I can hear sleigh bells
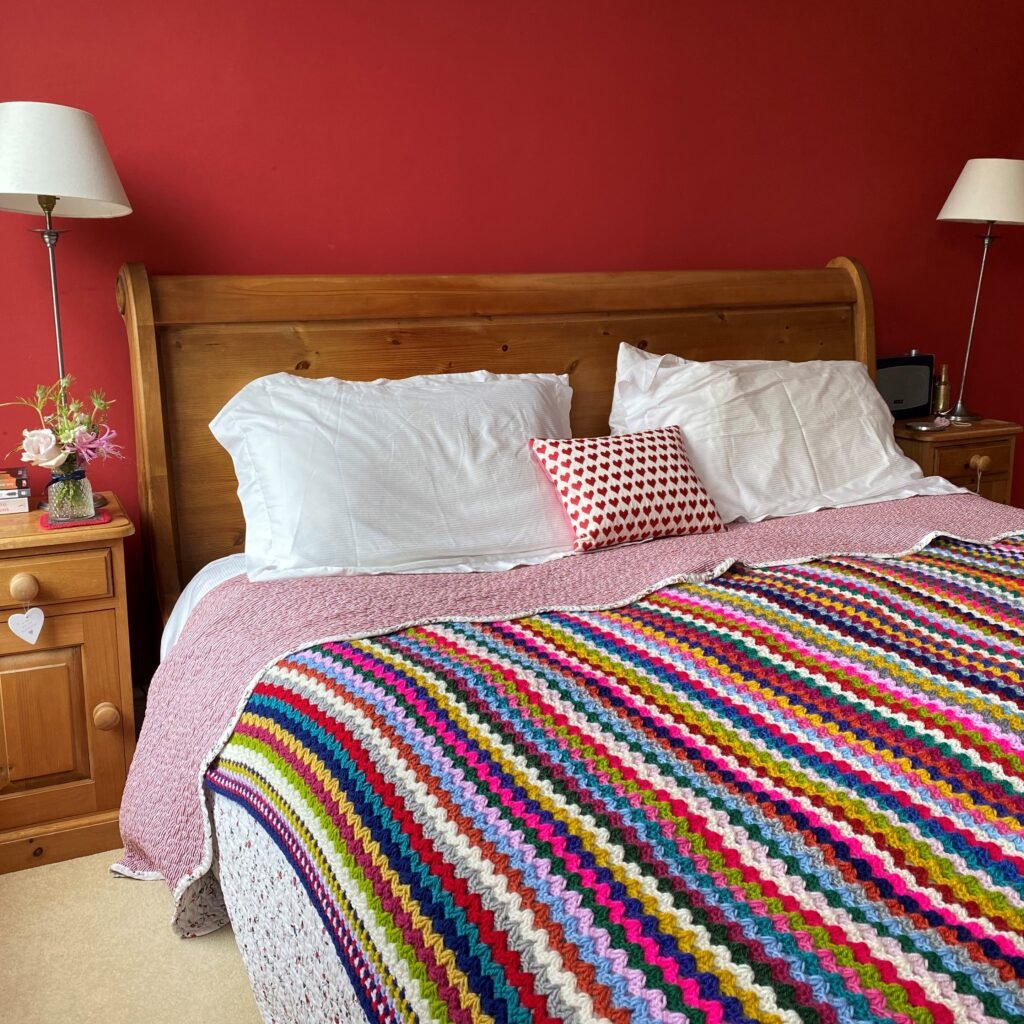
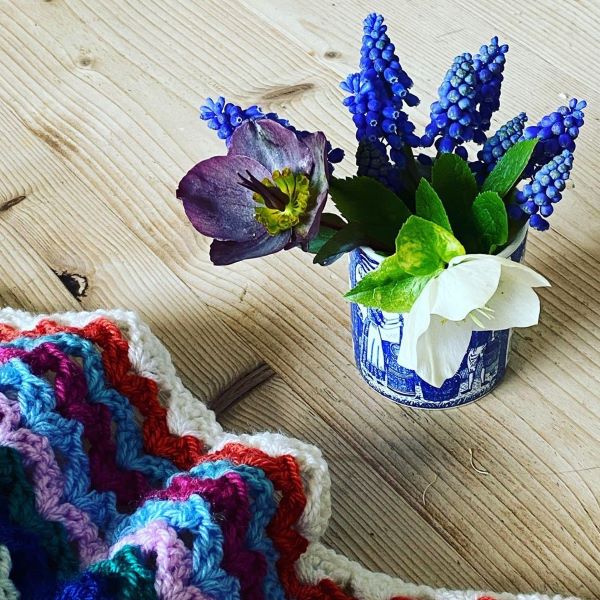
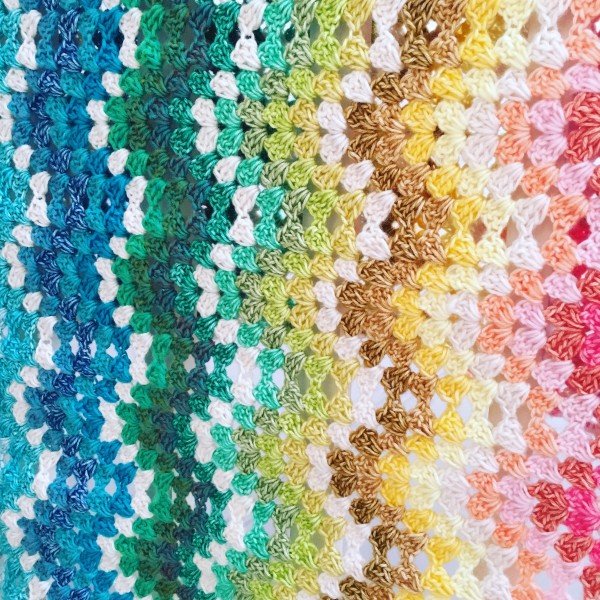
Finally after many many weeks I have finished my Vintage ‘V’ Stitch Blanket. Right at the beginning of this blanket journey, I had grand plans to crochet a row of pretty ‘V’ stitches for every day of the Covid Pandemic. As is natural and normal it didn’t quite work to that plan. Some days I would crochet 10 rows – those would be lazy Sundays. Some weeks I didn’t manage a line at all.
As in my previous post – the idea was to represent each day and then create blocks of 7 lines of colour seperated by a line of cream to create weeks.
In all I have worked 16 blocks (weeks). The overall blanket is about 200cm long and 160cm wide. It is large and heavy and generously covers a single bed. In actual fact it mostly covers a Super-King size bed.
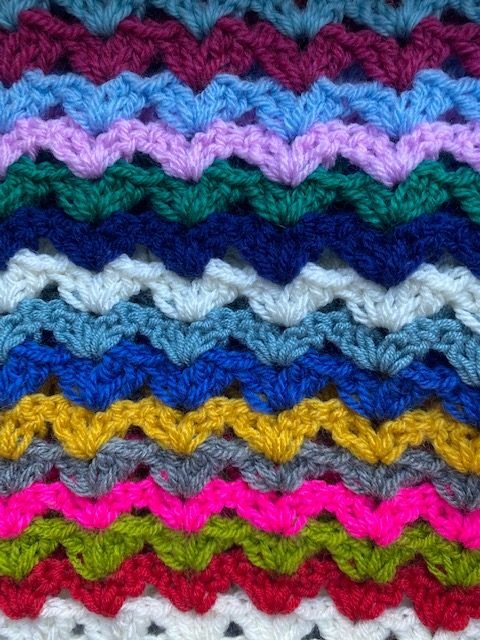
To finish off the whole blanket I worked a linen stitch edge. This is a nice and simple edging and doesn’t add extra fussiness to what is a rather bright and clashing palette.
My intention has always been to honour the scrap blankets of the war-time era. A make-do-and-mend aesthetic. Grab what I had in my stash and work it into the design. But let’s be honest. There was a little order. I didn’t repeat a colour within a one-week block. By adding in the regular cream lines there is a subtle regularity to the design.
Nearing the end of a big project like this – there is a strange conflict. I was keen to get to the edge, try out how it would look. At the same time there is a sadness of saying goodbye to an old friend. Certainly I was very cosy under the mass of yarn as I finally finished off the design.
The ‘V’ Stitch Blanket will now be our cosy blanket of choice for our bed during the Autumn and Winter months. That is if our son doesn’t adopt it in the meantime… there is a real possibility of that happening.
If you want to make your own version – please do use your stash of yarn. The majority of yarn I used was Stylecraft Special dk from my stash – to give you a list here are the colours: Cream, Dandelion, Mustard, Copper, Silver, Bottle, Apple, Duckegg, Petrol, French Navy, Lapis, Cloud Blue, Boysenberry, Bright Pink, Powder Pink, Bright Pink, Lipstick, Claret, Candy Floss.
You will need:
Lots of yarn of the same thickness (weight). I have used Double Knit yarn.
4mm crochet hook for the main pattern.
(If you have it, a 5mm crochet hook for the foundation chain)
Some small sharp scissors.
A tapestry need with large enough hole (eye) to thread yarn through.
Pattern
Using A and 5mm hook, chain 187
Row 1: 1dc in 2nd ch from hook, dc in each ch to end, turn. 186 sts.
Row 2: Using 4mm hook, 3ch, miss dc at base of ch, miss 1dc, (2tr, 1ch, 2tr) in next st, *miss 2dc, (2tr, 1ch, 2tr) rep from * to last 3sts, miss 2dc, 1tr in last st, turn. (63 V clusters).
Change
to yarn B.
Row 3: 3ch, *(2tr, 1ch, 2tr) in next ch sp, rep from * to end, 1tr in top of 3rd ch, turn. (63 V clusters).
Row 3 forms the pattern. Change the yarn colour every row. Weave in the ends as you go with your tapestry needle. Work until your blanket measures 180cm. The width will be approximately 160cm dependent on your tension.
Edging
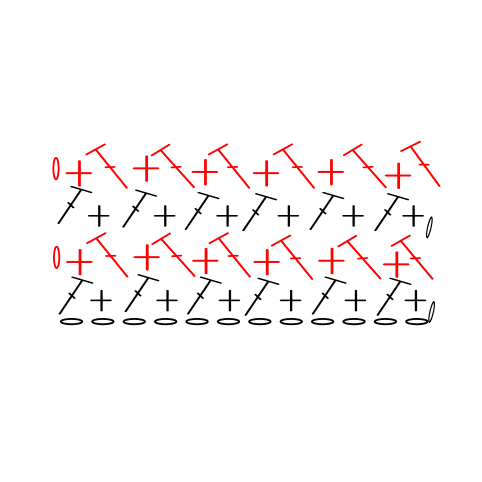
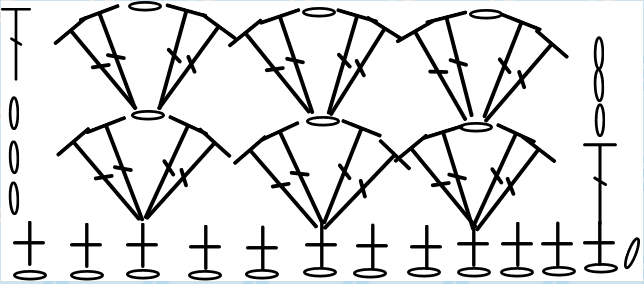
I crocheted 10 rows of linen stitch for the edging. I did an initial row of double crochet around the edge. Making 5 dc stitches for every two rows. Use a 5mm hook and this will avoid some puckering of the edge. Here is a basic stitch pattern for linen stitch. My advice is to work (1dc, 2ch, 1dc) into each corner.
If you start making a Vintage ‘V’ Blanket please do share your images over on the Facebook page or tag me in via Instagram. I would love to see them. Remember to really get the Vintage look the more colour clashes the better. In my blanket I have made every 8th row a cream row. But you could substitute this with a muted grey or even black which brings a little bit of neutral colour order to the overall look. Happy Making!
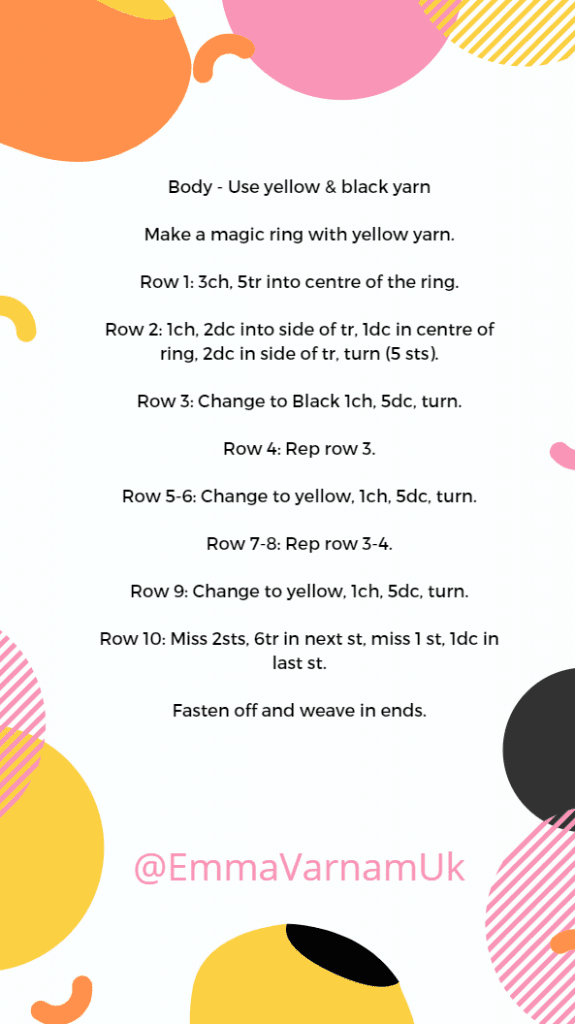
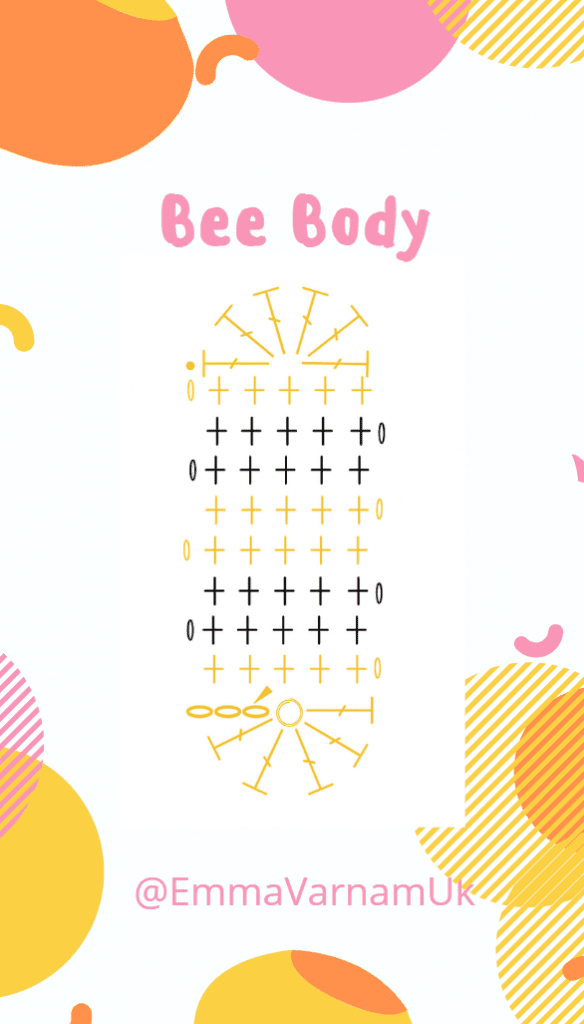
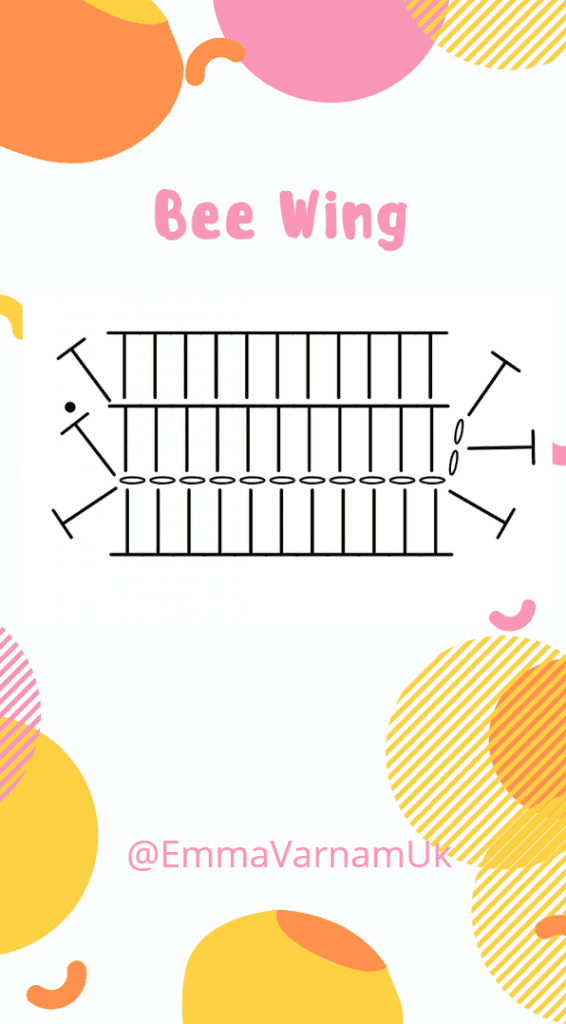
Living the great northern city of Manchester we have in the last few years really owned the worker bee symbol. It is nearly 3 years since the tragic MEN arena bombing. A terrible time which birthed a renewed sense of community unity. A few of my key-worker friends asked me to make them a mask mate which was in the shape of the Bee. I’ve done something very very simple and I share it here for you just in case it is helpful. Stay safe and ‘Thank you’ to all those who are working hard to look after our community.
Currently I don’t have much thinking space or time to be working on complex crochet patterns. My mind wandered last week, remembering the crafters and makers in the Second World War. They used whatever they could find, whatever could be re-purposed to make their creation. Then I remembered that we have a wonderful scrappy blanket in our cupboard, inherited form my husband’s grandma.
It is a simple pattern and each row is a riot of clashing colours. A perfect project for difficult times. It seem to me that would be a lovely idea to try and crochet a row each evening as we remain in lock-down. All being well, at the end we will have a new crazy coloured celebration blanket.
So I am sharing the pattern with you. If you are a beginner this is a good place to start. Find as much yarn as you can and don’t think too hard about the colour combinations.
You will need:
Lots of yarn of the same thickness (weight). I have used Double Knit yarn.
4mm crochet hook for the main pattern.
(If you have it, a 5mm crochet hook for the foundation chain)
Some small sharp scissors.
A tapestry need with large enough hole (eye) to thread yarn through.
Pattern
Using A and 5mm hook, chain 187
Row 1: 1dc in 2nd ch from hook, dc in each ch to end, turn. 186 sts.
Row 2: Using 4mm hook, 3ch, miss dc at base of ch, miss 1dc, (2tr, 1ch, 2tr) in next st, *miss 2dc, (2tr, 1ch, 2tr) rep from * to last 3sts, miss 2dc, 1tr in last st, turn. (63 V clusters).
Change
to yarn B.
Row 3: 3ch, *(2tr, 1ch, 2tr) in next ch sp, rep from * to end, 1tr in top of 3rd ch, turn. (63 V clusters).
Row 3 forms the pattern. Change the yarn colour every row. Weave in the ends as you go with your tapestry needle. Work until your blanket measures 180cm. The width will be approximately 160cm dependent on your tension.
Here are some video tutorials to help you get started:
If you start making a Vintage ‘V’ Blanket please do share your images over on the Facebook page or tag me in via Instagram. I would love to see them. Remember to really get the Vintage look the more colour clashes the better. In my blanket I have made every 8th row a cream row. But you could substitute this with a muted grey or even black which brings a little bit of neutral colour order to the overall look. Happy Making!
Do you know why I taught myself to crochet? The odds and ends of yarn. The ever increasing yarn stash. Inspired by the post-war thifty chic, I saw that you could something really quite beautiful from all the clashing colours of crochet. It is a journey of learning and self-improvement I have never regretted. But the stash has never really got any smaller. Actually I think it might have increased. Darn.
The first pattern
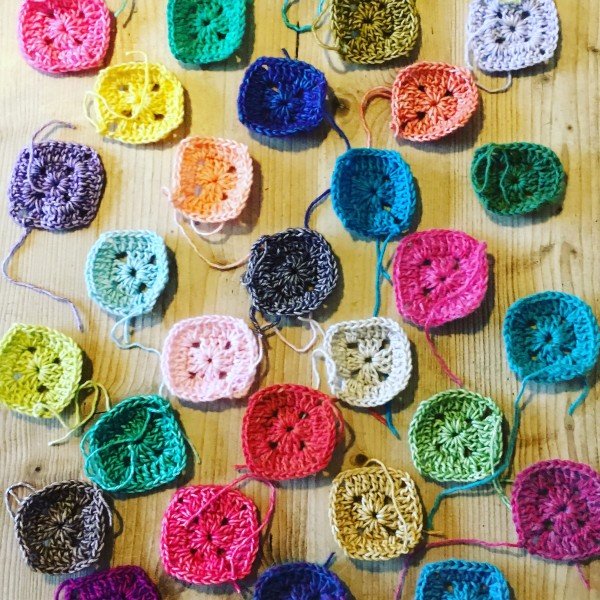
With my recent Little River Blanket that I designed for Black Sheep Wools, I really tried to use up as much of the 25g ball of wool as I could. However, mindful of the need to leave a little bit of yarn to ensure everyone’s crochet tension was catered for, I left just a little bit of each colour. What to do?
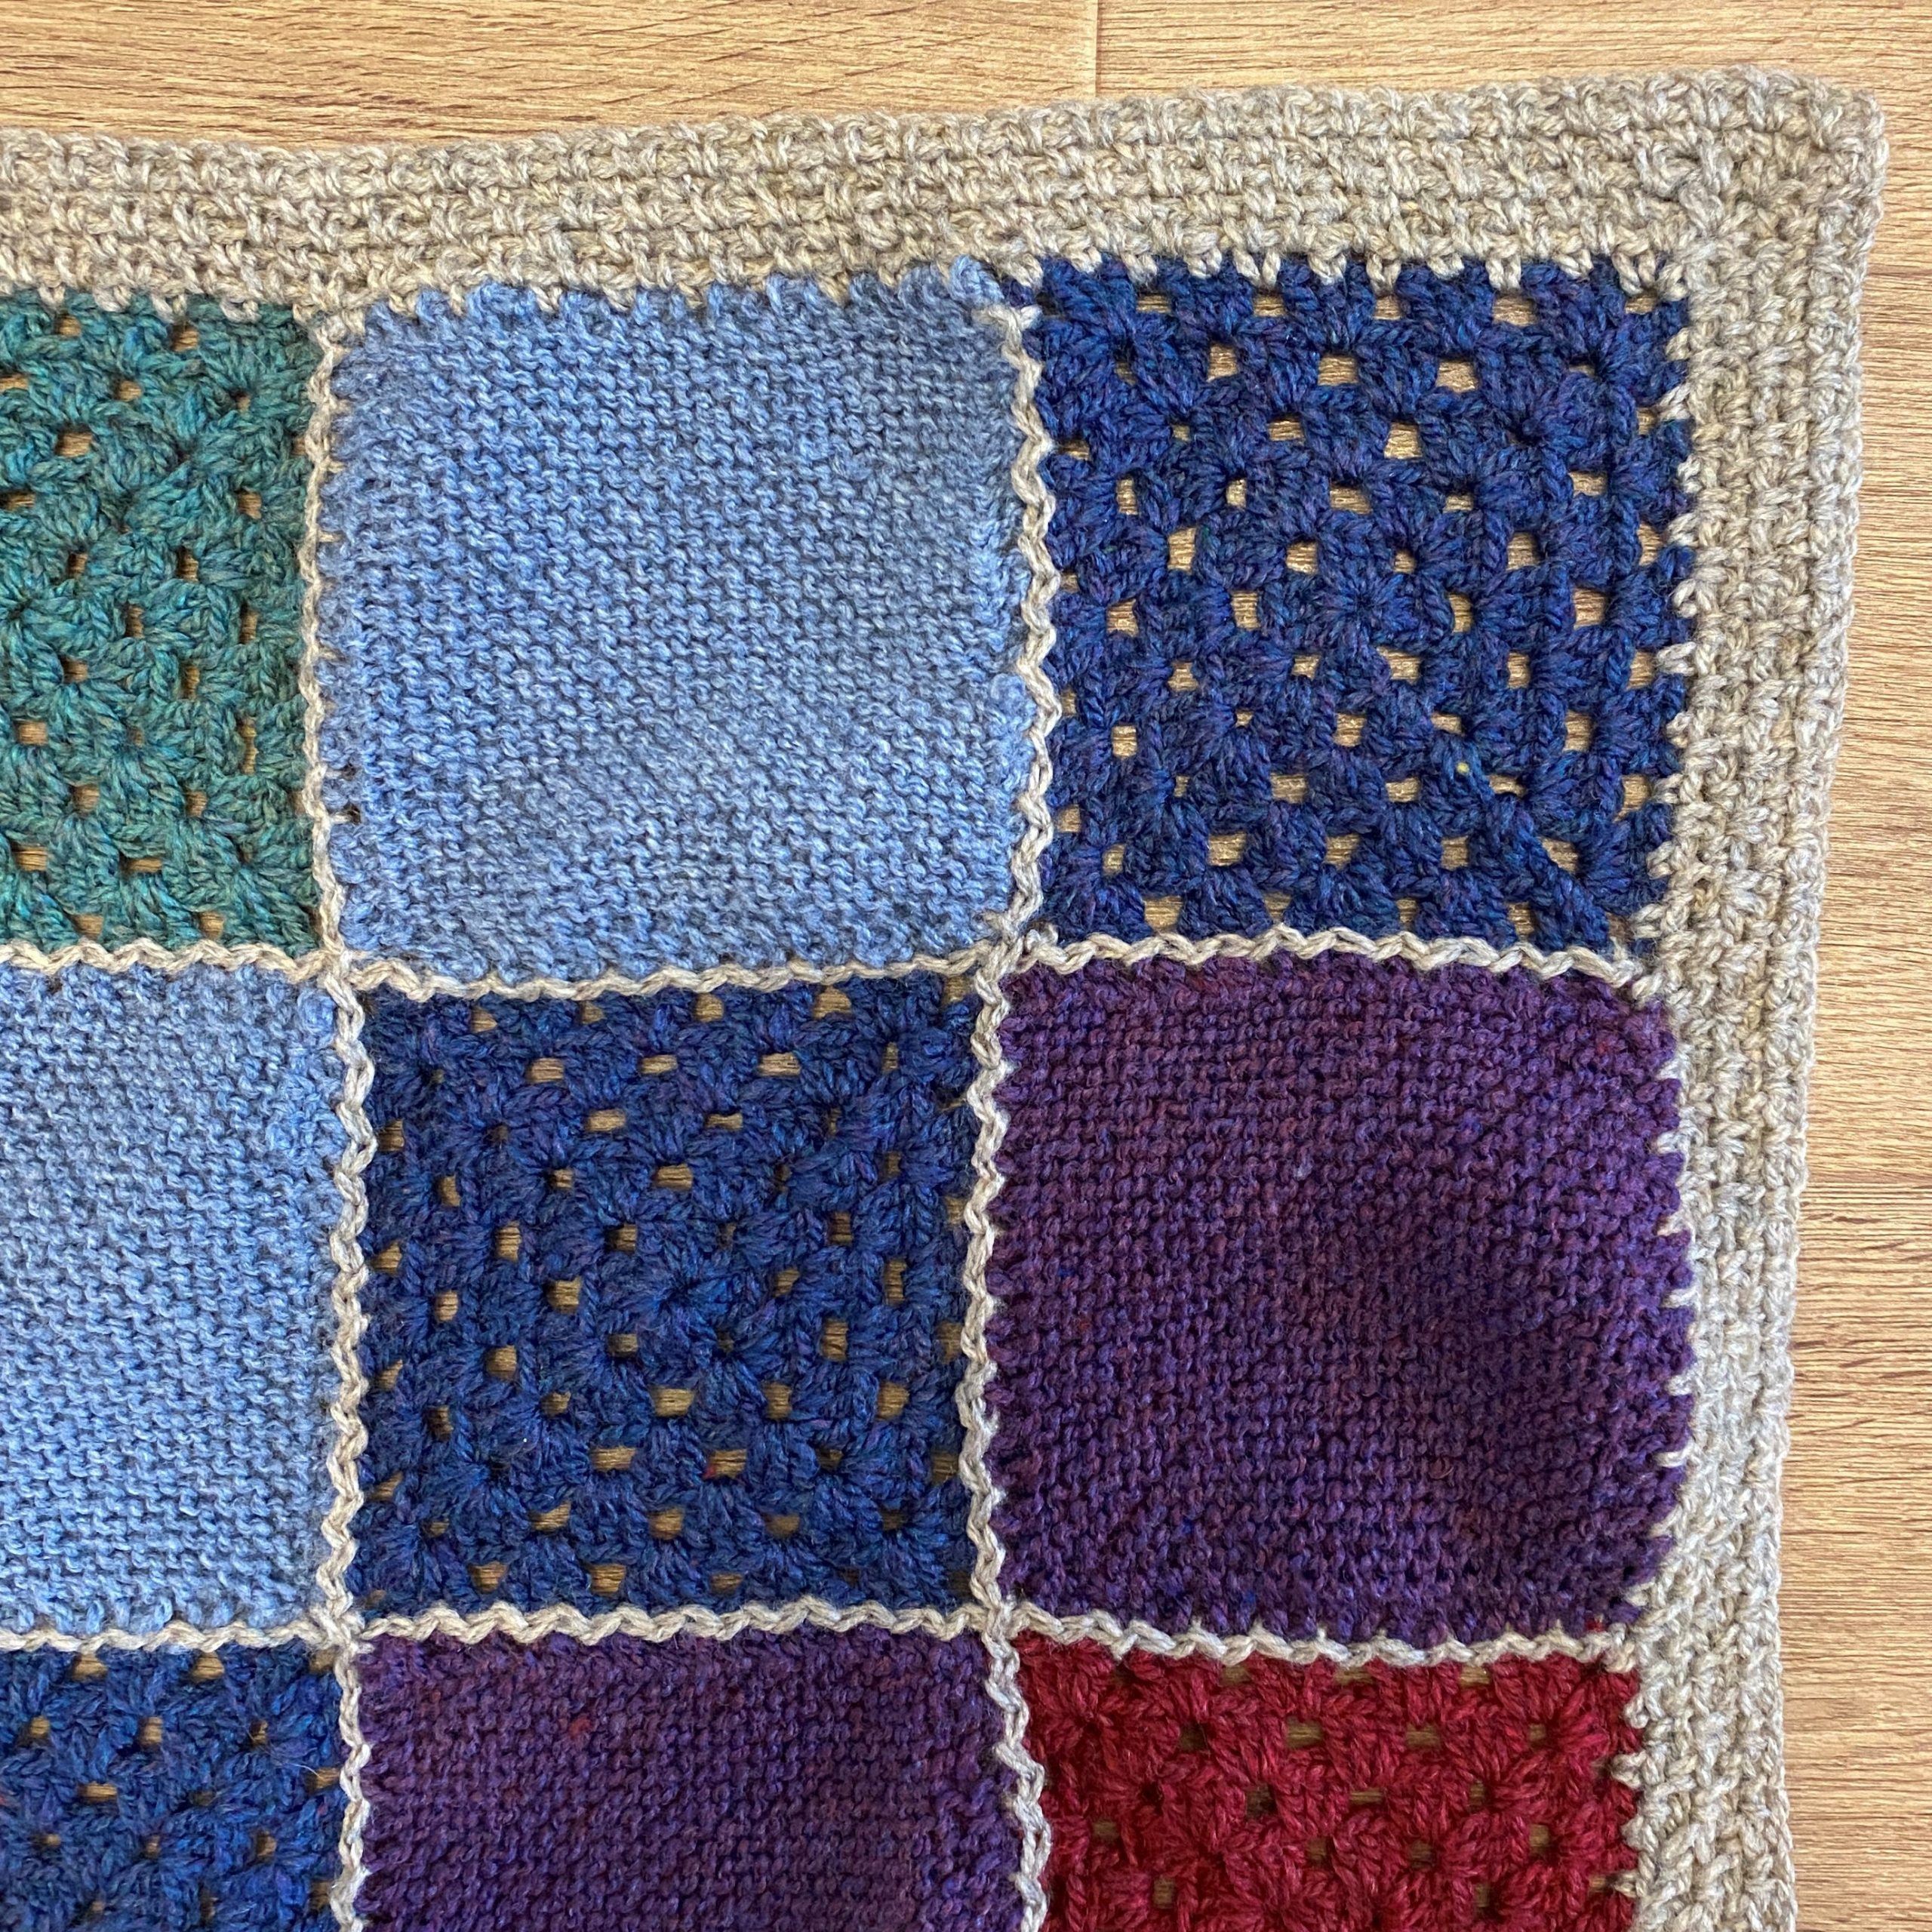
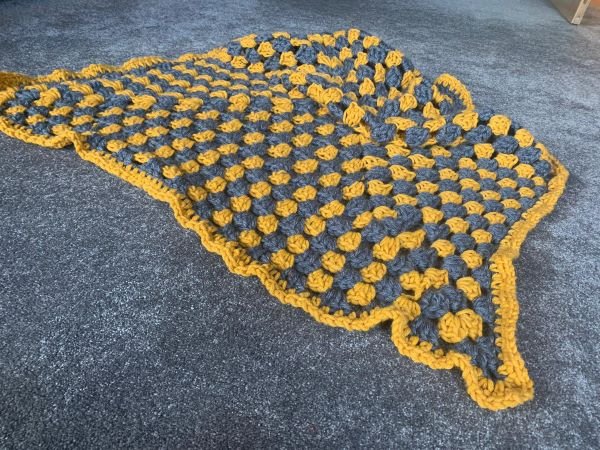
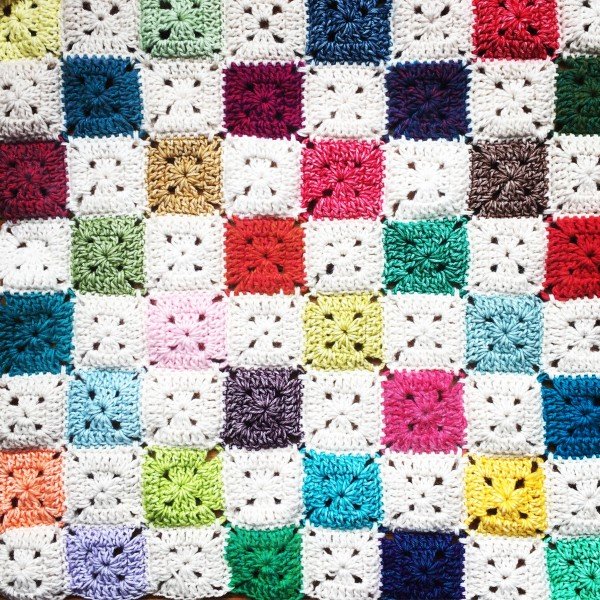
So I made some quick and easy solid granny squares. This is a traditional pattern. You can find it almost in any crochet stitch dictionary. A basic two round square. I put together eight rows of eight columns and alternated each colour square with a square of Scheepjers Stonewashed Moonstone.
It was quick and easy to make. If you would like to make the squares yourself, feel free to follow the pattern below.
The basic pattern
BASIC SQUARE
Using your chosen yarn with 3.5mm hook, work 4ch and join with a sl st to form a ring.
Round 1: 5ch (counts as 1tr, 2ch), 3tr into ring, *2ch, 3tr; rep from * once, 2tr, sl st into 3rd ch at the beg of round. (4tr clusters). Do not fasten off.
Round 2: Sl st into ch sp, 5ch (counts as 1tr, 2ch), 2tr in same ch sp, 1tr in next 3str, *(2tr, 3ch, 2tr) into next 3ch sp, 1tr into next 3tr, rep from * twice, 1tr into next 3ch sp, join with a sl st into 3rd of 5ch.
Some Help
I know this standard patterns very well, but if you feel you need to follow a pattern why not look at the fabulous book by Emma Lamb; Crochet Home. I attached each square as I made it. This a very satisfying technique and a cushion cover is a great way to practice before you embark on a blanket. My top advice would be to look at the Youtube tutorial of Sandra Cherryheart. Her tutorials are brilliant and very clear. I tacked the crochet onto an old very plain cushion cover and that means that there is a nice uniformed backing behind the crochet.
Now my cushion has pride of place in our kitchen, but I realise that not everyone has a shabby-chic aesthetic. I find that crochet look particularly good in the garden around this time. Cushions and blankets in a myriad of colours bring comfort and individuality to the outdoor space.
You know what? I am rather thrilled with this last minute odds and ends make. My advice: don’t get hung up on the colour arrangement – let yourself have a bit of fun with a really random pattern. It is easy to overlook the left-overs, but isn’t the magic of craft taking something that would normally be thrown away and creating something beautiful and useful?
We use basic cookies to give you the best experience on this website. These do not collect or share personal information about you, but help with technical things like loading forms. No information is shared with third parties. If you continue to use this site we will assume that you are happy with it. This site may also use Google fonts. Google may receive automated information about the IP address of computers which access their fonts. If this is a problem for you, please contact Google directly. OkPrivacy policy