Patterns

The new campervan – lets go for an adventure!

new-campervan-crochet-emma-varnam

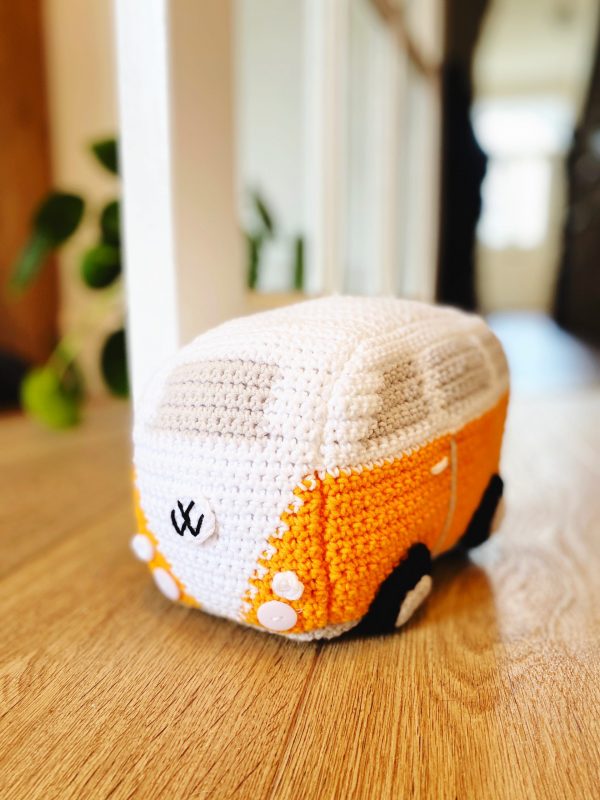
My campervan pattern which I first shared on the blog perhaps nearly a decade ago is perhaps my most popular pattern. That is hard to believe if you are a fan of crocheted cacti or succulents – or if you are a maker of my cuddly toys. But across the world people who have always wanted to own the best symbol of adventure and escape have enjoyed making a crocheted version

The first one I ever made was a gift for a friend. I often find my best ideas come from that place. Imagining a great of fun gift. Inside Crochet Magazine published the first version of the pattern and then a few years later I revisited the pattern. I think it has been reprinted maybe 2 or 3 times.

new-campervan-crochet-emma-varnam

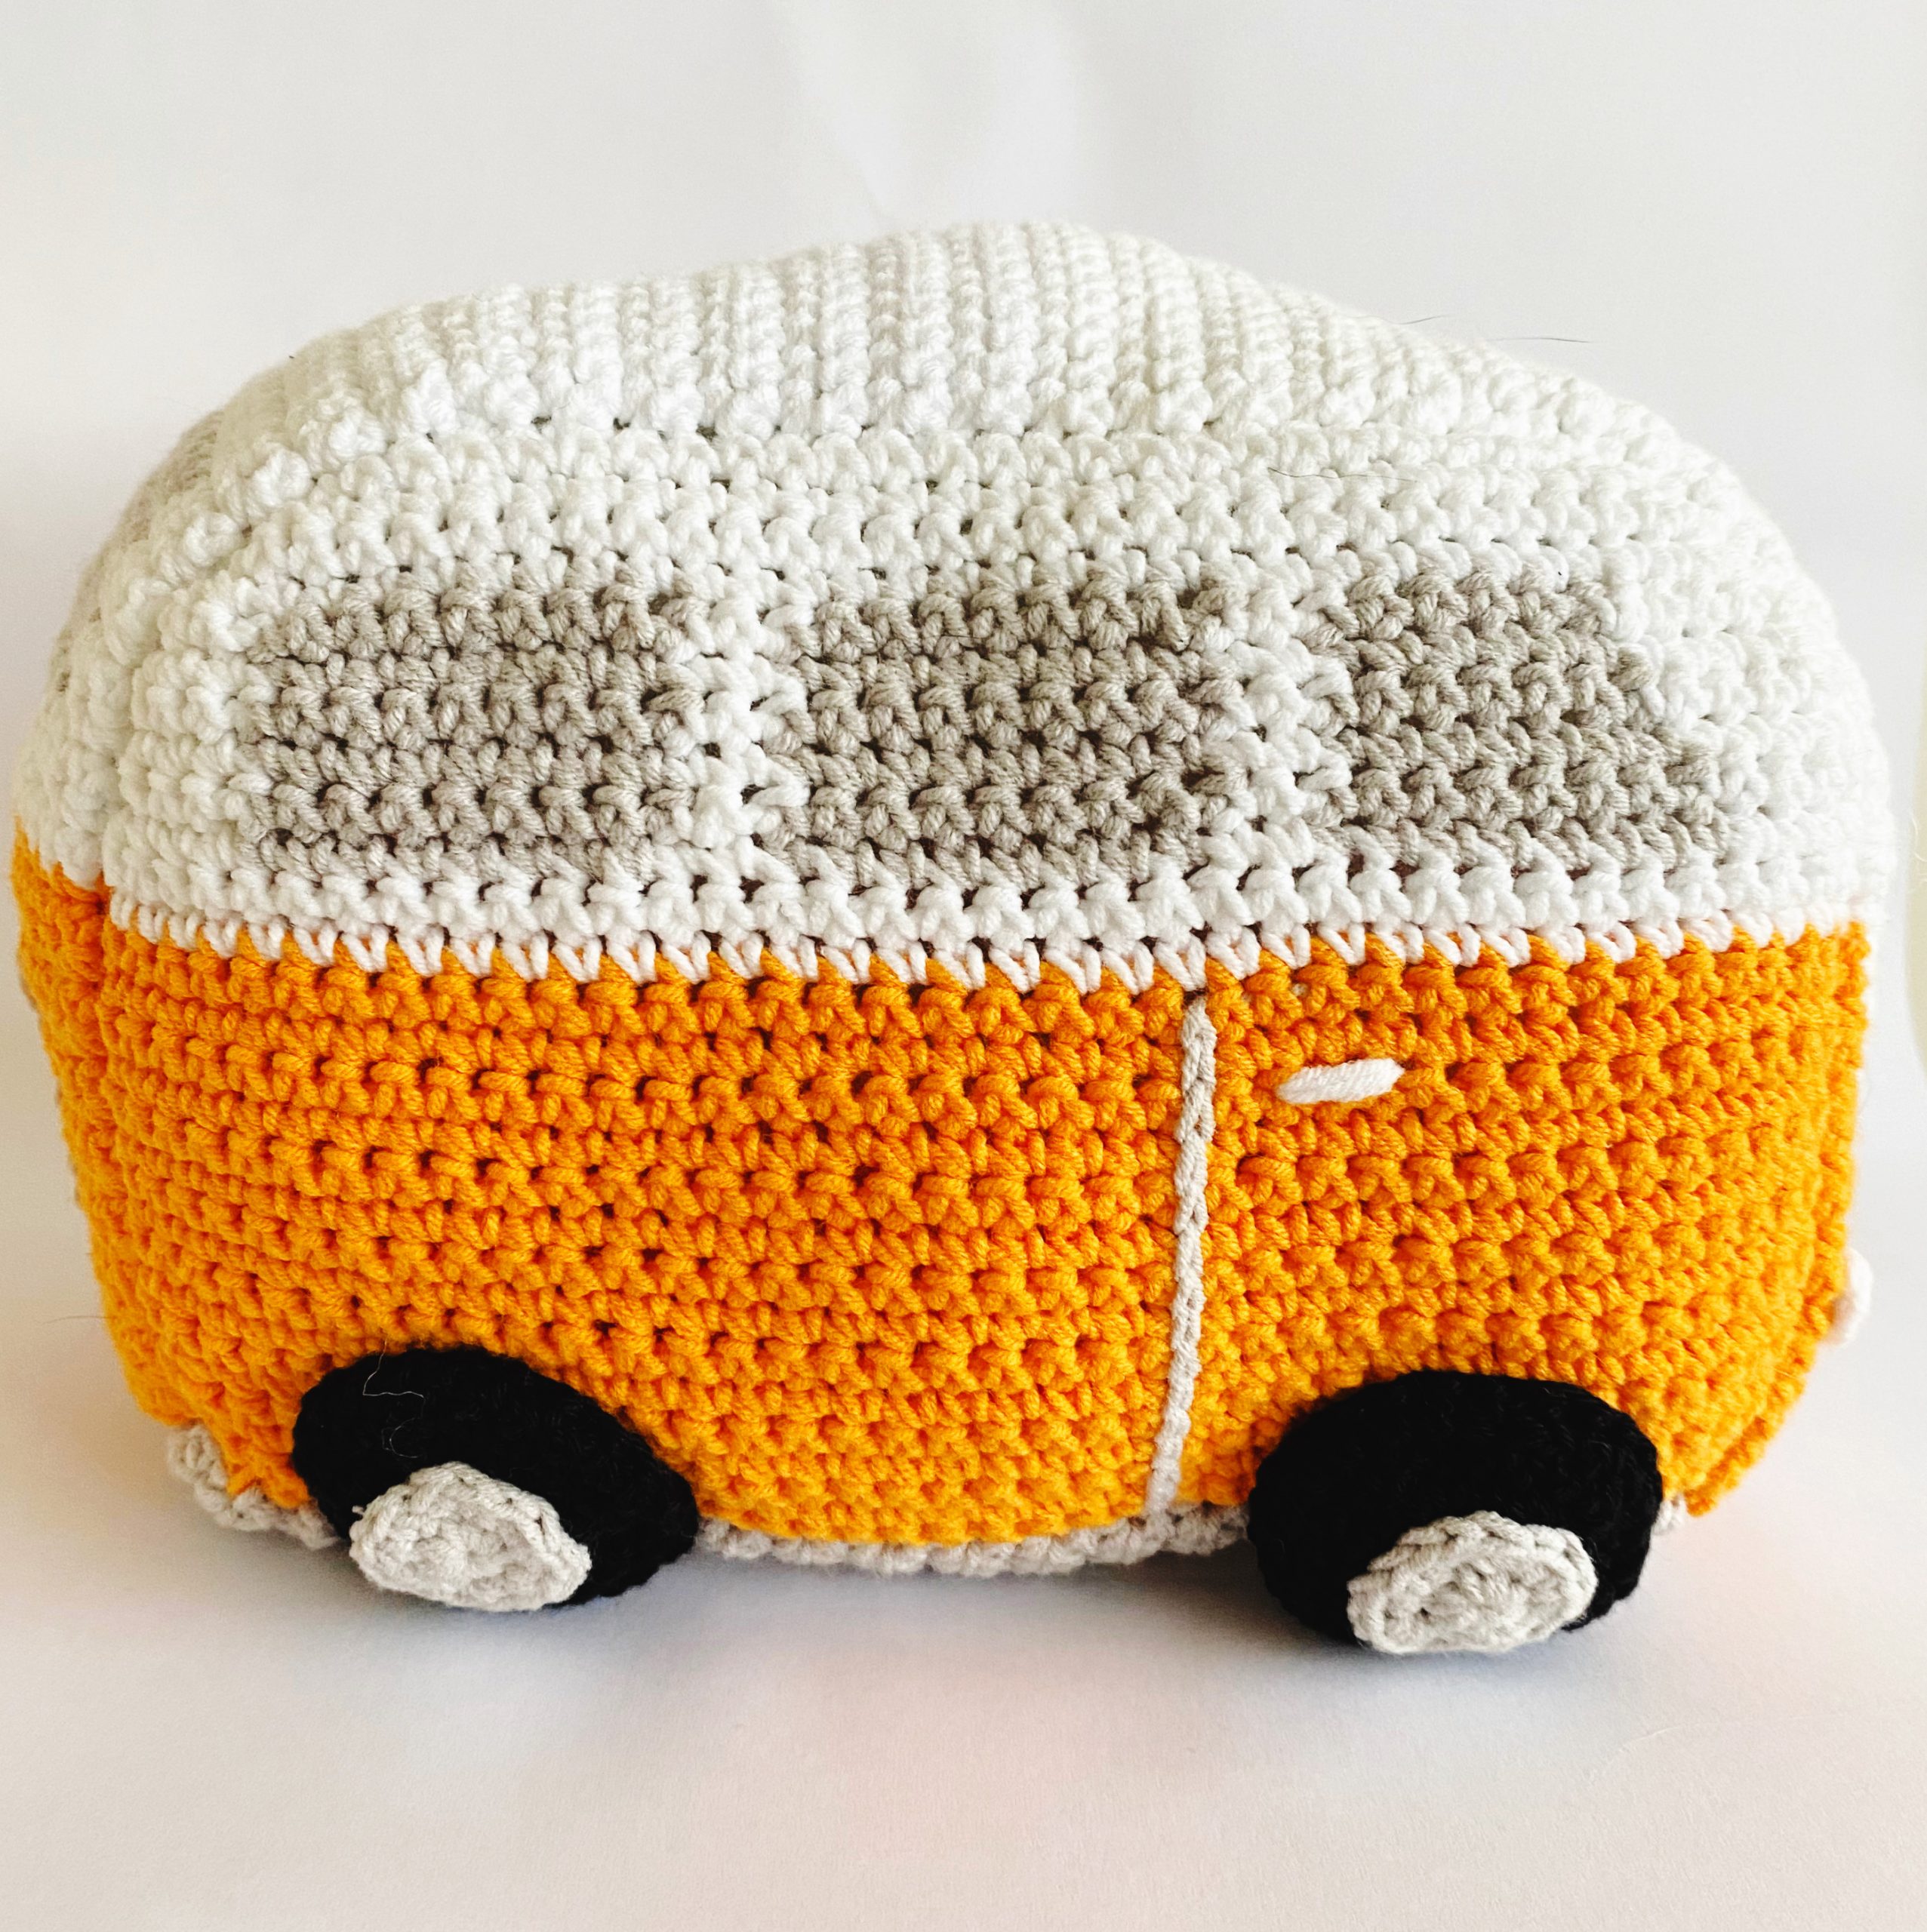
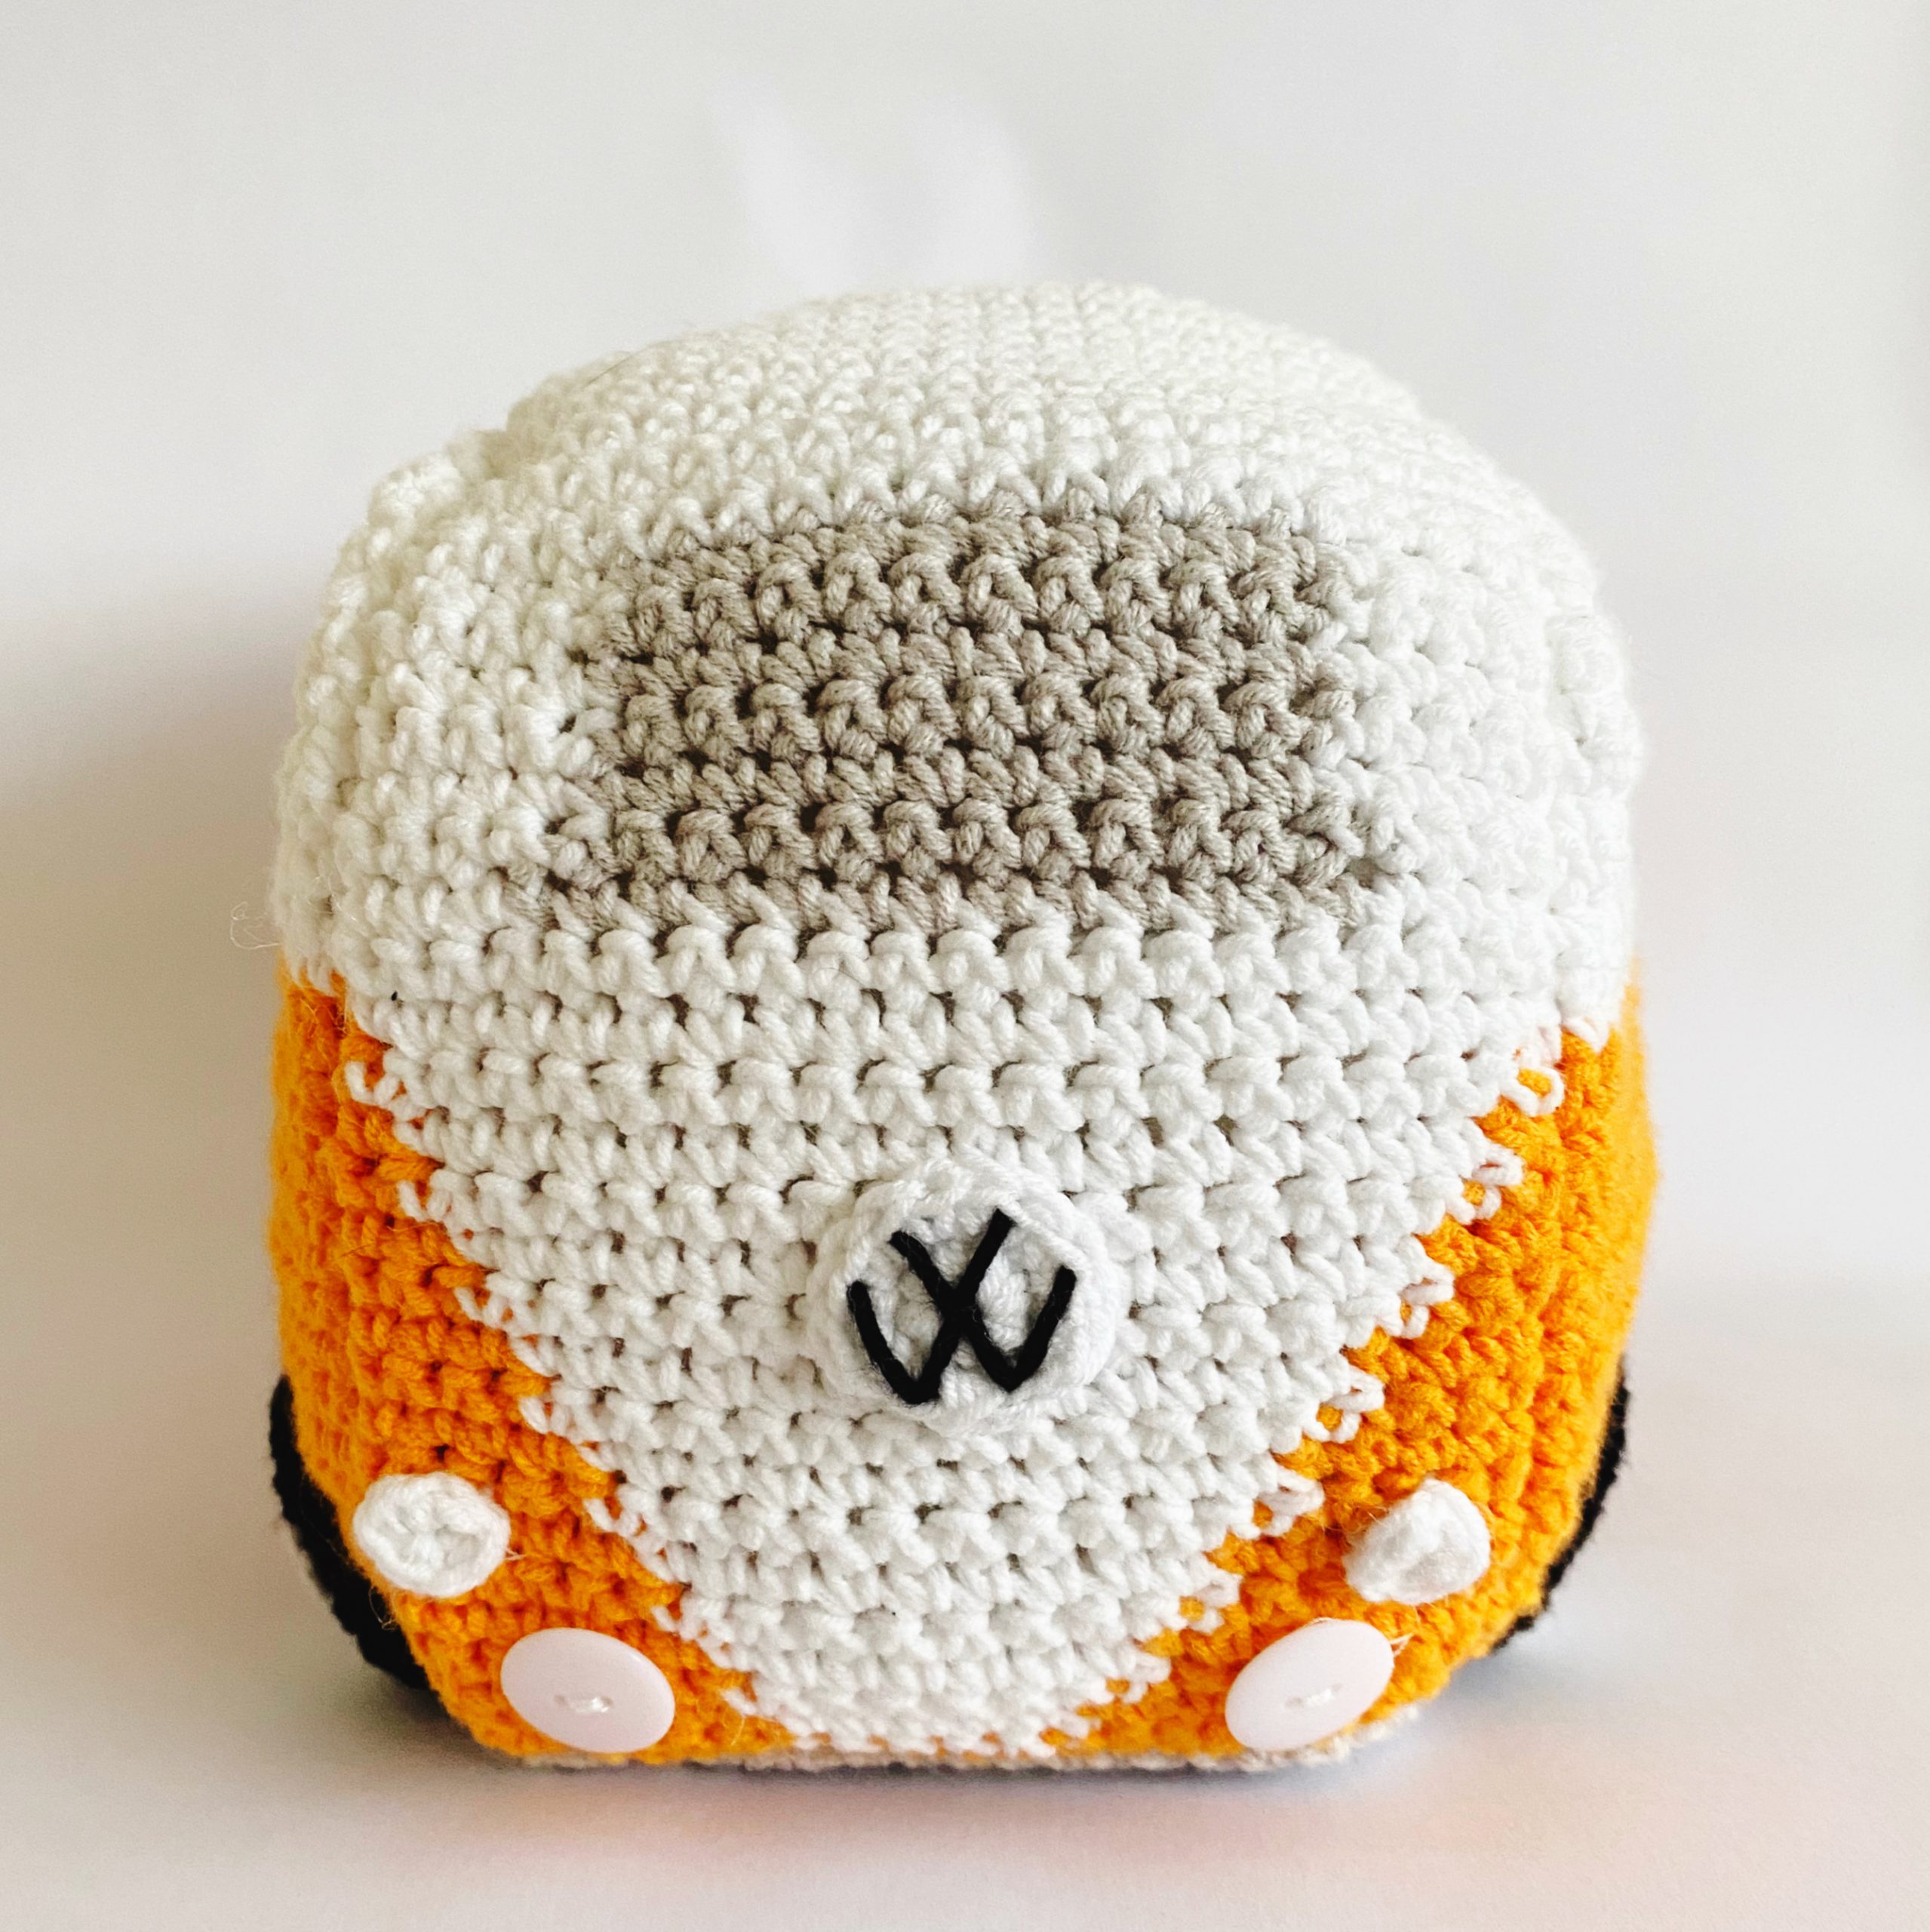
The latest version is slightly different from my first creations. How so? Well the first and second editions used grey felt for the windows. I really enjoy working in mix-media and using felt or fabric in my designs. But some crocheters find sewing a bit daunting and they asked me to integrate crochet windows into the pattern. Secondly I did use HUGE buttons for the wheels. I think they looked super cute but some people found them difficult to get hold of. So the new version has a crocheted wheels and hub-caps.

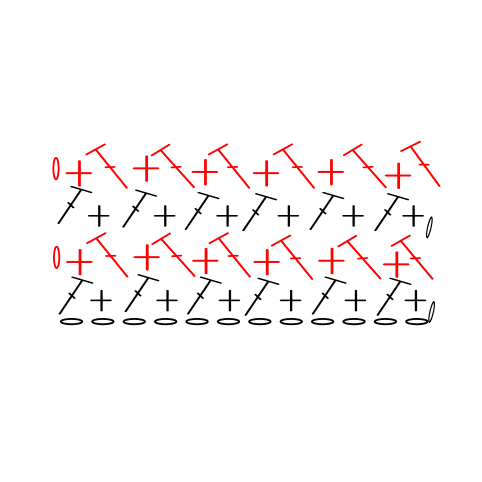
You will be pleased to know that the new pattern doesn’t only have the written instructions for the colour changes. It also contains a stitch schematic which has the colours shown in a simple colour graph. So simple to follow. If you want to download this pattern it is available in my shop here.

new-campervan-crochet-emma-varnam

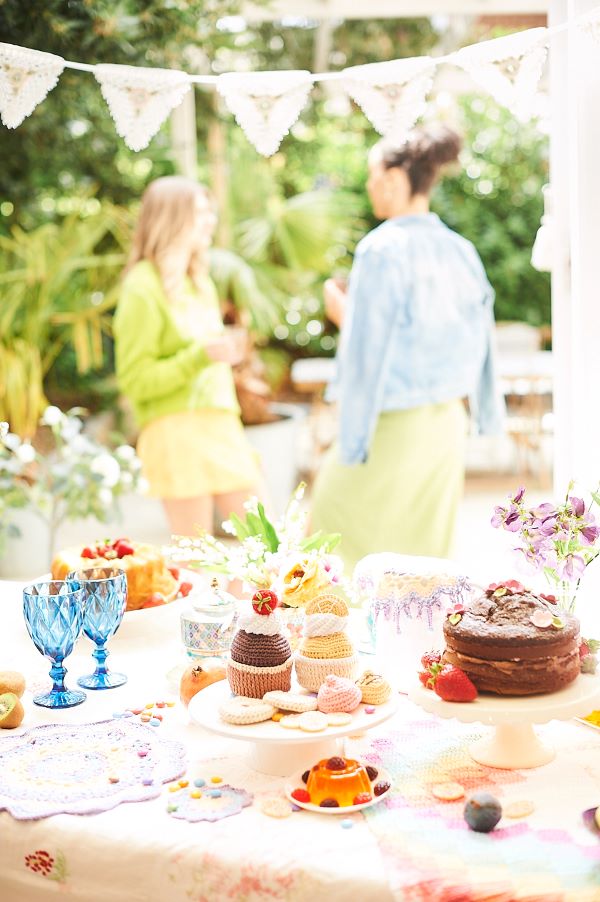
My top tip would be to add a bag of lentils or rice to the base of the campervan if you intend to use it as a doorstop. But the design would also make a really fun cuddly toy for the campervan enthusiast. As usual please do share if you have made your own version. I love to see them.

The new campervan – lets go for an adventure! Read More »

Lovely Jubbly Cakes

When my friends at Stylecraft had an idea of running a celebration for the Queen’s Platinum Jubilee – a virtual Garden Party – I knew immediately what I was going to make. It had to be crochet cake! I am so delighted that all my blogging friends are collaborating together to create a festival of garden party patterns.

Amigurumi cakes were some of the very first things I made when I first learnt to crochet. The first things I made were granny squares, I then tried to get lines of double crochet straight. Not that easy. Then, very quickly the whimsical and fun makes drew me in and I began crocheting in the round. I still am.

In the early days our son, Little B…(not so little now) enjoyed playing with the creations I made. Pretend food, little monsters and of course small cuddly penguins. With those days gone I still enjoy making pretty cakes and biscuits to play with or as a table decoration.

There are two types of cupcake – a chocolate and lemon. Each can be removed from their cup-cake case. The chocolate cake has piped frosting and a strawberry decoration. The lemon drizzle cake also uses a creamy frosting and a slice of lemon.

In true British afternoon tea style I have made a few fondant fancies – these are so much fun and you will have enough yarn to make lemon, strawberry and chocolate.

Finally I have made my own Jammy biscuit – all of the delight, none of the calories. They are so easy to make and I think it might be fun to disguise a couple of these in amongst your other biscuits. All three patterns can be used as a base to make other flavours and add on your favourite toppings. Why not add beads for sprinkles or even a little bit of glitter.

The yarn I have used is Stylecraft Naturals Organic Cotton DK in: Coffee Bearn, Wood, Flax, Gypsum, Poppy, Leaf, Buttermilk, Bone and Blush. This pattern will be available to download for FREE until the end of May from my SHOP.

One lucky Stylecraft fan and their friend has the chance to win the yarn to make this project. Checkout the link to Stylecrafts Instagram account here to find out more. 

All the patterns for the Blogstars Garden Party are so pretty and there so many decorative projects you can choose from. The patterns are available throughout May and I am delighted that the next pattern is out on 20th May by my friend Helen Kurtz – you can check out her blog post here

if you do make some lovely cakes or biscuits I would love to see them and do tag me in either on Instagram or the Facebook page and I will share your beautiful makes x

Lovely Jubbly Cakes Read More »

Hop into Spring

peter-rabbit-emma-varnam

It must have be a certain Mr Peter Rabbit that captured my imagination as a child…but for as long as I can remember a bunny or rabbit is one of my favourite animals to draw, paint and more recently make as a toy.

I was thinking only this week, ‘how many bunny patterns have I made?’. Lots and lots and all different forms and sizes. Of course when the calendar swings round towards Easter then my making focuses on bunnies again.

emma-varnam-bunny-crochet

I thought perhaps if you were looking for a little Egg Hunt companion I would collect some of my patterns together in one post. First up is my downloadable PDF – Bobby Bunny. This is available in my shop and I have a few kits still in stock if you want me to send you all the equipment you need. I made a cute little jacket for this one and he makes a rather neat little Peter.

emma-varnam-toys-debbie-bliss-croche

You might also want to look at a lovely little pattern I designed for my friend Debbie Bliss. One of the highlights of last year was creating this little matching bunny and outfit combo. I love the long legs of these bunnies and who doesn’t want a smart pea-coat for their best long eared friend. The downloadable PDF is available on the Love Knitting website and you will be able to purchase the yarn directly from them. I always love using Debbie’s yarns it is such a pleasure to work with the classic Baby Cashmerino.

If you are looking for a larger bunny then Ruby Rabbit in my book Cute Crocheted Woodland Animals is a very cute friend. Very sweet in her dungarees, you can also make any of the other clothes in the book and they will fit her. The very tiny bunny who is a little cuddly friend for Benji Bear also features in this book.

Jack Rabbit and his friend Emily from my first Cute Crocheted Animals book will always be a classic – I love seeing so many of these bunnies across the world, all wearing their gorgeous outfits. The very best photos are ones where a bunny is firmly pinned under the arm of their young owner…off on an adventure.

But then if you are new to crochet I have two projects which will help you get started in working in the round. They also make great gifts for the Easter Table. The little bunny in my book How to Crochet is one of my go-to beginners projects for amigurumi. Really easy to make and also popular with little hands.

Finally the very first book I wrote was Crocheted Keyrings and Charms – I have been revisiting it recently and it has some cracking patterns in there. They not only make great charms for a hand bag but also little table decorations or party gifts. There is a cute bunny pattern in that book. I return to it every once in a while to use for a gift. I have a few signed copies still available in the shop.

Finally do tell me if you have a bunny or spring pattern idea you would like me to develop. As the bulbs start pushing through in the garden and the sun comes out – then the creative ideas start flowing. Its always a good time to get making.

Hop into Spring Read More »

English Spring Garden Hexagon Blanket

spring-garnden-blanket-emma-varnam

It’s finished! Beautifully finished. Not until just now – tracking back through my photos have I realised that I started this pretty hexagon blanket in May. In my mind, it has been on the hook for much longer. You can read my previous blog post at the beginning of the project here.

I began learning to crochet to whittle down my stash of yarn…well that worked out well! Yarn continues to bulge out of wardrobes and from storage boxes. All those years ago I had in my mind that I would make endless mixed coloured blankets – not caring of the colour combination and slowly all the errant balls of wool would become fab vintage style bedcovers.

spring-garnden-blanket-emma-varnam

Ha!….lovely idea, what happens in reality is that I might start using yarn in my stash and then…oh I need another ball of cream….wouldn’t it be nice to chuck a duck-egg blue in here. The stash remains the same.

Some balls of yarn are so pretty, so expensive that they almost take up squatting rights in the stash collection. Eventually they begin to speak to me and I lose patience. I determine that really that ball needs to be used and that is how the English Spring Garden Hexagon Blanket began.

Many years ago my husband bought me a ball of sock yarn, hand-dyed by a very upmarket producer. The base is a pretty rose pink, with highlights of a shocking cerise and flecks of green, yellow and blue. I want to call it ‘Tutti Fruitti’.

spring-garnden-blanket-emma-varnam

Instead of making a pair of socks with it, which might eventually wear out, it occurred to me that it would make a really pretty centre for a granny square or hexagon. The shades reminded me of the faded pastel prettiness of an English paper piece quilt…and that is how the design evolved. If I had the time I would make a hand-stitched patchwork quilt, that is not going to happen. Instead I reached into my stash to grab all the spare balls of Stylecraft Bellissma and Bambino and set about building the first rows.

spring-garnden-blanket-emma-varnam

In essence every centre uses the pink sock yarn. The next row on is Clotted Cream Bellissima. Row 3 was a coloured Bellissima and then the final row is the cream again. The seasoned crocheter will now be shouting at the screen….’Hang on Lady! You are mixing your yarn weights!!’  – Yes my friend, yes I am… does it matter too much?…no not really. But what I will say. A word to the wise – the sock yarn is a slippery little sucker. The centre seems to easily unravel. This is an event that could make any crocheter burst into tears. I have secured the centre of each hexagon with judicious weaving in. I have taken time and care to do it. Over the past year – this blanket has been a slow burn. I have started and completed another blanket since. I knew though, that this blanket would be coverlet for the base of a bed. I knew all along that the blanket would belong to me.

spring-garnden-blanket-emma-varnam

If you were thinking of making similar,

You could use Stylecraft Head over Heels in Red Potts, or perhaps West Yorkshire Spinners Signature 4ply in Pink Flamingo.

I have used Stylecraft Bellissima: Precious Posy, Sugar Snap, Denim Dungarees, Mellow Yellow.

Stylecraft Bambino: Clotted Cream, Vintage Pink, Soft Pink, Vintage Blue, Little Boy Blue, Heather and Sage,

I joined each hexagon by double crocheting the edges together and I edged the whole blanket with 4 rows of half treble.

Do I love it? Yes…

Is it soft and cosy? Yes….It makes me smile – in some ways this is blanket is probably me, yarn form, full of the hope of Spring.

English Spring Garden Hexagon Blanket Read More »

Cheeky Christmas Cosie

christmas-striped-mug-cosie- emma-varnam

Are you getting in the festive mood yet? Even though I am a winter baby it does take me to mid-December before I am ready for the trees, the decorations and the carols. Designing for Christmas in the middle of summer, can mean that I need to get myself excited when the season actually comes round. However this year I feel more jolly.

I have written up a cheeky wee pattern for you which will be a quick and easy gift to make and will bring a smile to your mulled wine or Christmas cup of tea. This design means your mug can wear its own Christmas jumper. Make in the traditional candy stripes or perhaps just go for a plain design. I know you will able to customise this design yourself.

I have used some oddments of yarn left in my stash – Stylecraft Special DK in Lipstick, Cream and Bottle.

christmas-striped-mug-cosie- emma-varnam

Only the basic knitting skills are required. I have popped the pattern over on my shop and it will be free download for the rest of December 2021. If you do make one please do tag me into your photos – I would love to see them. Happy Christmas!

Cheeky Christmas Cosie Read More »

Soft Summer Blanket Yarn Giveaway

I am so thrilled that so many of you said lovely things about my Soft Summer Blanket. Many of you have already begun to make the blanket. That makes me so happy.

I am thrilled that my lovely friends at Stylecraft have been willing to sponsor a Giveaway. They have generously given us 2 balls of each colour – so that is a stupendous 14 balls of yarn. You will also get a beautiful shade card for this blanket from Simply Shade Cards.

So if you would like to enter you can either leave a comment/like & tag a friend on my instagram account. Or you can leave a comment at the end of this blog post. I would really lovely to know who you would like to make the blanket for.

The blanket pattern recipe is available for free in this blog post.

I would like the yarn to go a good home and someone who will be thrilled to make the blanket. If you haven’t caught my Instagram Live September series – then do pop over to Instagram and have a look in my IGTV and there are a series of hints and tips.

The Giveaway finishes for entry at 6am British Summer Time on 24.09.21 – Good Luck!

Soft Summer Blanket Yarn Giveaway Read More »

Pretty Flower Puff Teacosy

pretty-puff-teacosy-emma-varnam

I have a little confession – I don’t drink tea…never have…never will. But that doesn’t mean I don’t like teacosies. I love them! I love the shape of a traditional teapot and I love the fact that a cosy is practical and a brilliant gift for all tea drinkers.

Over the years I have made and designed quite a few cosies. I have even co-authored a book on the subject. I have a few go-to patterns that I make regularly for tea drinking friends. Well as we get cosy for Autumn I have rummaged in my yarn stash and started cosy making.

pretty-puff-teacosy-emma-varnam

I thought it might be fun to share with you a new textured crochet pattern for a cosy and top it with some yarny flower puffs. The is certainly not a new idea – it is an old vintage trick. There is an excellent knitting pattern and explanation in the book ‘The Gentle Art of Knitting’ by Jane Brocket. A book that is a real favourite for me and worth borrowing from your Library or ordering your own copy.

If you would like to make the cosy for yourself. Below is the pattern recipe and a few photos to help you make the flower puffs.

Pretty Flower Puff Teacosy

Sides (make 2)

Using a 3.5mm hook and some DK yarn – I have used Stylecraft Special DK – Warm Grey, make 29 ch sts.

Row 1: 1dc in 2nd ch from hook, 1tr in next ch, (1dc, 1tr) rep to end, turn. (28 sts)

Row 2: 1ch, (1dc, 1tr) rep to end, turn. (28 sts).

Repeat row 2, 22 times – working 24 rows.

Fasten off leaving 20cm tail of yarn. Attach sides together at the top and the bottom of each side to create 2 large slits. Then use a large length of yarn to gather the top of the teacosy together using small running stitches.

pretty-puff-teacosy-emma-varnam

Flower Puffs (make as many as you like)

You will need some large knitting needles (I used 2 x 10mm) or thick pens. Also some left over yarn from your stash.

pretty-puff-teacosy-emma-varnam

Holding the needles together and with your thumb holding the yarn down at the end, wind the yarn over both needles about 20 times. Cut off this yarn.

pretty-puff-teacosy-emma-varnam

Then using another strand of yarn about 20cm long, pull it between the needles and tie over the centre of the wound yarn. Make one knot

pretty-puff-teacosy-emma-varnam

Slip the yarn off the needles and secure with a second knot. Neaten all the ends and sew securely to the top of your teacosy. Ta-dah!

pretty-puff-teacosy-emma-varnam

So pretty. I have shared a little tutorial on Instagram if you would like to watch me doing it in real time. But it is fairly simple and a really fun way to use up the ends of your yarn.

pretty-puff-teacosy-emma-varnam

If you like this little pattern and find it helpful – please do share and I would be delighted if you use the ‘Buy me a Coffee’ button in the Shop. But also comments and suggestions are so welcome below. Happy Making!

Pretty Flower Puff Teacosy Read More »

Soft Summer Blanket

A few weeks ago I told you about a blanket I was making. The original plan was to make a boxy granny square cardigan. I made the cardigan – it looked appalling. I very nearly threw it in the bin – in a fit pique! Luckily sense prevailed and I didn’t. I un-picked the majority of seams and managed to salvage the majority to form the beginnings of a new blanket. The Soft Summer Blanket.

So what did I do since last we spoke? Well I have quite a few lap blankets for outdoor evenings and indoor sofa snuggling. I thought it might be nice to add some granny stripes and make a blanket large enough for a British single bed. Approximately this works out at 130cm width by 180cm length.

I have placed the squares in the centre and then worked the rows of granny striped around. The colours are soft with pinks and duck egg, but there is a zing with the yellow and a little low tone with the denim which knocks out all the sickly sweet colours. A few of you on instagram have asked me about the colours and have been keen to see if the finished result. For me this isn’t so much a designed pattern but more of a riff on a theme. The seasoned crocheter could easily copy what I have done – but for the beginner I thought I would just note down here more of a recipe.

If you do make a version do send me a photo – but also please do comment below and link to the blog post if you like it – I love to hear your feedback.

Soft Summer Blanket Recipe

I used my favourite 3.5mm hook and approx 2 ball each of Stylecraft Special DK – Pale Rose, Powder Pink, Denim, Cloud Blue, Cream, Duck Egg and Mustard.

Stage 1:

Make 36 x Granny Squares which have 6 rows. Make rows 1-5 in different colours and try to make sure there are equal distribution of colours. Don’t use pale rose in rows 1-5 but use it for Row 6 (the last row) for each square.

Basic square

Using 3.5mm hook and A, ch 4 sts, sl st in first ch to form a loop.

Round 1: 3 ch, 2 tr in loop, 3 ch, (3 tr, 3 ch) rep twice more, sl st in 3 ch. (4 tr clusters).

Round 2: Change to B, attach yarn to any 3 ch sp, (3 ch, 2 tr, 3 ch, 3 tr, 1 ch) in ch sp, (3 tr, 3 ch, 3 tr, 1 ch) in next ch sp, 3 times, sl st in 3 ch (8 tr clusters).

Round 3: Change to C, attach yarn to any 3 ch sp, (3 ch, 2 tr, 3 ch, 3 tr, 1 ch) in ch sp, (3 tr, 1 ch) in next ch sp, *(3 tr, 3 ch, 3 tr, 1 ch) in next 3 ch sp, (3 tr, 1 ch) in next ch sp; rep from * twice more, sl st in 3 ch (12 tr clusters).

Round 4: Change to D, attach yarn to any 3 ch sp, (3 ch, 2 tr, 3 ch, 3 tr, 1 ch) in ch sp, (3 tr, 1 ch) in next 2 ch sps, *(3 tr, 3 ch, 3 tr, 1 ch) in next 3 ch sp, (3 tr, 1 ch) in next 2 ch sps; rep from * twice more, sl st in 3 ch (16 tr clusters).

Round 5: Change to E, attach yarn to any 3 ch sp, (3 ch, 2 tr, 3 ch, 3 tr, 1 ch) in ch sp, (3 tr, 1 ch) in next 3 ch sps, *(3 tr, 3 ch, 3 tr, 1 ch) in next 3 ch sp, (3 tr, 1 ch) in next 3 ch sps; rep from * twice more, sl st in 3 ch (20 tr clusters).

Round 6: Change to Pale Rose, attach yarn to any 3 ch sp, (3 ch, 2 tr, 3 ch, 3 tr, 1 ch) in ch sp, (3 tr, 1 ch) in next 4 ch sps, *(3 tr, 3 ch, 3 tr, 1 ch) in next 3 ch sp, (3 tr, 1 ch) in next 4 ch sps; rep from * twice more, sl st in 3 ch (24 tr clusters).

Fasten off and weave in ends. I blocked each square at this stage as I find it helps with accurately joining each square together. With Pale Rose I slip-stitched the squares together to make a 6 x 6 square.

Stage 2

Starting with the Duck Egg I then worked 16 rows of a granny square clusters around the outside of the 36 squares. Each row was a different colour – however the 2nd row, and following 2 x 5th rows were cream.

Stage 3

I then added more single rows to each end of the blanket to turn it from being a square into a rectangle. Starting with a cream row, I added 14 more rows. The first and every following 5th row was cream. I repeated the colour striping on the otherside of the blanket.

Stage 4

Finally I worked an linen stitch edging around the blanket.

Round 1: With RS facing using 3.5 mm hook, join cream to the top of any treble 1ch, 1dc into each tr, and ch st around, work (1dc, 1ch, 1dc) into each corner, sl st first ch. Fasten off. 

Now you will work 3 rows of linen stitch. Use a different colour for each row.

Rounds 2-4: With RS facing, attach yarn A, 2 ch, miss 1dc at base of ch, (1dc in next st, 1ch, miss 1 st) rep around, work (1dc, 1ch, 1dc) in each corner, sl st in first ch. Fasten off and weave in ends.

There you go – a Soft Summer Blanket. Perfect for a single bed or it looks lovely at the bottom of a King Size bed. I have used the normal crochet abbreviations in this free pattern and if you need any further help with learning to crochet do have a look at my book – How to Crochet which has a great introduction to the Granny Square Technique or my book Granny Squares Home which has some lovely patterns for bed spreads and lap blankets and all the techniques and stitches are explained in detail.

I don’t mind telling you that I am rather thrilled that I have been able to redeem this previously failed project. I have already dragged it outside for evening snuggles and found Stanley claiming ownership a couple of times. I suspect that come the autumn months it will have pride of place at the foot of our bed. Now what else can I fix?

Soft Summer Blanket Read More »

Hidden in plain sight – the Crochet Cactus

homemade-cactus-emma-varnam

In the town where I spent my early childhood there was an amazing game which the local shops played. It must have been during Carnival week, in the early autumn. Each shop window displayed an item which was totally unrelated to their business. The competition trail asked children to spot and name all the incongruous hidden gems displayed in the windows. I loved this trail. I am sure it was never as extensive as my memory serves – but the joy of spotting something hidden was an utter thrill.

homemade-cactus-emma-varnam

When I worked in museums – staff knew that there was nothing I enjoyed more than treasure trail and we took the game of my childhood and would hide tiny woolly sheep or teddy bears amongst the exhibits and display cabinets. My inner child is never very far away. I think it is this penchant for whimsy that makes me so fond of making crochet cacti.

When I made my first crochet cactus I became almost giddy with delight – I popped it in a teacup and sat it on the mantlepiece amongst my other house plants. It sat there, in disguise for many months. Only a few guests spotted it was not real. During that time I added to my woolly plant collection for the book Crocheted Succulents. Each completed plant tickled me. They were fun, quick projects – but most importantly wilt due to neglect or more likely overwatering.

In the years that have followed I have seen hundred of photos of completed cacti by readers of my books. Each one is a joy to behold. Last year I launched a beginners kit and pattern for anyone who wanted to dip their toe in the crocheted succulent pond.

homemade-cactus-emma-varnam

A few of my friends have sheepishly admitted that they have no intention to learn to crochet…but ‘hint, hint’ they wouldn’t mind one of my Cacti. Well I have made a few and there are a small number available to purchase in my shop. If you visit our house – you will spot a few homemade cacti dotted amongst the bookshelves and nestled next to my real houseplants. No one can resist picking them up – and a broad smile stretches across their face. ‘Oh to have plant you can’t kill!’

Hidden in plain sight – the Crochet Cactus Read More »