Tutorial

Getting round the tedious

garndenrouteblanket7

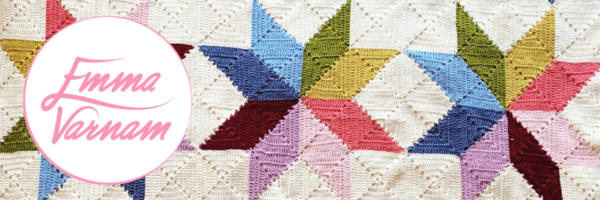
My last post featured my new blanket design for Black Sheep Wools. I hope you like the design – if you don’t crochet you might think, ‘ah, that looks pretty, I should get round to learning.’ If you are a crocheter, you might be thinking, ‘Should I start a new project?’, ‘I should finish the other 3 projects I have in my basket first?’, ‘I can see how many colours are used in that blanket, that is ALOT of sewing and weaving in ends.’

Let’s face it, some crochet projects are a breeze and others need dedication. What we need is a little psychological motivation and an eye on the prize. When I have a large project that I need to finish I have a couple of techniques I use to keep myself on track.

hexagonjoining3

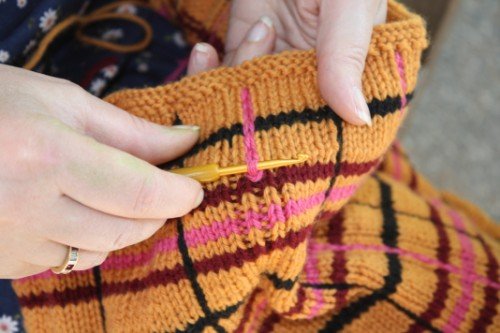
1. When joining squares or hexagons for a blanket I always like to join as I crochet. It is not the easiest  method but certainly it ensures that you can see the blanket growing and the joins are robust and less likely to unravel. The Garden Route Blanket uses this technique and I have some photos in the pattern to help with this process.

2. Break the project up into sections. I either work in rows, or set myself a goal of how many motifs I will make in one sitting. Often when I am finished at the end of the day I might lay out my crochet on a chair and have a sneaky wee ‘admire’, before putting the project away in the basket.

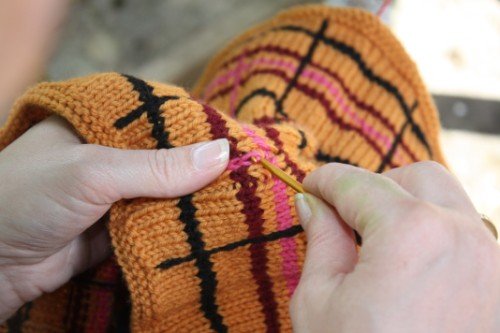
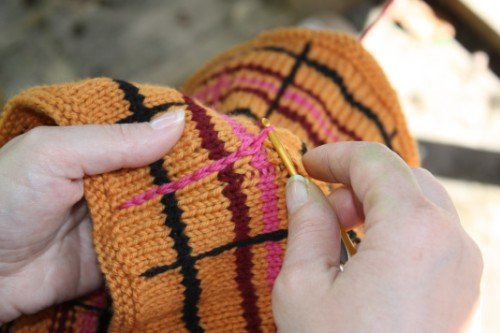
3. Weave in ends as you go. For this latest blanket, when I got half way through joining the squares, I did all the weaving in of the ends. This ensured that it wasn’t a mammoth task at the end of the project.

4. Set yourself a fake deadline. My design work usually has a deadline. I really don’t like missing these dates, so I tend to set myself a fake deadline just so I can avoid missing crucial dates. Hopefully for you crochet and knitting is a relaxing hobby, where you can avoid the stress and time restraints of life. However we have all promised to make baby blankets that have been sat in the project basket way past the due date, and in some cases those babies have been toddlers before their blanket has arrived. Set yourself a realistic time-scale and a fake deadline.

garndenrouteblanket8

5. If you hate it – Frog it. (Frogging is ripping back a project). This is your hobby! If you are really hating a pattern, don’t get hung up about it, rip the wool back and make a pattern you do like. Life it too short to get hung up on a crochet pattern you are not enjoying and there are so many patterns you can get your teeth into.

6. Do a C.A.L. Lots of crocheters are loving the Crochet-A-Long projects. A new part of the pattern is released gradually as a surprise. By breaking the projects up into manageable sections many crocheters are finding this a better way of working. Why not try this kind of project to keep your interest alive.

Getting round the tedious Read More »

My crochet top tips!

MC3

In preparation for my book signing and demonstration a couple of weeks ago I put a call out to my twitter friends asking them for their top crochet tips. Many of them were super generous and shared with me their developed wisdom after many hours of teaching crochet up and down the country. I even had a lovely late night conversation with the uber-tutor Ali Campbell. That was lots of fun.

I then chatted away with good friends I had taught to crochet. They gave me their words of wisdom – things I has passed on but had forgotten. So here you go – these are my top five…feel free to add your own.

1. BLOCK!

Ok you can’t learn to block before you have learnt to crochet – but I suggest that unless you are making an amigurumi toy, your work is far too precious not to block. It makes all the difference. If you have ever said to yourself, ‘My crochet doesn’t look like it does in the book/magazine!’, ask yourself this question, Did you block it? There are lots and lots of articles available online about this. I have also written a section in my new book and indeed on this blog. Do it!

2. BUY A DECENT CROCHET HOOK

If you know you like this lovely yarn hobby and have begun acquiring a small yarn stash and a couple of pattern books, I suggest it is time to splash out and buy a good crochet hook. I literally have no sense of humour if someone steals mine…my eye starts to twitch. Personally I love Clover Soft Touch hook, but the are other ergonomic ranges which are loved by the professionals including Tulip and Knit Pro. I am a firm believer that my crochet is faster with a good quality hook and other friends testify to this fact. In fact it is a shame I am not on commission for the sales of my favourite brand!

3. LEARN TO MAKE A MAGIC RING

Even seasoned crocheters can find the magic ring (adjustable ring) difficult to master. This is a way of creating a foundation round of stitches that form a circle and you can avoid an unsightly hole in the middle. I have found the easiest way is to use a slip-knot method, illustrated beautifully in my book (shameless plug). Once you have mastered this technique toys and accessories look much more professional and are far more durable.

4. USE STITCH MARKERS

Designers and professionals need to use stitch markers…so I would suggest that you use them too. Stitch markers don’t have to be complicated or expensive.  For ease of removal and sight I use a contrasting piece of yarn to mark my place. No need to hunt around the project bag for hidden safety pins or plastic swirls. The odd unwanted stitch or two in an amigurumi toy can really effect the look of the design – so choose the pattern wisely if you want to go free form and use stitch markers when the shape really matters.

5. DON’T BE AFRAID OF COLOUR

So many people find colour choice daunting. I fully understand that, but my top tip to enable you to break out of a colour inertia is to find a card or magazine cover you like and match your yarn choice to the colours in that pretty photograph. This particularly helps if you are drawing hues together for a stash busting blanket. You might feel all alone without the prescription of a magazine or designer colour scheme. Don’t fret, let your birthday card do the choosing. This technique will enable you to be a bit more colour adventurous.

The photograph above was taken by my lovely husband as a demonstration shot for the illustrations in my book. He took hundreds and I never really thanked him for the hours of dedication – but it does show the process of making a magic circle and my precious gorgeous crochet hook.

My crochet top tips! Read More »

Crochet Chat

Dear Lovely Friends, thanks to the technical genius of my husband (who is very kind to me and patient) I was able to record my talk that I gave at Manchester Art Gallery and splice it onto the photograph presentation I delivered at the same time.

The result is not perfect – but if you have the patience you can listen to the little snippets of musings as you scroll through the images. You will need to press the arrow keys to jump to the next slide and hear the recording. Not all slides have a commentary.

All the opinions given were entirely personal and the recording was live and unrehearsed. So please do excuse the ‘umms’ and ‘ahhs’. However the presentation does give you some idea behind my inspiration and crochet journey – enjoy x

Crochet Chat Read More »

Crafty Magazine ~ I’m loving it!

Issue 9 cover project Sarah Fordham(1)

There is a new craft magazine on the block – Crafty Magazine is now on issue 9 and I have to say it has turned my head in the supermarket aisle.

I really do like the ideas they have and I must say I do enjoy following their Pinterest site. There is also an added bonus for me because the publisher is local and it makes me very happy to support a local company.

Knit Purl Gloves - Emma Varnam(1)

I will really thrilled that the editor of the magazine  wanted me to produce a tutorial for their current issue. Making cheeky wee tattoo inspired gloves. I had lots of fun with this project and it enables you to have all that attitude with none of the permanent ink. There is something incredibly fun and inventive about the new craft resurgence. Think of any words you might want to embroider on some gloves and you can have lots of fun with a personalised gift. Crafty Magazine are currently showing my photo tutorial on how to do chain stitch, so if you fancy brushing up on your sewing skills, there is a little reminder there – I realise now, I should have got a manicure.

Japanese Boro textile sewing Elizabeth Healey 2(1)

Other great things to make in this issue are some beautiful scrap cushions by Elizabeth Healey. I adore these textures.

Meringue Kisses - The Meringue Girls(1)

Finally if you are a baker rather than a maker find inspiration from the glorious colourful meringues by the Meringue girls. So pretty, almost too pretty to eat….on second thoughts!


Crafty Magazine ~ I’m loving it! Read More »

A girls night-in

crafteve2

Last week was one of the best weeks I have ever had in my ‘craft-life’. I had a lot of fun, inspiration, laughter and joy. I will tell you more about the ‘professional’ side of that adventure later in the week. However all that excitement was crowned at the weekend by a wonderful craft evening with some of my favourite girls.

crafteve1

Ella and Bea are very special – gorgeous young women, we love them dearly. They are even immortalized in my design work, having their very own Fairy Dolls created for them.

crafteve3

For a while we have plotted and discussed an Aunty Emma craft evening. Both girls have received knitting and crochet books as gifts and wanted first hand instruction to get them started. So we settled on a crafty sleepover. The girls arrived raring to go in the late afternoon and we set about listing some ‘objectives’ and planning our available time, just to make sure we could fit it all in.

crafteve4

They were both keen to cover some note books which they could then give to friends for Christmas. Great idea! Inspired by two tutorials from my favourite craft blogs, we set about making some hairclips. Look at the concentration.

crafteve7

These are from the wonderful Ruffles and Stuff. I love this pattern and look how effective the clips look. Both girls chose navy to match their school uniform.

crafteve8

We then moved on to make little felt roses. What hilarious fiddly fun this was! This tutorial was inspired by the great Alicia Paulson. I wasn’t able to find the crocodile clips she uses in the pattern. So instead we covered the clip to make a leaf and then used the pinking shears to finish it off.  The finished product looks so pretty. As everything was allowed to dry, it was time to snuggle up in front of ‘Strictly’ and start our crochet tutorial. (I know this sounds like craft boot camp!) Both girls did brilliantly well at their first crochet tutorial. Admittedly we were all fairly distracted by the dancing and sequins on the telly.

crafteve5

Next morning we had a working breakfast. We covered the little notebooks with felt and then the girls chose to make another felt rose to decorate.

crafteve9

Pretty impressive stuff. I also love their colour choices. All their own and completely distinct from each other. I cannot deny that I had so much fun sitting, chatting and working with these young women.

crafteve6

The joy of making together was a gift they gave me. Now that’s what I call a girly night-in.

A girls night-in Read More »

Chain stitch vertical lines tutorial

stripetutorial1I promised to share with you a technique I have used within my Gingernut Cowl design in the Autumn 2013 issue of Knitting Magazine. It is a way of creating vertical lines of contrasting colour within a knitting pattern without having to carry yarn along the back of your knitting using the intarsia method. (If you are not a knitter….sorry this perhaps is not a post for you).

stripetutorial2The basic overall design uses stocking stitch for its right side stitch. Following the pattern you change the colours to create horizontal stripes. But within the pattern there are a number of places where a purl stitch is used on each row. This creates a reverse stitch furrow. When the whole of the pattern has completed, you then go back and add in the vertical stripe detail by using a crochet hook and chain stitching the colour along the furrow line.

stripetutorial3I found it worked best to put my hook in every two rows as this created a smooth stitch effect and the difference between these crocheted details and the knitted material is almost imperceptible to the untrained eye.

stripetutorial4There are two reasons why this technique really appeals to me. My intarsia knitting is not always as regular or flat as I would like it to be and this way of creating a plaid design has been more reliable for me. I also always enjoy combining my love for knitting and crochet into one project. The colour choices for the Gingernut Cowl are very ‘now’ for this season – however if you would like to create a more traditional tartan effect, try using a base of navy, with green, red and white as your contrasting colours.

Chain stitch vertical lines tutorial Read More »